Endor Labs deployment depends on the scans that you want to do in your environment.
You can perform the following scans with the Endor Labs application.
This is the multi-page printable view of this section. Click here to print.
Endor Labs deployment depends on the scans that you want to do in your environment.
You can perform the following scans with the Endor Labs application.
Perform monitoring scans to gain fast and broad visibility over open source risks across the application portfolio without requiring integrations into application pipelines. These scans are conducted periodically.
graph TD
    A(["Endor Labs App"]) -->|<span style='font-size: 12px'>Continuous monitoring</span>| B["Customer Repositories"]
    A -->|<span style='font-size: 12px'>Initiate scans every 24h or on-demand</span>| C["Endor Labs Cloud
    <span style='font-size: 12px'>Customer data destroyed after scans</span>"]
    B -->|<span style='font-size: 12px'>Clones and scans repositories</span>| C
    C -->|<span style='font-size: 12px'>Pass scan data</span>| D(["Endor Labs Platform
    <span style='font-size: 12px'>Generate findings from scan results</span>"])
    subgraph "<span style='font-size: 18px'>Supervisory scan workflow<span>"
    A
    B
    C
    D
    end
Endor Labs features available depends upon the type of scan and the SCM.
The following table lists the scan capabilities available for different types of SCM.
| Feature | GitHub Cloud | Azure DevOps Cloud | GitLab Cloud | GitLab Self-Managed | Bitbucket Data Center | Bitbucket Cloud |
|---|---|---|---|---|---|---|
| Reachability Analysis | ✓ | ✓ | ✓ | ✓ | ✓ | ✓ |
| CI/CD Tools | ✓ | ✓ | ✓ | ✓ | ✓ | ✓ |
| Secrets Scan | ✓ | ✓ | ✓ | ✓ | ✓ | ✓ |
| SAST | ✓ | ✓ | ✓ | ✓ | ✓ | ✓ |
| RSPM | ✓ | ✗ | ✗ | ✗ | ✗ | ✗ |
| PR Comments | ✓ | ✗ | ✗ | ✗ | ✗ | ✗ |
| PR Checks | ✓ | ✗ | ✗ | ✗ | ✗ | ✗ |
| Container Scan | ✗ | ✗ | ✗ | ✗ | ✗ | ✗ |
The following table lists the types of remediation available for different types of SCM.
| Feature | GitHub Cloud | Azure DevOps Cloud | GitLab Cloud | GitLab Self-Managed | Bitbucket Data Center | Bitbucket Cloud |
|---|---|---|---|---|---|---|
| Jira remediation | ✓ | ✓ | ✓ | ✓ | ✓ | ✓ |
| Endor Patches | ✓ | ✓ | ✓ | ✓ | ✓ | ✓ |
| PR remediation | ✓ | ✗ | ✗ | ✗ | ✗ | ✗ |
Endor Labs provides a GitHub App that continuously monitors users’ projects for security and operational risk. You can use the GitHub App to selectively scan your repositories for SCA, secrets, RSPM, or CI/CD tools. GitHub App scans also establish baselines that are subsequently used during CI scans.
The Endor Labs GitHub App scans your repositories every 24 hours and reports new findings or changes to your code’s release versions. It also performs RSPM scans weekly on Sundays to manage your repository’s posture.
If you want to use PR remediations as part of your monitoring scan, you need to use GitHub App (Pro).
Before installing and scanning projects with Endor Labs GitHub App, make sure you have:
endorctl, while you wait for the approval.To automatically scan repositories using the GitHub App:
Sign in to Endor Labs.
Choose Projects and click Add Project.
From GITHUB, choose GitHub App
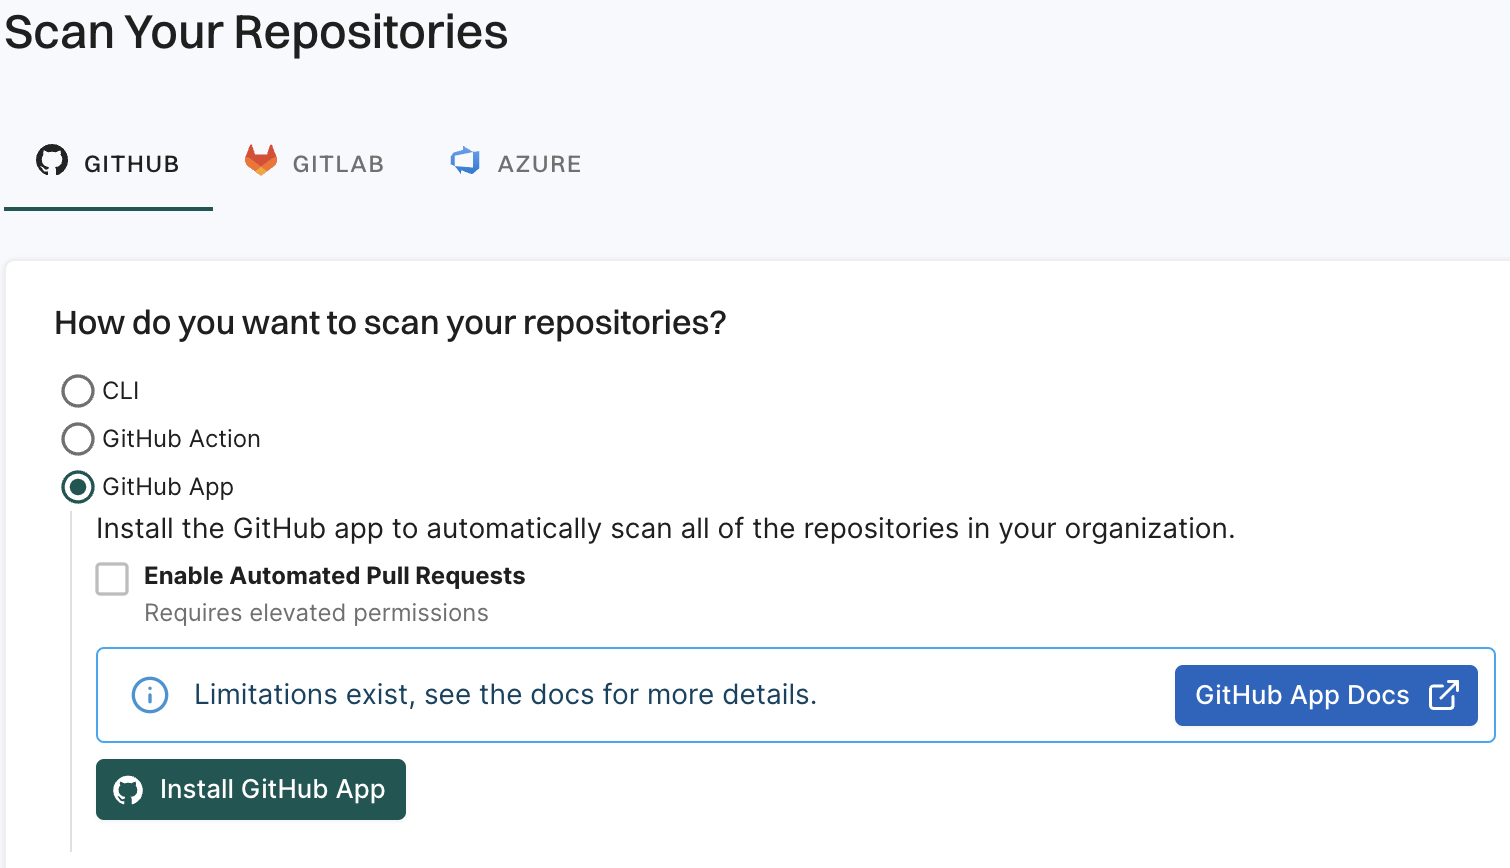
Click Install GitHub App.
You will be redirected to GitHub to install the GitHub App.
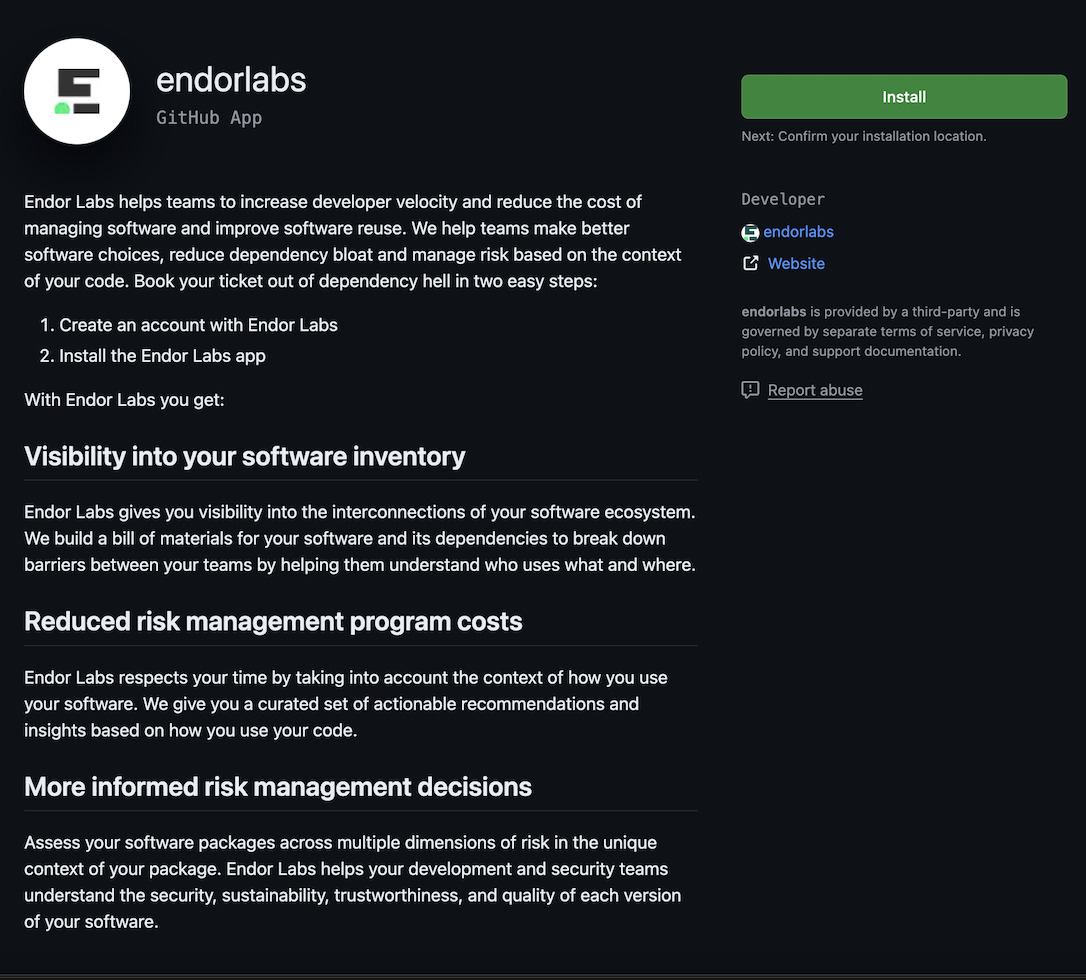
Click Install.
Select a user to authorize the app.
Select the organization in which you want to install the app.
Select whether to install and authorize Endor Labs on all your repositories or select the specific repositories that you wish to scan.
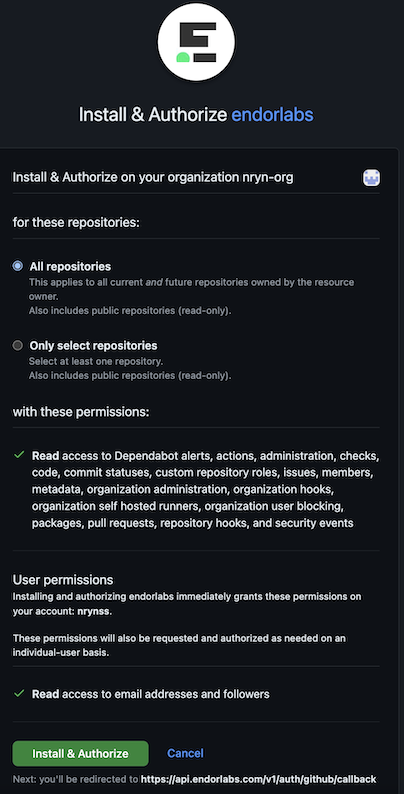
Review the permissions required for Endor Labs and click Install and Authorize.
Choose a namespace and click Next.
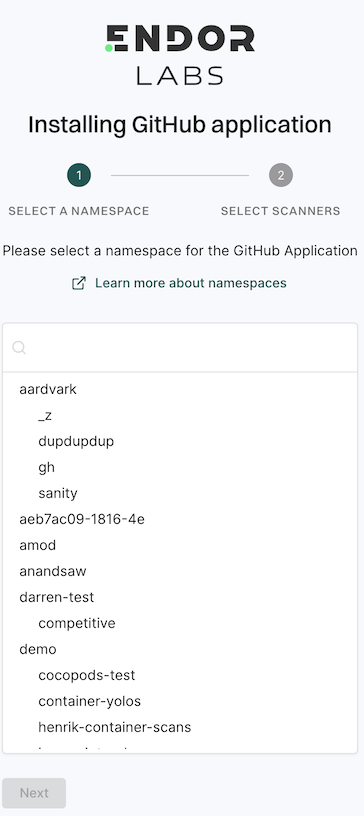
Based on your license, select and enable the scanners.
Select Include Archived Repositories to scan your archived repositories. By default, the GitHub archived repositories aren’t scanned.
Select PULL REQUEST SCANS to set preferences for scanning pull requests submitted by users.
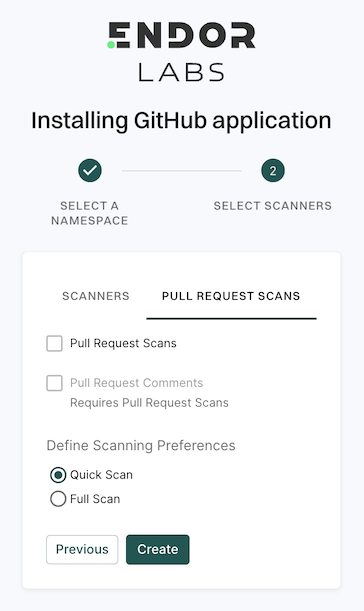
Select Pull Request Comments to enable GitHub Actions to comment on PRs for policy violations.
In Define Scanning Preferences, select either:
Quick Scan to gain rapid visibility into your software composition. It performs dependency resolution but does not conduct reachability analysis to prioritize vulnerabilities. The quick scan enables users to swiftly identify potential vulnerabilities in dependencies, ensuring a smoother and more secure merge into the main branch.
Full Scan to perform dependency resolution, reachability analysis, and generate call graphs for supported languages and ecosystems. This scan enables users to get complete visibility and identifies all issues dependencies, call graph generation before merging into the main branch. Full scans may take longer to complete, potentially delaying PR merges.
See GitHub scan options for more information on the scans that you can do with the GitHub App.
Click Continue.
You have successfully installed the GitHub App.
You can edit or delete the GitHub App integrations.
Select Enable Automatic Pull Request Scanning to automatically scan the PRs submitted by users.
Select Enable Pull Request Comments to enable GitHub Actions to comment on PRs for policy violations.
Set the Scanning Preferences to:
Quick Scan to gain rapid visibility into your software composition. It performs dependency resolution but does not conduct reachability analysis to prioritize vulnerabilities. The quick scan enables users to swiftly identify potential vulnerabilities in dependencies, ensuring a smoother and more secure merge into the main branch.
Full Scan to perform dependency resolution, reachability analysis, and generate call graphs for supported languages and ecosystems. This scan enables users to get complete visibility and identifies all issues dependencies, call graph generation, before merging into the main branch. Full scans may take longer to complete, potentially delaying PR merges. The changes are applicable from the next scanning cycle.
You can improve your experience with the GitHub App by setting up package repositories. This will help you create a complete bill of materials and perform static analysis. Without setting package repositories, you may not be able to get an accurate bill of materials. See Set up package manager integration for more information.
With the Endor Labs GitHub App, you can enhance the security of your repository through the following types of scans.
The Endor Labs GitHub App automatically scans your repositories every 24 hours for potential security issues and operational risks, providing up-to-date information about your projects’ security posture.
After scanning the complete repository, it’s important to address the pull requests submitted by users. Administrators can enable a fully automated scanning process for all pull requests and merges initiated into the main branch.
To automatically scan the PRs, set the pull request preferences during the installing of the GitHub App or edit the integration preferences afterwards.
Whenever a PR is created against a repository, the Endor Labs GitHub App performs an incremental scan to detect any changes in resolved dependencies that may introduce new vulnerabilities. These incremental scans are CI runs and are not monitored. You can see the results of the scan on GitHub.
Based on your preferences, it performs a quick scan or a full scan before merging the PRs into the main branch.
Endor Labs enables you to rescan your GitHub projects. When you make a code change or upgrade a dependency, rescanning your GitHub projects ensures the integrity and security of your software.
To enable periodic scanning of your GitHub projects, install the GitHub App from Endor Labs. For more information, see Install the GitHub App.
Endor Labs automatically triggers a rescan of your GitHub projects every 24 hours. However, you can manually trigger a rescan. Follow these steps:

The Endor Labs GitHub App provides visibility across a GitHub organization, but it has technical limitations that do not account for the unique requirements of your application.
Here are some of these limitations.
Endor Labs requires executing custom build steps outside of standard package manager commands to build software packages and get an accurate bill of materials and perform static analysis. Sometimes, a complete bill of materials may not be generated, or static analysis may not be performed if custom steps are required for your software to build. Applications that require custom build steps may need to be implemented in a CI environment to successfully get an accurate bill of materials.
Large applications may require significant memory allocations to perform static analysis on a package. The services scanning the GitHub App use 16 GB of memory by default. Applications that require more memory may not obtain vulnerability prioritization information using the GitHub App. Scan large applications in a CI environment using a runner with sufficient resource allocations.
Private software components hosted in an internal package repository may require authentication credentials to create a complete bill of materials or perform static analysis.
If your authentication information to your private package repository is hosted outside the repository, you will need to configure a package manager integration. See Set up package manager integration for more details. If your package repository is inaccessible from the public internet, you can work with Endor Labs to evaluate options.
Endor Labs GitHub App (Pro) is an enhanced version of the Endor Labs GitHub App that supports PR remediation to fix vulnerabilities. See PR remediation for more information.
Before installing and scanning projects with Endor Labs GitHub App (Pro), make sure you have:
endorctl, while you wait for the approval.To automatically scan repositories using the GitHub App and create automatic PRs to fix vulnerabilities:
Sign in to Endor Labs.
From the left sidebar, choose Projects and click Add Project.
From GITHUB, choose GitHub App
Select Enable Automated Pull Requests.
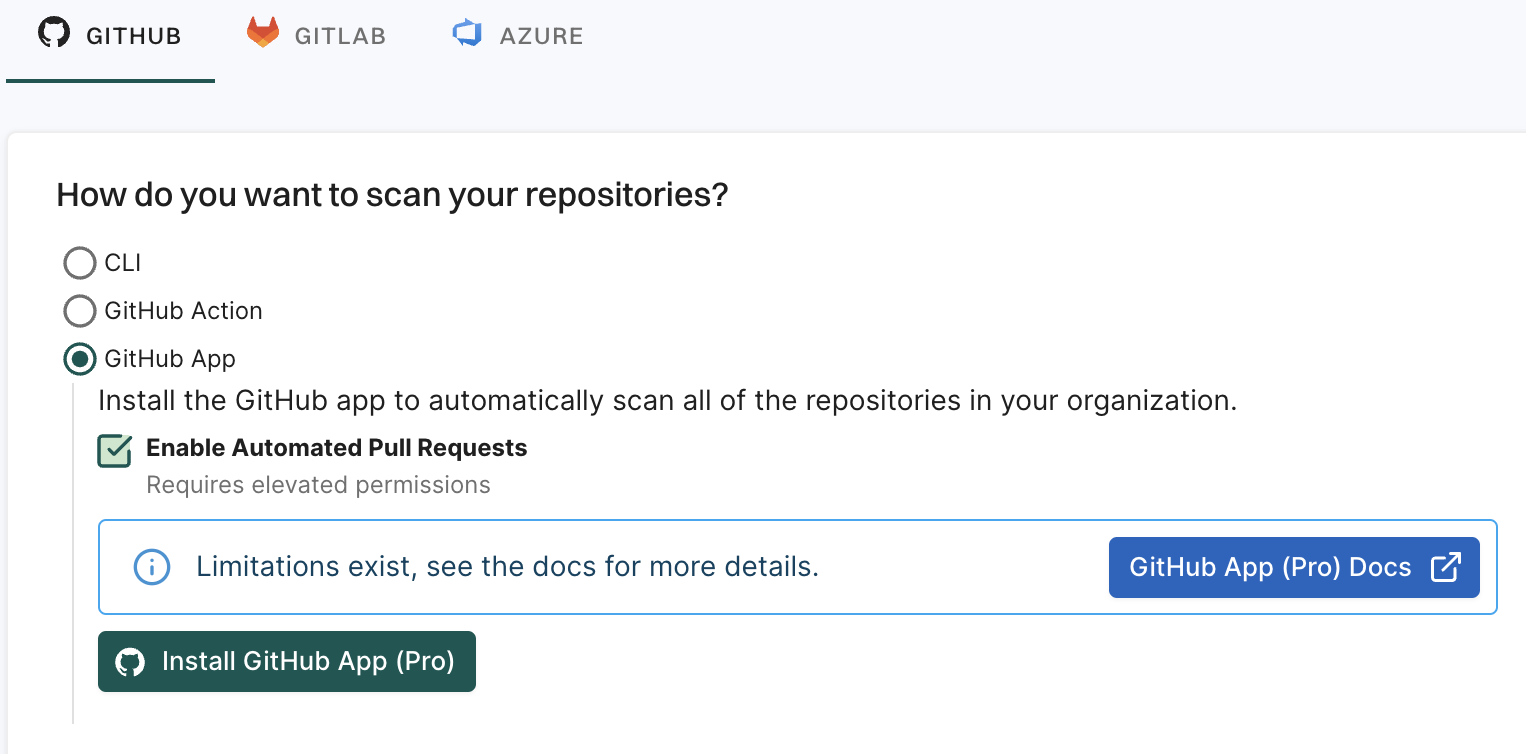
Click Install GitHub App (Pro).
You will be redirected to GitHub to install the Endor Labs App (Pro).
Click Install.
Select a user to authorize the app.
Select the organization in which you want to install the app.
Select whether to install and authorize Endor Labs on all your repositories or select the specific repositories that you wish to scan.
Review the permissions required for Endor Labs and click Install and Authorize.
Choose a namespace and click Next.

Based on your license, select and enable the scanners.
The following scanners are available:
Select PULL REQUEST SCANS to set preferences for scanning pull requests submitted by users.
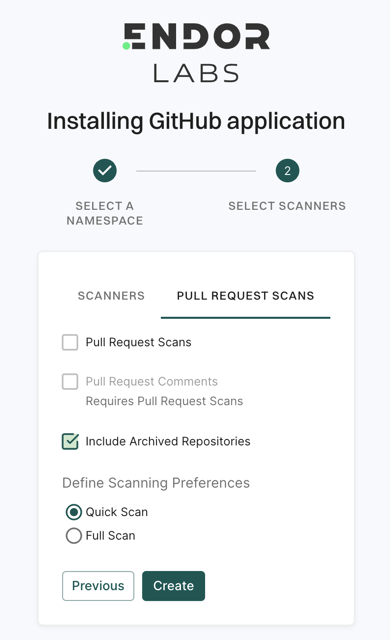
Select Pull Request Comments to enable GitHub Actions to comment on PRs for policy violations.
Select Include Archived Repositories to scan your archived repositories. By default, the GitHub archived repositories aren’t scanned.
In Define Scanning Preferences, select either:
Quick Scan to gain rapid visibility into your software composition. It performs dependency resolution but does not conduct reachability analysis to prioritize vulnerabilities. The quick scan enables users to swiftly identify potential vulnerabilities in dependencies, ensuring a smoother and more secure merge into the main branch.
Full Scan to perform dependency resolution, reachability analysis, and generate call graphs for supported languages and ecosystems. This scan enables users to get complete visibility and identifies all issues dependencies, call graph generation before merging into the main branch. Full scans may take longer to complete, potentially delaying PR merges.
See GitHub scan options for more information on the scans that you can do with the GitHub App.
Click Continue. You have successfully installed the GitHub App (Pro).
Endor Labs GitHub App (Pro) scans your repositories every 24 hours and reports any new findings or changes to release versions of your code. It can also raise a PR with a fix based on your remediation policy. Ensure that you configure automated PR scans in your environment. See Automated PR scans for more information.
You can edit or delete the GitHub App integrations.
To edit the GitHub App integration:
You can migrate your GitHub App (Pro) to standard GitHub App (or from standard to Pro).
Sign in to Endor Labs.
Select Manage > Integrations from the left sidebar.
Click Manage next to GitHub under Source Control Managers.
Click the three vertical dots on the right side of the GitHub App (Pro) that you want to edit, and select Migrate To Standard App.
Click Migrate.
You will be redirected to GitHub.
Click Configure.
Select a user to authorize the app.
Select Configure in the organization in which you want to migrate the app.
Select whether to install and authorize Endor Labs on all your repositories or select the specific repositories that you wish to scan.
Choose the namespace and click Next.
Select and enable the scanners you require.
Select the preferences for scanning pull requests, if required.
Click Continue.
To delete a GitHub App integration, click the three vertical dots on the right side, and select Delete Integration.
You are to taken to the GitHub App page, where you can uninstall the app from your GitHub organization.
To manually trigger a scan, click Rescan Org. Endor Labs GitHub App scans your repositories every 24 hours, use Rescan Org to manually schedule outside the 24-hour period.
Click Scan More Repositories to go to Projects page, from which you can add more repositories to scan through the GitHub App.
You can improve your experience with the GitHub App by setting up package repositories. This will help you create a complete bill of materials and perform static analysis. Without setting package repositories, you may not be able to get an accurate bill of materials. See Set up package manager integration for more information.
The Endor Labs GitHub App (Pro) has the same limitations as the GitHub App. See Limitations for more information.
Endor Labs provides an Azure DevOps App that continuously scans Azure repos in your projects for security risks. You can selectively scan your repositories for SCA, secrets, SAST, or CI/CD tools.
You can choose to configure the Azure DevOps App at the organization level or the project level. When you configure the Azure DevOps App at the organization level, Endor Labs adds all the projects under the organization and scans all the repos in the projects. When you add an Azure DevOps project, Endor Labs scans all repos within that project.
You need to add an Azure organization or a project to an Endor Labs namespace. Organizations and projects in Azure DevOps are mapped as managed namespaces in Endor Labs.
Managed namespaces have the following restrictions:
When you add an Azure organization to an Endor Labs namespace, Endor Labs creates a child namespace for the organization and creates child namespaces for each project in the organization under the organization namespace. The organization namespace and project namespaces are managed namespaces. You can add multiple projects to the same Endor Labs namespace. Each project will have its own managed namespace.
If your organization name is deerinc and you have three projects, buck, doe, and fawn, Endor Labs creates four managed namespaces: deerinc, buck, doe, and fawn. The namespaces buck, doe, and fawn are child namespaces of the deerinc namespace.
The following image shows the namespace structure in Endor Labs.
graph TD

      %% Endor Labs namespace
      EN[endor-azure]

      %% Azure projects
      O1[deerinc]
      P1[buck]
      P2[doe]
      P3[fawn]


      %% connections
      EN --> O1
      O1 --> P1
      O1 --> P2
      O1 --> P3

      class EN,EN2 endor
      class O1,P1,P2,P3 managed
      classDef managed fill:#3FE1F3
When you add an Azure DevOps project to an Endor Labs namespace, Endor Labs creates a child namespace for the Azure DevOps project and maps all repositories in that project to this namespace. The child namespace that maps to the Azure DevOps project is a managed namespace. The managed namespace has the name, <organization name>-<project name>. For example, if your organization name is deerinc and project name is doe, the managed namespace will have the name, deerinc-doe.
You can add multiple projects to the same Endor Labs namespace. Each project will have its own managed namespace. For example, your organization name is deerinc, which has three projects, buck,doe, andfawn. You add each project to the Endor Labs namespace, endor-azure.
The following image shows the namespace structure in Endor Labs.
graph TD

      %% Endor Labs namespace
      EN[endor-azure]

      %% Azure projects
      A1[deerinc-buck]
      A2[deerinc-doe]
      A3[deerinc-fawn]


      %% connections
      EN --> A1
      EN --> A2
      EN --> A3

      class EN,EN2 endor
      class A1,A2,A3 managed
      classDef managed fill:#3FE1F3
Ensure the following prerequisites are in place before you install the Endor Labs Azure DevOps App.
To automatically scan repositories using the Azure DevOps App:
Sign in to Endor Labs.
Select Projects from the left sidebar and click Add Project.
From AZURE, select Azure DevOps App.
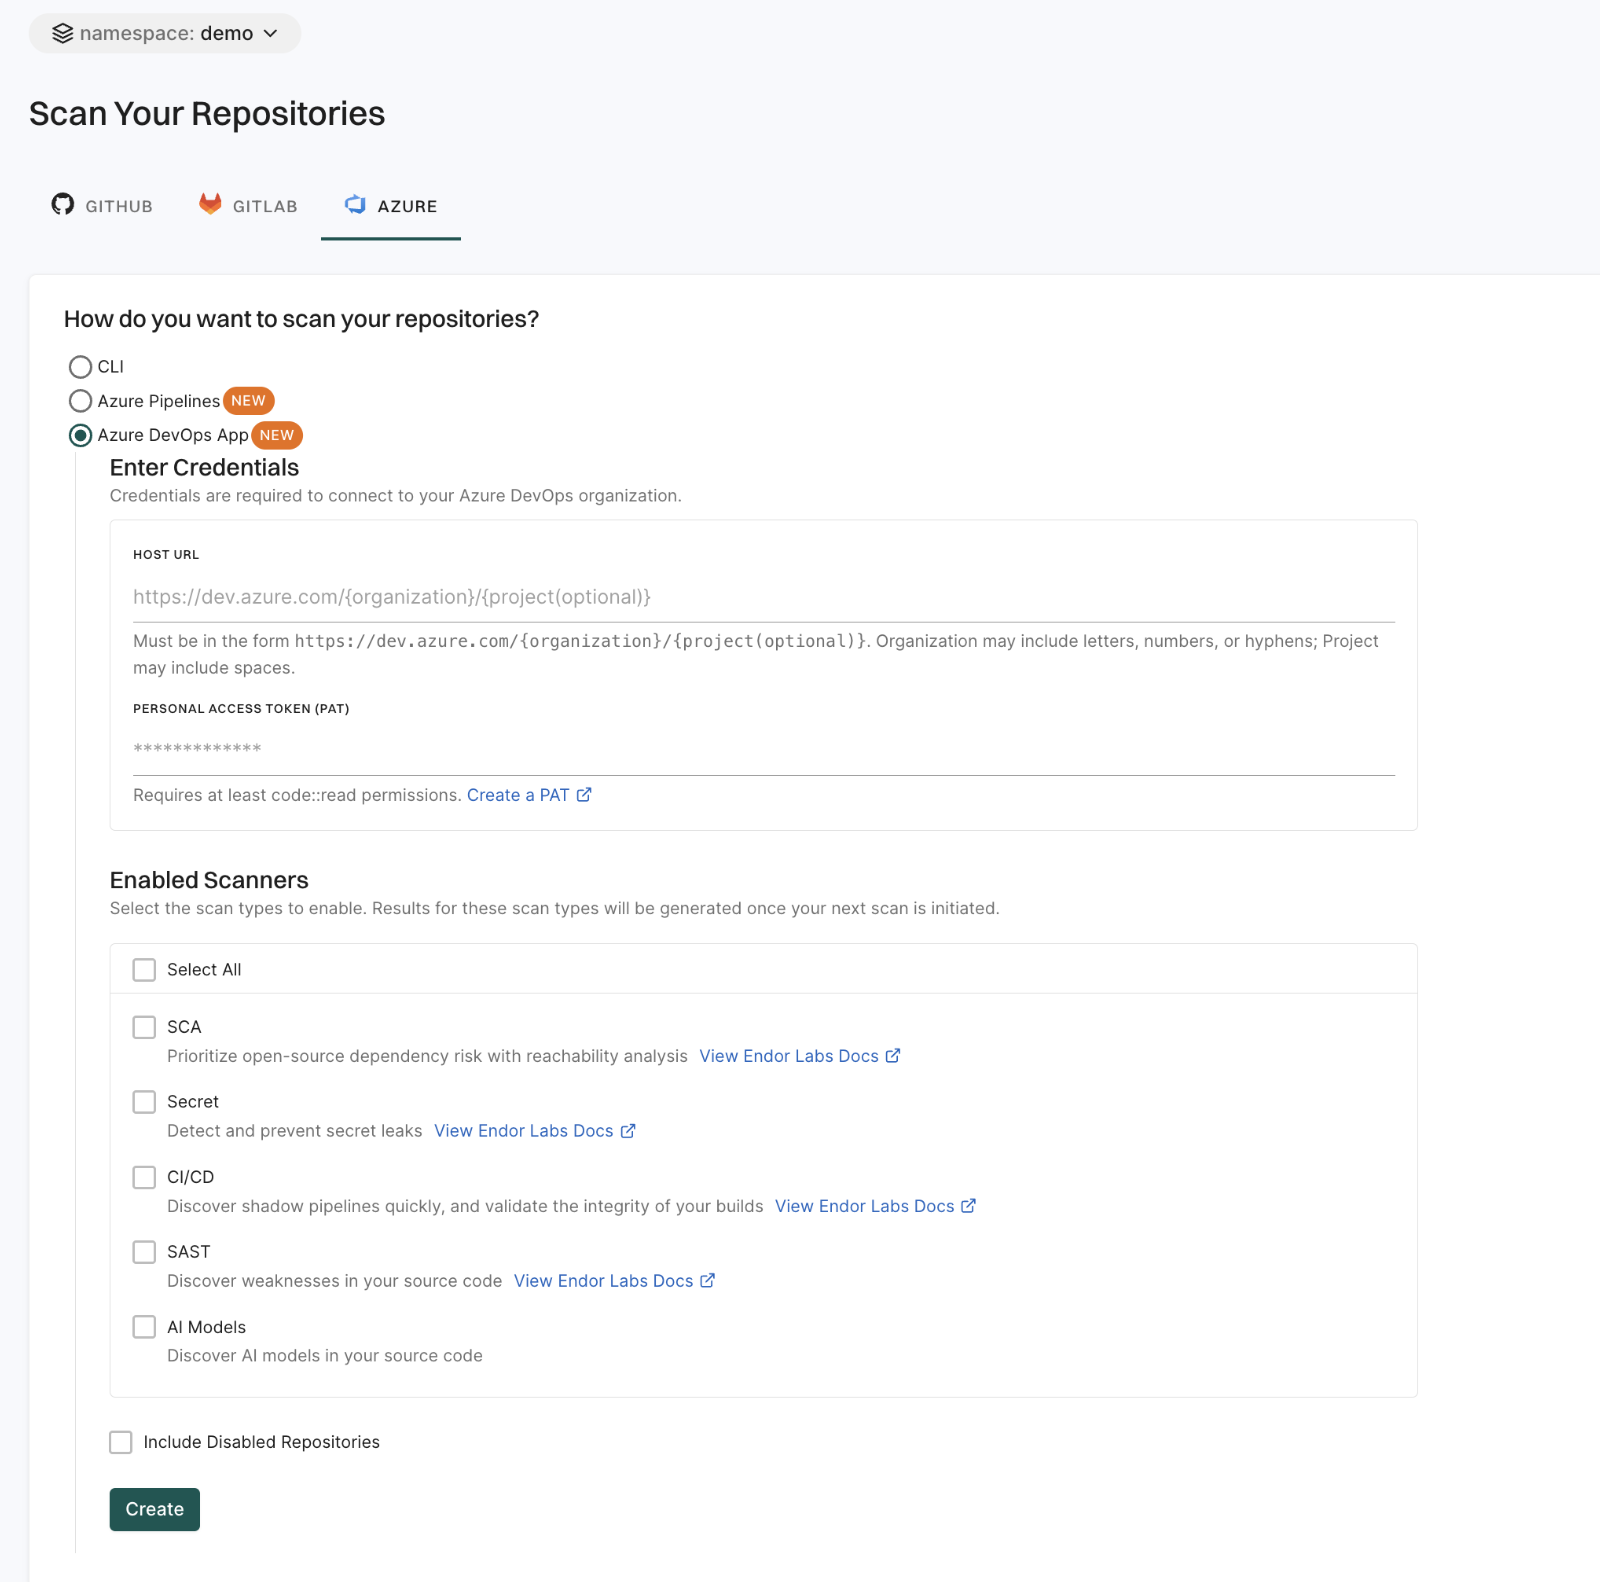
Enter the host URL of your Azure project.
The URL must be in the format, https://dev.azure.com/<ORG_NAME>/ when you add an Azure organization. When you add an Azure DevOps project, the URL must be in the format, https://dev.azure.com/<ORG_NAME>/<PROJECT_NAME>.
Enter your personal access token from Azure.
You must have at least read permissions in the Code category for your Azure DevOps personal access token.
Click Scanners and select the scan types to enable.
The available scan types depend upon your license.
Select Include Disabled Repositories to scan your archived repositories. By default, the Azure archived repositories aren’t scanned.
Click Create.
Endor Labs Azure DevOps App scans your Azure repos every 24 hours and reports any new findings or changes to release versions of your code.
You can edit or delete the Azure DevOps App integrations.
To edit the Azure DevOps App integration:

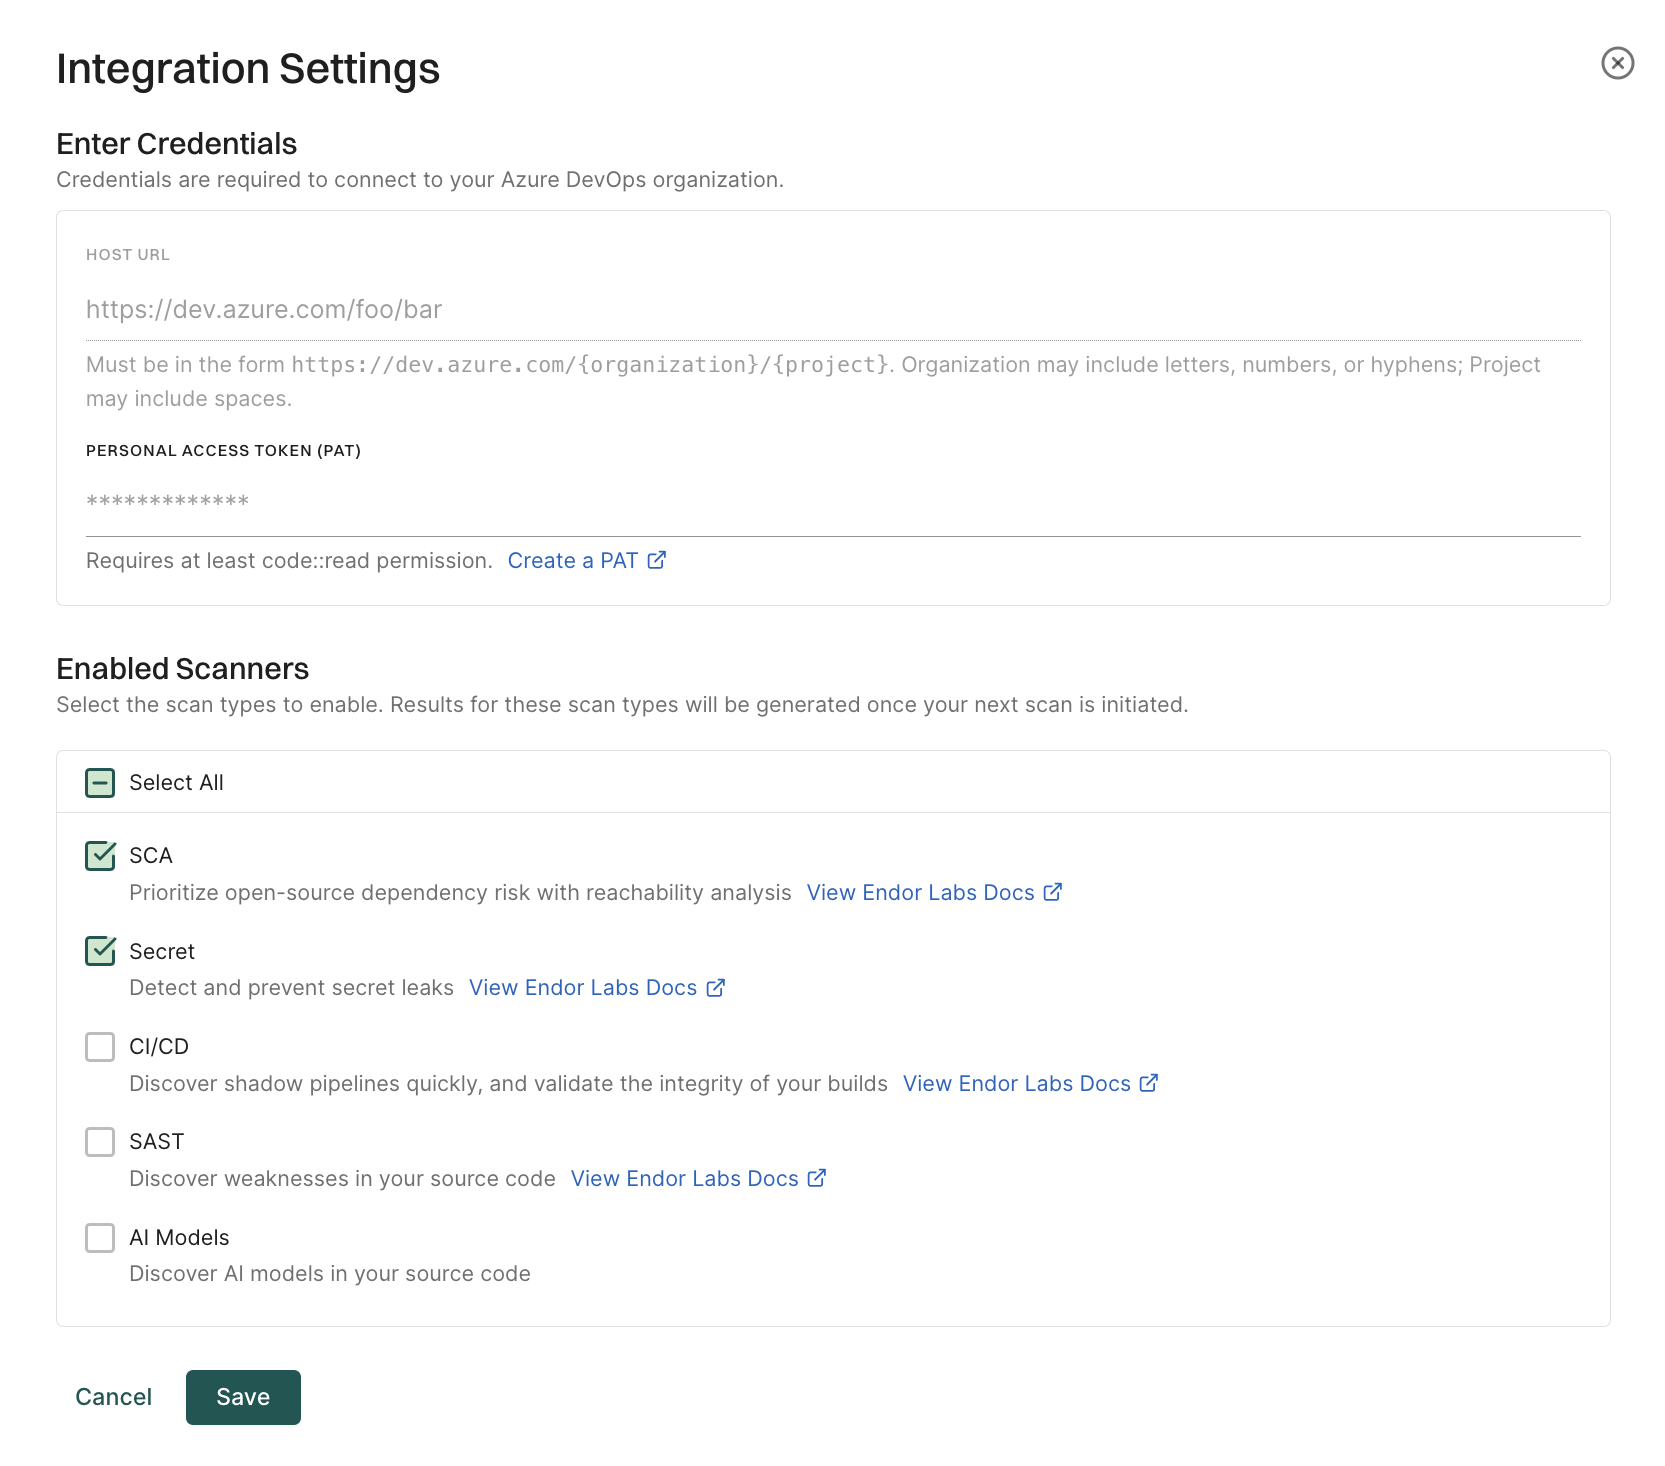
To delete an Azure DevOps App integration, click on the three vertical dots next to the integration, and select Delete Integration.
To manually trigger a scan, click Rescan Org. Azure DevOps App scans your repositories every 24 hours. Use Rescan Org to manually schedule outside the 24-hour period.
Click Scan More Repositories to go to Projects, where you can add more organizations or projects to scan through the Azure DevOps App.
Endor Labs provides a GitLab App that continuously monitors users’ projects for security and operational risk. You can use the GitLab App to selectively scan your repositories for SCA, secrets, SAST, and CI/CD tools. You can use the GitLab App with a GitLab cloud account or a self-hosted GitLab instance.
When you use Endor Labs GitLab App, Endor Labs creates namespaces based on your organization hierarchy in GitLab.
The namespaces created by the Endor Labs GitLab App are not like regular namespaces and are called managed namespaces. These namespaces are named after subgroup slugs in GitLab.
Ensure that you consider the following limitations when you use the GitLab monitoring scan.
tenant.namespace1.namespace2, the available nesting depth for subgroups in GitLab is reduced. In this case, Endor Labs can only support up to eight levels of nested subgroups.Managed namespaces are always reflective in terms of structure and content in GitLab.
Managed namespaces have the following restrictions:
You cannot delete managed namespaces.
You cannot delete projects present within managed namespaces.
You cannot add projects or create namespaces within managed namespaces.
You cannot create any new Endor Labs App installation within the managed namespaces.
For example, you cannot create an Endor Labs GitHub App installation within a namespace that was created by the Endor Labs GitLab App.
Any modifications to the namespaces have to be in GitLab. The changes that you make to the namespaces and projects are reflected in Endor Labs after a rescan.
If your organization has the following hierarchy in GitLab:
graph TD
    GL((GitLab))
    HC[HappyCorp]

    %% Main divisions
    Web[Web]
    Mobile[Mobile]
    Desktop[Desktop]

    %% Web subgroups
    WA[Alpha]
    WB[Beta]
    WG[Gamma]

    %% Mobile subgroups
    MD[Delta]
    ME[Epsilon]
    MZ[Zeta]

    %% Desktop subgroups
    DP[Pi]
    DR[Rho]
    DS[Sigma]

    %% Main connections
    GL --> HC
    HC --> Web
    HC --> Mobile
    HC --> Desktop

    %% Web connections
    Web --> WA
    Web --> WB
    Web --> WG

    %% Mobile connections
    Mobile --> MD
    Mobile --> ME
    Mobile --> MZ

    %% Desktop connections
    Desktop --> DP
    Desktop --> DR
    Desktop --> DS

    class HC main
    class Web,Mobile,Desktop division
    classDef default fill:#D3D3D3
    classDef circle fill:white
    class GL circle
Endor Labs creates managed namespaces that mirror your GitLab groups under an Endor Labs namespace (for example, happyendor). Endor Labs creates happycorp as the parent namespace with web, mobile, and desktop as the child namespaces. The namespace happycorp will be under the Endor Labs namespace.
Each of these child namespaces have further child namespaces as follows:
The following diagram shows the organization of namespaces in Endor Labs.
graph TD
    EN[happyendor]
    HC[happycorp]

    %% Main divisions
    Web[web]
    Mobile[mobile]
    Desktop[desktop]

    %% Web subgroups
    WA[alpha]
    WB[beta]
    WG[gamma]

    %% Mobile subgroups
    MD[delta]
    ME[epsilon]
    MZ[zeta]

    %% Desktop subgroups
    DP[pi]
    DR[rho]
    DS[sigma]

    %% Main connections
    EN --> HC
    HC --> Web
    HC --> Mobile
    HC --> Desktop

    %% Web connections
    Web --> WA
    Web --> WB
    Web --> WG

    %% Mobile connections
    Mobile --> MD
    Mobile --> ME
    Mobile --> MZ

    %% Desktop connections
    Desktop --> DP
    Desktop --> DR
    Desktop --> DS

    class HC main
    class EN endor
    class Web,Mobile,Desktop division
    class WA,WB,WG,MD,ME,MZ,DP,DR,DS group
    classDef main fill:#3FE1F3
    classDef division fill:#3FE1F3
    classDef group fill:#3FE1F3
You cannot create multiple GitLab installations with the same root group in the host URL within the same Endor Labs namespace.
For example, if a GitLab installation exists with a host URL like gitlab.com/group1/sg1, you cannot create another installation with a host URL like gitlab.com/group1/sg2 within the same Endor namespace. Instead, you must create the installation with a different root group in the host URL, such as gitlab.com/group2/sg2.
graph TD

      %% Endor Labs namespace
      EN[happyendor]

      %% GitLab groups
      G1[group1]
      G2[group2]
      SG1[sg1]
      SG2[sg2]

      %% connections
      EN --> G1
      EN --> G2
      G1 --> SG1
      G2 --> SG2

      class EN endor
      class G1,G2,SG1,SG2 managed
      classDef managed fill:#3FE1F3
If you wish to create an installation with a host URL like gitlab.com/group1/sg2, it should be inside a different Endor Labs namespace.
graph TD

      %% Endor Labs namespace
      EN[happyendor]
      EN2[happyendor2]

      %% GitLab groups
      G1[group1]
      G2[group1]
      SG1[sg1]
      SG2[sg2]

      %% connections
      EN --> G1
      EN2 --> G2
      G1 --> SG1
      G2 --> SG2

      class EN,EN2 endor
      class G1,G2,SG1,SG2 managed
      classDef managed fill:#3FE1F3
Before installing and scanning projects with Endor Labs GitLab App, make sure you have:
read_api permission.Sign in to Endor Labs.
Select Projects from the left sidebar and click Add Project.
From GITLAB, select GitLab App.
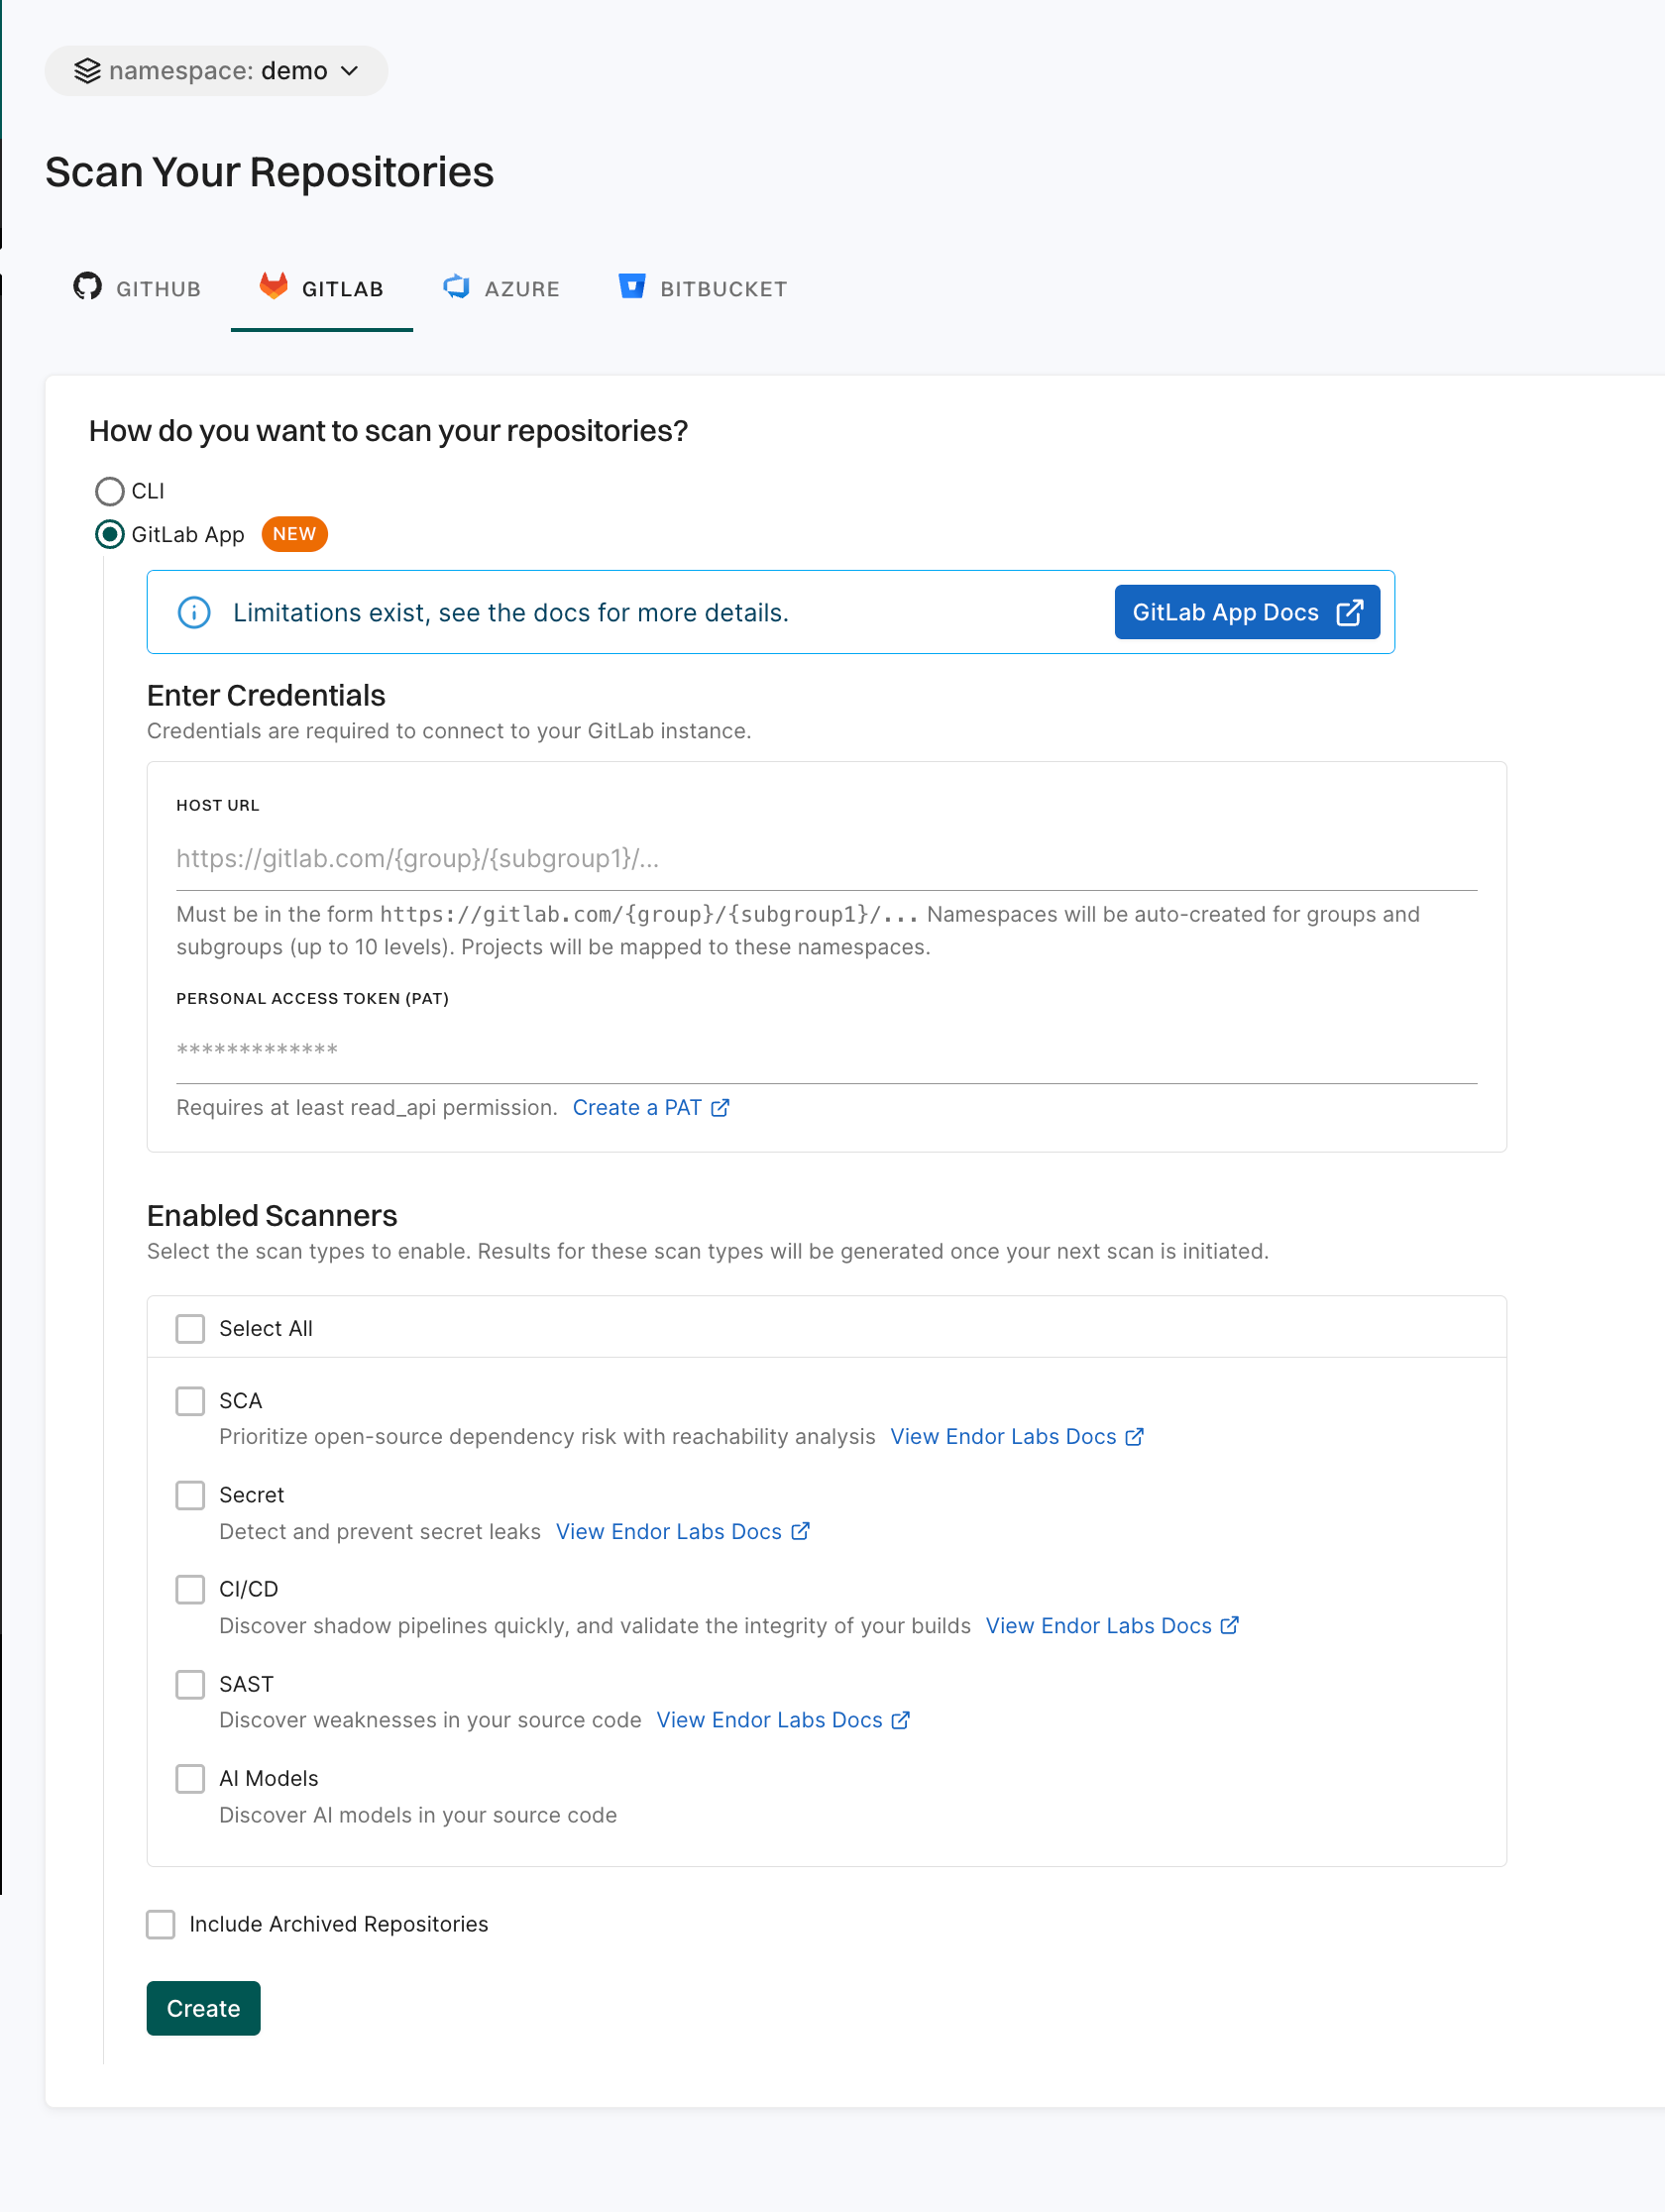
Enter the GitLab organization URL in the format: https://gitlab.com/{group}/{subgroup1}/....
You need to enter at least the root group. For example, https://gitlab.com/group1.
You can provide the host URL up to any subgroup level. For example, https://gitlab.com/group1/subgroup1/subgroup2/subgroup3.
Endor Labs creates namespaces for groups and subgroups and maps projects to these namespaces.
If the GitLab installation is created at the tenant level, Endor Labs supports up to 10 levels of GitLab group nesting. If the installation is created within a nested namespace under the tenant, the supported nesting depth decreases by one level for each additional level of nesting.
Enter the GitLab personal access token.
The personal access token must have at least the read_api permission.
Select the scan types to enable:
The available scan types depend upon your license.
Select Include Archived Repositories to scan your archived repositories. By default, the GitLab archived repositories aren’t scanned.
Click Create.
Endor Labs GitLab App scans your GitLab projects every 24 hours and reports any new findings or changes to release versions of your code.
You can edit or delete the GitLab App integrations.
To edit the GitLab App integration:

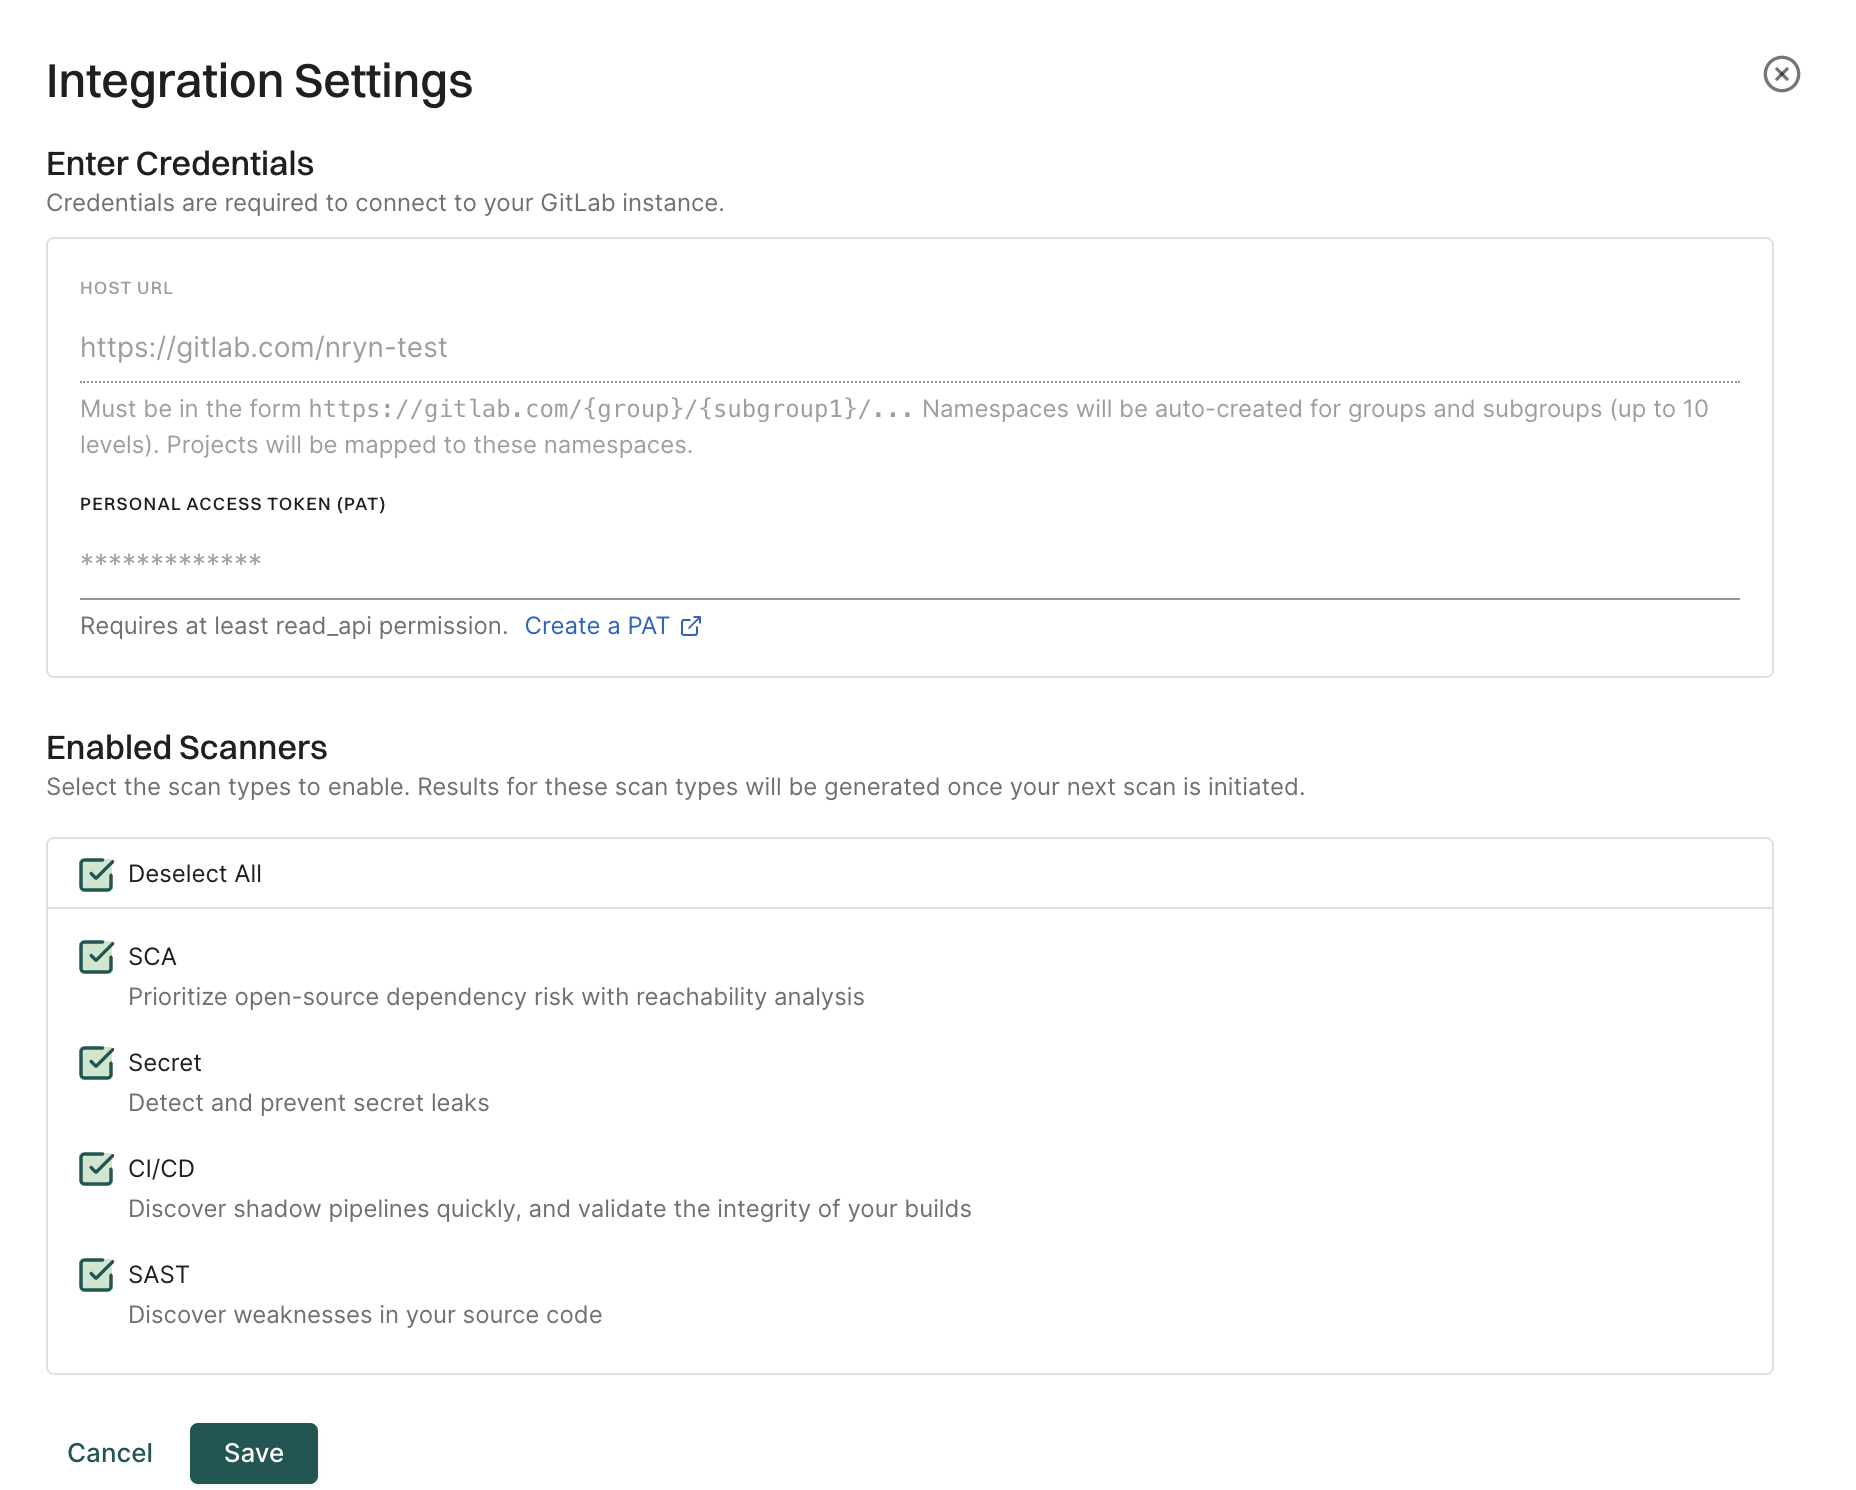
To delete a GitLab App integration, click on the three vertical dots next to the integration, and select Delete Integration.
 When you delete the integration, it will also delete all child namespaces, projects and references associated with the auto generated root group namespace. It also deletes any manually created namespaces and projects under auto generated namespace.
To manually trigger a scan, click Rescan Org. GitLab App scans your repositories every 24 hours, use Rescan Org to manually schedule outside the 24-hour period.
Click Scan More Repositories to go to Projects, where you can add more projects to scan through the GitLab App.
Endor Labs provides a Bitbucket App that continuously monitors users’ projects for security and operational risks in Bitbucket Data Center. You can use the Bitbucket App to selectively scan your repositories for SCA, secrets, SAST, and CI/CD tools.
When you use the Endor Labs Bitbucket App, it creates namespaces based on your projects in Bitbucket Data Center. The namespaces created by the Endor Labs Bitbucket App are not like regular namespaces and are called managed namespaces. You can either configure the URL to Bitbucket Data Center to import all the projects or configure the project key to import a specific project in Endor Labs.
You need to add the Bitbucket Data Center host or a project to an Endor Labs namespace. Bitbucket host and projects are mapped as managed namespaces in Endor Labs.
Managed namespaces have the following restrictions:
When you add a Bitbucket Data Center host to an Endor Labs namespace, Endor Labs creates a child namespace for the Bitbucket host and creates child namespaces for each project in the host under the host namespace. The namespaces of the host and projects are managed namespaces. If there are periods (.) in the Bitbucket datacenter hostname, it is converted to a hyphen (-). You can add multiple Bitbucket Data Center hosts to the same Endor Labs namespace. Each host will have its own managed namespace.
If your host name is bitbucket.deerinc.com and you have three projects, buck, doe, and fawn, Endor Labs creates four managed namespaces: bitbucket-deerinc-com, buck, doe, and fawn. The namespaces buck, doe, and fawn are child namespaces of the bitbucket-deerinc-com namespace.
The following image shows the namespace structure in Endor Labs.
graph TD

      %% Endor Labs namespace
      EN[endor-bitbucket]

      %% Bitbucket projects
      O1[bitbucket-deerinc-com]
      P1[buck]
      P2[doe]
      P3[fawn]


      %% connections
      EN --> O1
      O1 --> P1
      O1 --> P2
      O1 --> P3

      class EN,EN2 endor
      class O1,P1,P2,P3 managed
      classDef managed fill:#3FE1F3
When you add a Bitbucket Data Center project to an Endor Labs namespace, Endor Labs creates a child namespace for the Bitbucket Data Center project and maps all repositories in that project to this namespace. The child namespace that maps to the Bitbucket Data Center project is a managed namespace. The managed namespace has the name, <host name>_<project name>. For example, if your Bitbucket hostname is bitbucket.deerinc.com and project name is doe, the managed namespace will have the name, bitbucket-deerinc-com_doe.
You can add multiple projects to the same Endor Labs namespace. Each project will have its own managed namespace. For example, your hostname is bitbucket.deerinc.com, which has three projects, buck,doe, andfawn. You add each project to the Endor Labs namespace, endor-azure.
The following image shows the namespace structure in Endor Labs.
graph TD

      %% Endor Labs namespace
      EN[endor-bitbucket]

      %% Bitbucket projects
      A1[bitbucket-deerinc-com_buck]
      A2[bitbucket-deerinc-com_doe]
      A3[bitbucket-deerinc-com_fawn]


      %% connections
      EN --> A1
      EN --> A2
      EN --> A3

      class EN,EN2 endor
      class A1,A2,A3 managed
      classDef managed fill:#3FE1F3
Ensure the following prerequisites are in place before you install the Endor Labs Bitbucket App.
Project read permission at the project level.Sign in to Endor Labs.
Select Projects from the left sidebar and click Add Project.
From BITBUCKET, select Bitbucket App, and select Data Center to import projects from Bitbucket Data Center.
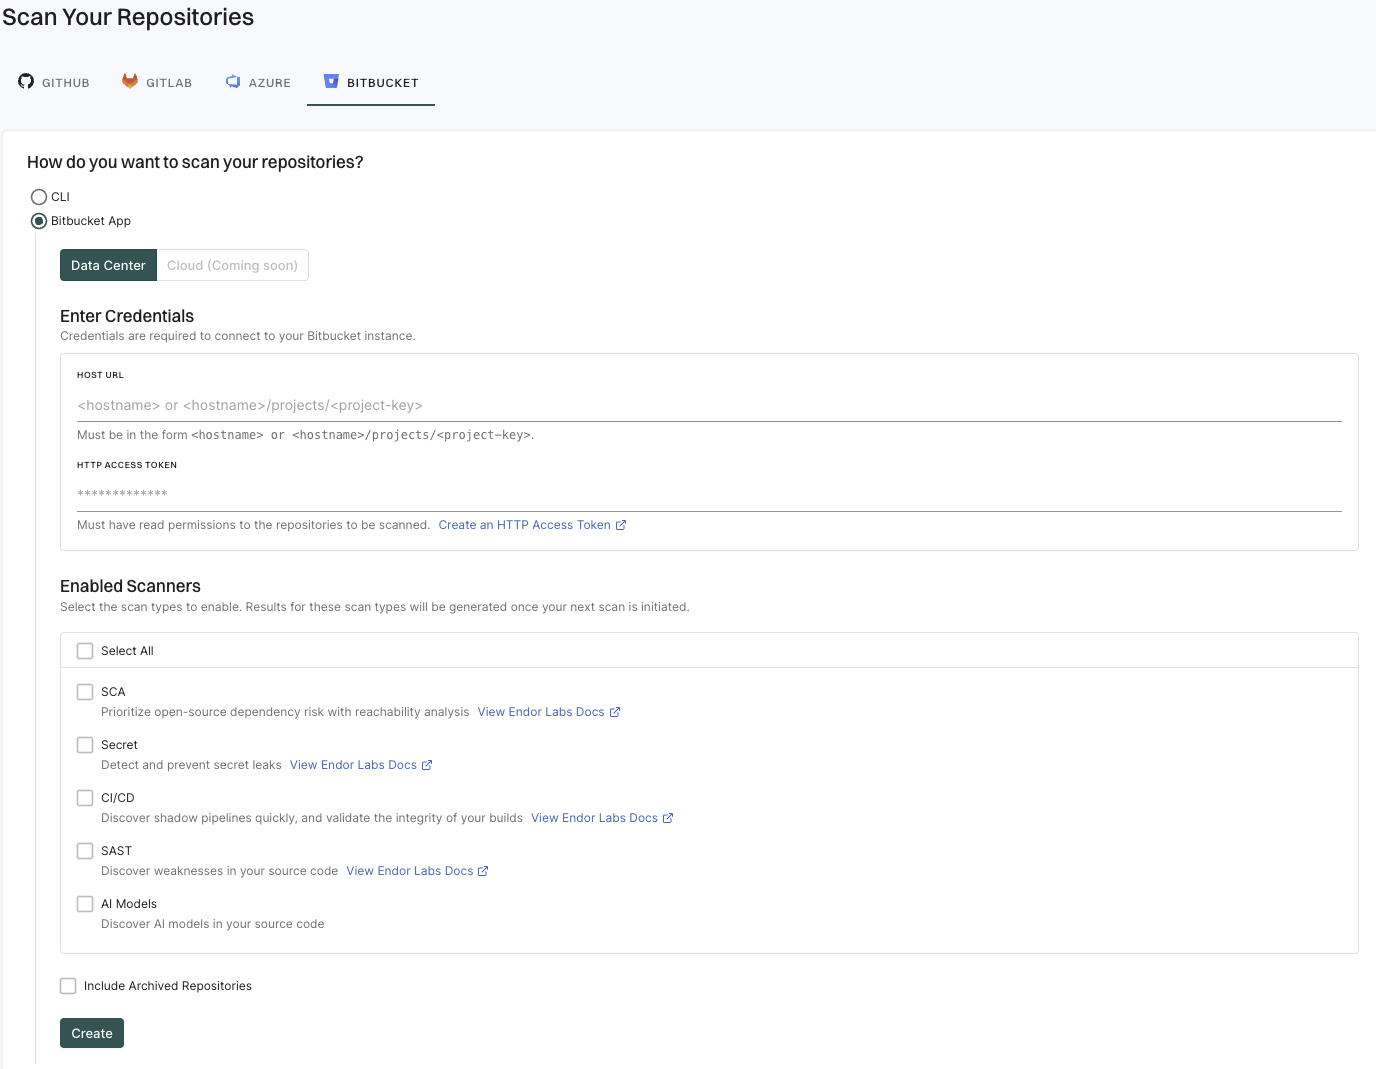
Enter the Bitbucket hostname URL in the format: https://<host name> to import all the projects.
Endor Labs creates namespaces for all projects that are available in the Bitbucket Data Center host.
You can also provide the URL up to a project level to import a specific project: https://<host name>/projects/<project-key>. For example, https://endor-bitbucket.com/projects/LAB.
Enter the Bitbucket Data Center HTTP access token.
The HTTP access token must have at least the Project read permission at the project level.
Select the scan types to enable.
The available scan types depend upon your license.
Select Include Archived Repositories to scan your archived repositories.
By default, the Bitbucket archived repositories aren’t scanned.
Click Create.
Endor Labs Bitbucket App scans your Bitbucket projects every 24 hours and reports any new findings or changes to release versions of your code.
You can edit or delete the Bitbucket App integrations.
To edit the Bitbucket App integration:

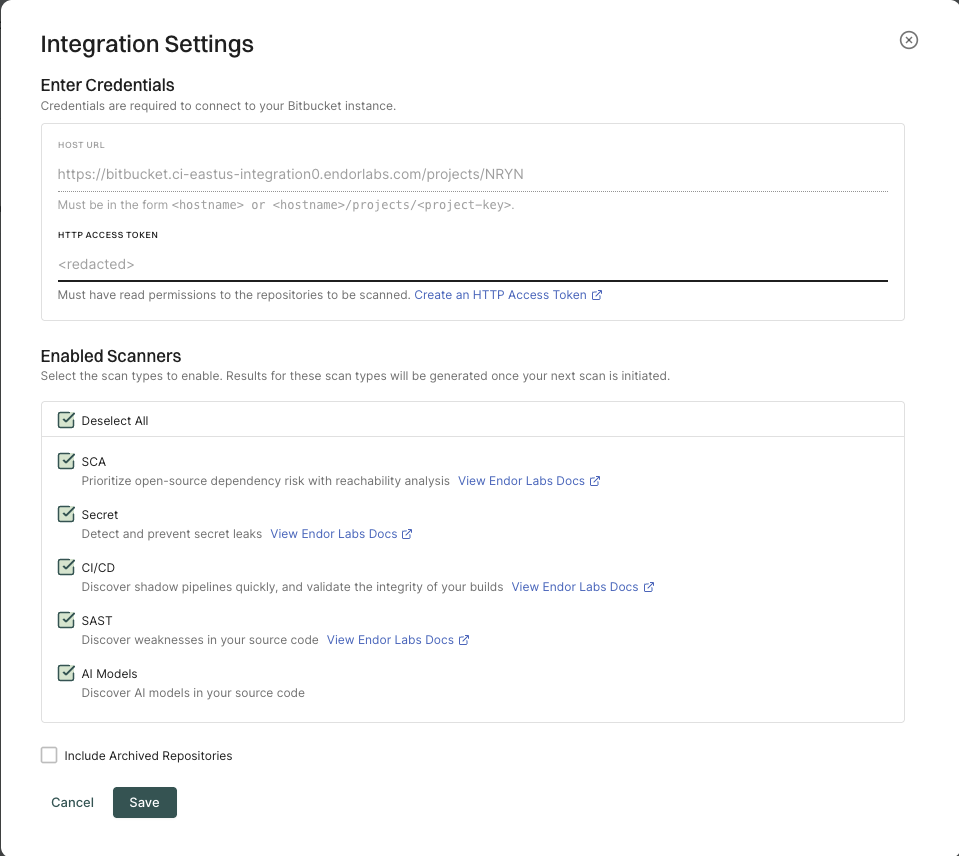
To delete a Bitbucket App integration, click on the three vertical dots next to the integration, and select Delete Integration.

When you delete the integration, it will also delete all child namespaces, projects and references associated with the auto generated root group namespace. It also deletes any manually created namespaces and projects under auto generated namespace.
To manually trigger a scan, click Rescan Org. The Bitbucket App scans all the projects that use the integration.
Click Scan More Repositories to go to Projects, where you can add more projects to scan through the Endor Labs App.
Endor Labs provides a Bitbucket App that continuously monitors users’ projects for security and operational risks in Bitbucket Cloud. You can use the Bitbucket App to selectively scan your repositories for SCA, secrets, SAST, and CI/CD tools.
When you use the Endor Labs Bitbucket App, it creates namespaces based on your workspace and projects in Bitbucket Cloud. The namespaces created by the Endor Labs Bitbucket App are not like regular namespaces and are called managed namespaces. You can either configure the URL to Bitbucket Cloud to import all the projects or configure the project key to import a specific project in Endor Labs.
You need to add the Bitbucket Cloud workspace or a project to an Endor Labs namespace. Bitbucket Cloud workspace and projects are mapped as managed namespaces in Endor Labs.
Managed namespaces have the following restrictions:
When you add a Bitbucket Cloud workspace to an Endor Labs namespace, Endor Labs creates a child namespace for the Bitbucket Cloud workspace and creates child namespaces for each project in the workspace under the workspace namespace. The namespaces of the workspace and projects are managed namespaces. You can add multiple Bitbucket Cloud workspaces to the same Endor Labs namespace. Each workspace will have its own managed namespace.
If your workspace name is deerinc and you have three projects, buck, doe, and fawn, Endor Labs creates four managed namespaces: deerinc, buck, doe, and fawn. The namespaces buck, doe, and fawn are child namespaces of the deerinc namespace.
The following image shows the namespace structure in Endor Labs.
graph TD

      %% Endor Labs namespace
      EN[endor-bitbucket]

      %% Bitbucket projects
      O1[deerinc]
      P1[buck]
      P2[doe]
      P3[fawn]


      %% connections
      EN --> O1
      O1 --> P1
      O1 --> P2
      O1 --> P3

      class EN,EN2 endor
      class O1,P1,P2,P3 managed
      classDef managed fill:#3FE1F3
When you add a Bitbucket Cloud project to an Endor Labs namespace, Endor Labs creates a child namespace for the Bitbucket Cloud project and maps all repositories in that project to this namespace. The child namespace that maps to the Bitbucket Cloud project is a managed namespace. The managed namespace has the name, <workspace name>_<project name>. For example, if your Bitbucket Cloud workspace name is deerinc and project name is doe, the managed namespace will have the name, deerinc_doe.
You can add multiple projects to the same Endor Labs namespace. Each project will have its own managed namespace. For example, your workspace name is deerinc, which has three projects, buck,doe, andfawn. You add each project to the Endor Labs namespace, endor-bitbucket.
The following image shows the namespace structure in Endor Labs.
graph TD

      %% Endor Labs namespace
      EN[endor-bitbucket]

      %% Bitbucket projects
      A1[deerinc_buck]
      A2[deerinc_doe]
      A3[deerinc_fawn]


      %% connections
      EN --> A1
      EN --> A2
      EN --> A3

      class EN,EN2 endor
      class A1,A2,A3 managed
      classDef managed fill:#3FE1F3
Ensure the following prerequisites are in place before you install the Endor Labs Bitbucket App.
Project read permission.Sign in to Endor Labs and select Projects from the left sidebar.
Click Add Project.
From BITBUCKET, select Bitbucket App, and ensure that Cloud is selected.
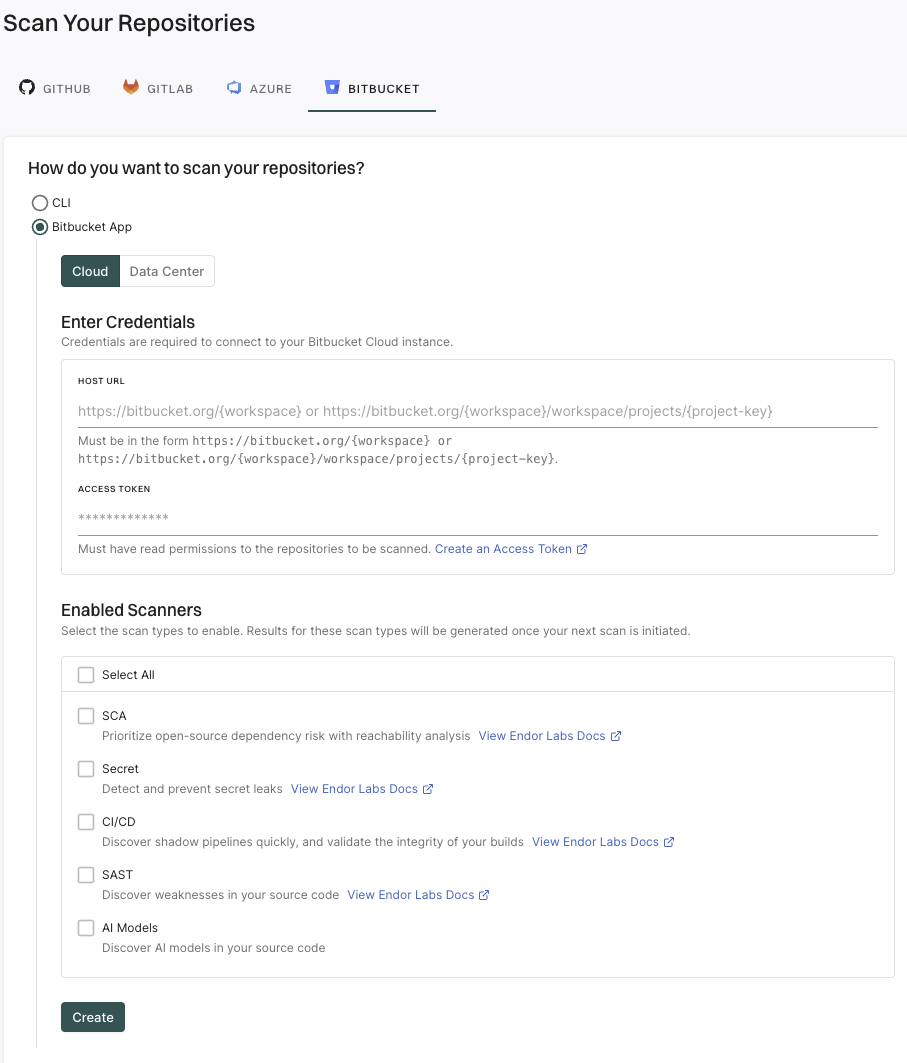
Enter the Bitbucket Cloud workspace URL in the format: https://bitbucket.org/{workspace} to import all the projects in the workspace.
Endor Labs creates namespaces for all projects that are available in the Bitbucket Cloud workspace.
You can also provide the URL up to a project level to import a specific project: https://bitbucket.org/{workspace}/{project-key}. For example, https://bitbucket.org/endor-labs/lab.
Enter the Bitbucket access token.
The access token must have at least the Project read permission.
Select the scan types to enable.
The available scan types depend upon your license.
Click Create.
Endor Labs Bitbucket App scans your Bitbucket projects every 24 hours and reports any new findings or changes to release versions of your code.
You can edit or delete the Bitbucket App integrations.
To edit the Bitbucket App integration:

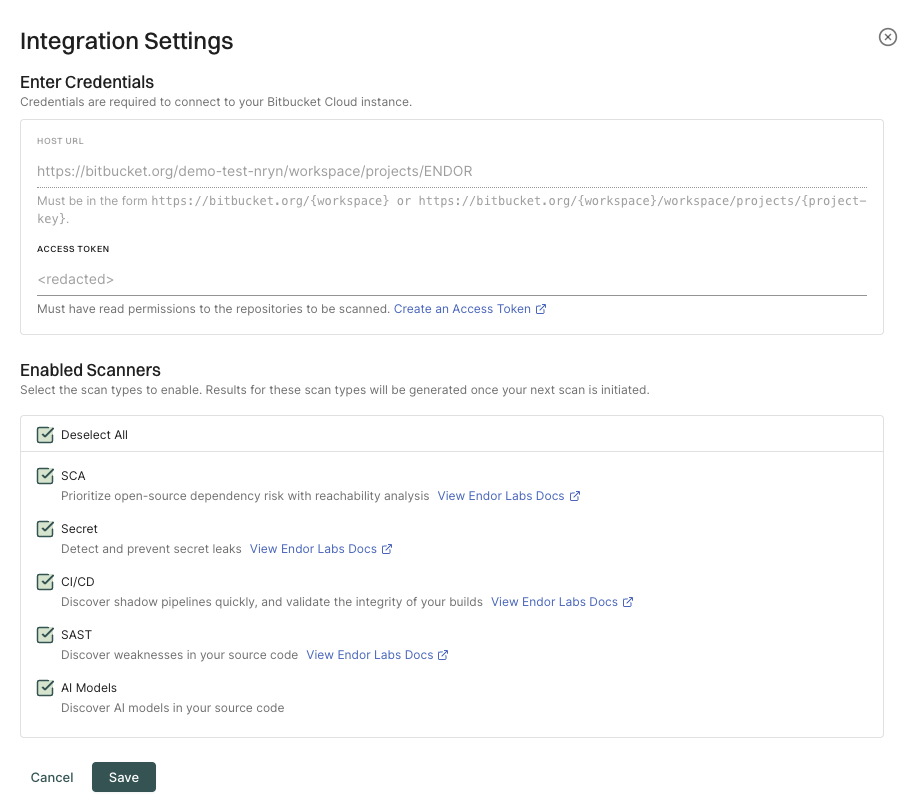
To delete a Bitbucket App integration, click on the three vertical dots next to the integration, and select Delete Integration.

When you delete the integration, it will also delete all child namespaces, projects and references associated with the auto generated root group namespace. It also deletes any manually created namespaces and projects under auto generated namespace.
To manually trigger a scan, click Rescan Org. The Bitbucket App scans all the projects that use the integration.
Click Scan More Repositories to go to Projects, where you can add more projects to scan through the Endor Labs App.
Endor Labs monitoring scan regularly scans your source code to discover vulnerabilities. The Endor Labs Apps clone and analyze all repositories every 24 hours, ensuring continuous monitoring for open source vulnerabilities and code weaknesses. See Monitoring scans for more information.
Endor Labs uses a Kubernetes cluster where your source code repositories and cloned, and the scans are conducted. Your policies may require that the source code repositories are not exposed to the public cloud. In such situations, you can use Outpost, which is a deployable on-prem instance of the Endor Labs scheduler that runs on your private Kubernetes cluster. After you deploy Outpost, Endor Labs uses your Kubernetes cluster to run the monitoring scans.
The scheduling of the scans and the scans themselves are run within your firewall. After the scans are completed, only the scan results are sent to Endor Labs.
Outpost provides full feature parity with regular cloud-based Endor Labs scans.
The following diagram shows how monitoring scans work when you configure Outpost.
graph TD
    A(["Endor Labs App"]) -->|<span style='font-size: 12px'>Continuous monitoring</span>| B["Source Code Repositories"]
    B <--> F["Private Artifact Registry"]
    A -->|<span style='font-size: 12px'>Initiates scans</span>| C["Private Kubernetes cluster
    <span style='font-size: 12px'>Runs Outpost and the scans inside your firewall</span>"]
    B -->|<span style='font-size: 12px'>Clones repositories</span>| C
    C -->|<span style='font-size: 12px'>Pass scan data</span>| D(["Endor Labs Platform
    <span style='font-size: 12px'>Generate findings from scan results</span>"])

    subgraph E["Firewall"]
    A
    B
    C
    F
    end

    class A,D endor
    class B,C,F customer
    class E firewall
    classDef customer fill:#3FE1F3
    classDef endor fill:#5BF385
    classDef firewall fill:transparent,stroke-dasharray: 5 5,stroke:#FF4500,color:#FF4500
Outpost helps you in the following instances:
You need to configure Outpost as an integration at your Endor Labs tenant namespace. You can only configure Outpost as an integration at your root namespace. After you configure the integration and complete the Kubernetes cluster configuration, all the monitoring scans in your Endor Labs tenant are run on your Kubernetes cluster.
The following sections describe how you can configure and deploy Outpost.
You need a Kubernetes cluster with nodes that have at least 8 cores and 32 GB of RAM. Nodes should be running Linux.
You must create a namespace in your Kubernetes cluster to deploy Outpost. Use this namespace when you configure Outpost integration in Endor Labs.
Outpost currently supports the following Kubernetes distributions:
The total number of nodes in the cluster depends on the number of projects that you want to scan and the number of scans that you want to run in a day.
The total scans per node per day (24 hours) is calculated based on the following formula.
Total scans per node per day = (Node memory ÷ Pod memory request - 1) × (24 ÷ Average scan duration)
Pod memory request is the memory required for running endorctl. The Outpost scheduler sets the pod memory requests. Typically, the pod memory request is 8 GB. For demanding ecosystems with call graph enabled, the Outpost scheduler sets the pod memory request to 16 GB.
You can use the following formula to calculate the number of nodes required.
Number of nodes = Total projects ÷ Total scans per node per day
The following table shows the number of nodes required for different combinations of projects and scans.
| Number of projects | Pod Memory Request | Average Scan Duration (in hours) | Scans per node per day | Node specification | Number of nodes |
|---|---|---|---|---|---|
| 140 | 8 GB | 1 | 72 | 8 cores, 32 GB RAM | 2 |
| 1000 | 8 GB | 1 | 72 | 8 cores, 32 GB RAM | 14 |
| 1000 | 8 GB | 1 | 360 | 32 cores, 128 GB RAM | 3 |
Ensure the following network requirements are met for Outpost:
Outpost can use the following authentication mechanisms:
You can create an Endor Labs API key and secret to authenticate your Outpost configuration. See API keys for more information.
Ensure that you select On-prem Scheduler as the API key permissions.
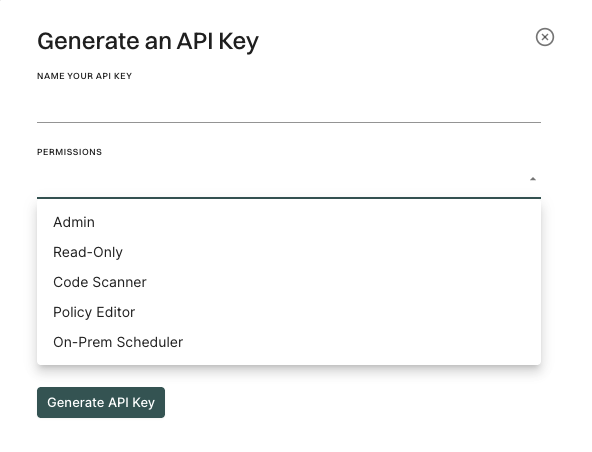
Perform the following steps to configure Outpost to use an Azure managed identity for authentication.
Enable workload identity in the AKS cluster.
Enable OIDC provider in the AKS cluster.
Create an Azure managed identity.
az identity create -g endor-group -n endor-identity
The command creates a zero-permission managed identity. Store the clientId for later use.
Run the following command to retrieve the OIDC Issuer from AKS.
OIDC_ISSUER=$(az aks show -g endor-group -n onprem-cluster --query "oidcIssuerProfile.issuerUrl" -o tsv)
The command fetches the OIDC issuer URL for federated authentication. Ensure that you enable OIDC and Workload Identity in the AKS cluster.
Create federated credentials for workloads.
Run the following command to create the scheduler federated credential.
az identity federated-credential create \
 --name scheduler-federated-identity \
 --identity-name endor-identity \
 --resource-group endor-group \
 --issuer $OIDC_ISSUER \
 --subject system:serviceaccount:onprem-cluster:onprem-scheduler-account
Run the following command to create the endorctl federated credential.
az identity federated-credential create \
 --name endorctl-federated-identity \
 --identity-name endor-identity \
 --resource-group endor-group \
 --issuer $OIDC_ISSUER \
 --subject system:serviceaccount:onprem-cluster:onprem-scheduler-endorctl-account
onprem-cluster specified in the commands is the name of the Kubernetes namespace where Outpost is to be deployed. Replace it with the actual namespace name where you want to deploy Outpost. Ensure that you create the namespace before running the commands.
The commands link the managed identity to Kubernetes service accounts and enable secure access without static credentials.
Configure an authorization policy in Endor Labs with configuration from Azure.
Configure the Outpost integration with Managed Identity Client ID.
See Outpost configuration for more information on how to configure the Outpost integration.
Perform the following steps to configure Outpost to use a GCP service account for authentication.
Enable workload identity in the GKE cluster.
Enable OIDC provider in the GKE cluster.
Create a new workload service account.
gcloud iam service-accounts create endor-compute \
  --description="Endor Labs Compute Service Account" \
  --display-name="Endor Labs Compute Service Account"
Grant roles/iam.serviceAccountOpenIdTokenCreator to workload service account.
gcloud projects add-iam-policy-binding endor-experiments \
 --member "serviceAccount:endor-compute@endor-experiments.iam.gserviceaccount.com" \
 --role "roles/iam.serviceAccountOpenIdTokenCreator"
Create a zero-permission service account for Endor Labs to perform federation.
gcloud iam service-accounts create endor-federation \
 --description="Endor Labs Keyless Federation Service Account" \
 --display-name="Endor Labs Federation Service Account"
Allow the Kubernetes service accounts to impersonate the IAM workload service account.
gcloud iam service-accounts add-iam-policy-binding endor-compute@endor-experiments.iam.gserviceaccount.com \
 --role roles/iam.workloadIdentityUser \
 --member "serviceAccount:endor-experiments.svc.id.goog[onprem-scheduler/onprem-scheduler-account]"
gcloud iam service-accounts add-iam-policy-binding endor-compute@endor-experiments.iam.gserviceaccount.com \
 --role roles/iam.workloadIdentityUser \
 --member "serviceAccount:endor-experiments.svc.id.goog[onprem-scheduler/onprem-scheduler-endorctl-account]"
Configure an authorization policy in Endor Labs with configuration from Google Cloud.
Configure the Outpost integration with Service Account Name.
See Outpost configuration for more information on how to configure the Outpost integration.
endor-experiments with the actual project name where you want to deploy Outpost. Replace endor-federation and endor-compute with the actual service account names.
After you set up your Kubernetes cluster and set up authentication, you can configure the Outpost integration.
Perform the following steps to configure Outpost:
Select Integrations from the left sidebar.
Click Configure under On-Prem Integration.
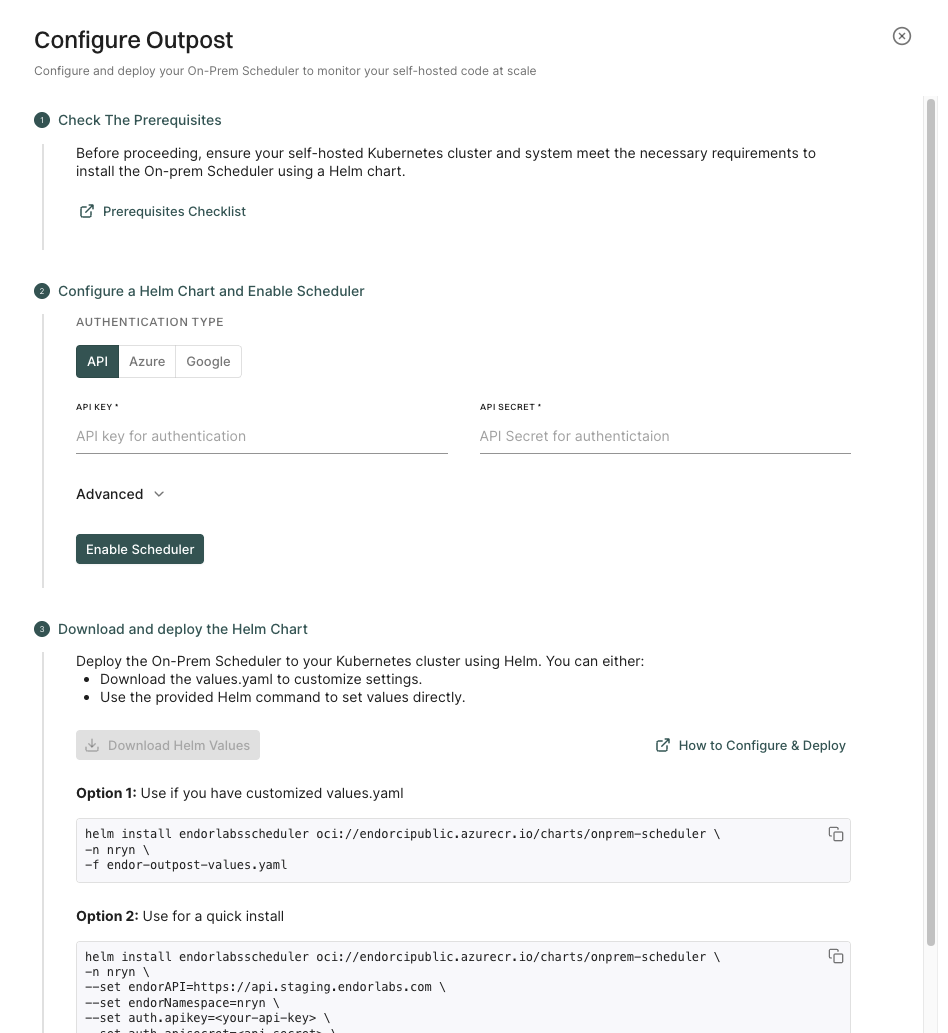
Choose from the following authentication methods:
Click Advanced to configure the following parameters:
Click Enable Scheduler to store the configuration and enable Outpost.
Click Download Helm Values to download the endor-outpost-values.yaml file.
You can choose to customize the values before you deploy Outpost.
You can also extract the chart from oci://endorcipublic.azurecr.io/charts/onprem-scheduler and refer the default values.yaml for all the available options. See Helm Chart Values for more information.
Run the following command to deploy Outpost in your Kubernetes cluster.
helm install endorlabsscheduler oci://endorcipublic.azurecr.io/charts/onprem-scheduler \
-n <your Kubernetes namespace> \
-f endor-outpost-values.yaml
The command installs the Outpost scheduler on your Kubernetes cluster.
If you use GCP service account authentication, you need to configure annotations for the service account in Helm values.
Add the following annotations to the Helm chart values before you run the Helm install command.
scheduler:
 .
 .
  serviceAccount:
    create: true
    annotations:
      iam.gke.io/gcp-service-account: "endor-scanner-sa@project-name-123456.iam.gserviceaccount.com"
endorctl:
 .
 .
  serviceAccount:
    create: true
    annotations:
      iam.gke.io/gcp-service-account: "endor-scanner-sa@project-name-123456.iam.gserviceaccount.com"
If you run the Helm command directly, update the generated Helm command to set the annotations with the following options:
--set scheduler.serviceAccount.annotations.iam.gke.io/gcp-service-account="<GCP_SERVICE_ACCOUNT_NAME>@<GCP_PROJECT_NAME>.iam.gserviceaccount.com"
--set endorctl.serviceAccount.annotations.iam.gke.io/gcp-service-account="<GCP_SERVICE_ACCOUNT_NAME>@<GCP_PROJECT_NAME>.iam.gserviceaccount.com"
For example:
helm install endorlabsscheduler oci://endorcipublic.azurecr.io/charts/onprem-scheduler \
    -n <k8s-ns> \
    --set endorAPI=https://api.staging.endorlabs.com \
    --set endorNamespace=nryn \
    --set auth.gcpServiceAccountName=endor-scanner-sa@project-name-123456.iam.gserviceaccount.com \
    --set scheduler.serviceAccount.annotations.iam.gke.io/gcp-service-account="endor-scanner-sa@project-name-123456.iam.gserviceaccount.com" \
    --set endorctl.serviceAccount.annotations.iam.gke.io/gcp-service-account="endor-scanner-sa@project-name-123456.iam.gserviceaccount.com" \
    --set bazelremote.install=false
The annotations are automatically added to the Helm chart values if you choose Azure managed identity authentication.
If you do not want to customize the values, the Helm command with your configured values appears in the user interface. You can copy the command and run it on your Kubernetes cluster.
For example, the following command appears on the user interface when you configure the integration on the endor Kubernetes namespace with the Azure managed identity authentication and build tool caching enabled. The root Endor Labs namespace is endor.
helm install endorlabsscheduler oci://endorcipublic.azurecr.io/charts/onprem-scheduler \
     -n endor \
     --set endorAPI=https://api.endorlabs.com \
     --set endorNamespace=endor \
     --set auth.azureManagedIdentityClientID=12a34b56-7c89-0d1e-2f34-567g890h1234 \
     --set bazelremote.install=true
You can copy the command and run it on your Kubernetes cluster to deploy Outpost.
To update the Outpost configuration, you need to uninstall the existing Helm chart and install a new one with the updated values.
Run the following command to uninstall the existing Helm chart.
helm uninstall endorlabsscheduler -n <your namespace>
You can update the configuration in the user interface to generate a new Helm chart or command, or you can manually update the values in the endor-outpost-values.yaml file. We recommend that you update the configuration in the user interface even if you manually update and install the Helm chart.
Perform the following steps to update the configuration in the user interface:
helm install command as described in Configure Outpost integration.Generally, you need to update the configuration when the authentication expires. API keys have a maximum validity period of one year. The expiry of Azure managed identity and GCP service accounts depends on the expiry of the corresponding authorization policy.
You can view the Outpost logs in the Endor Labs platform.
Perform the following steps to view the Outpost logs:
Select Integrations from the left sidebar.
Click View Logs under On-Prem Integration.
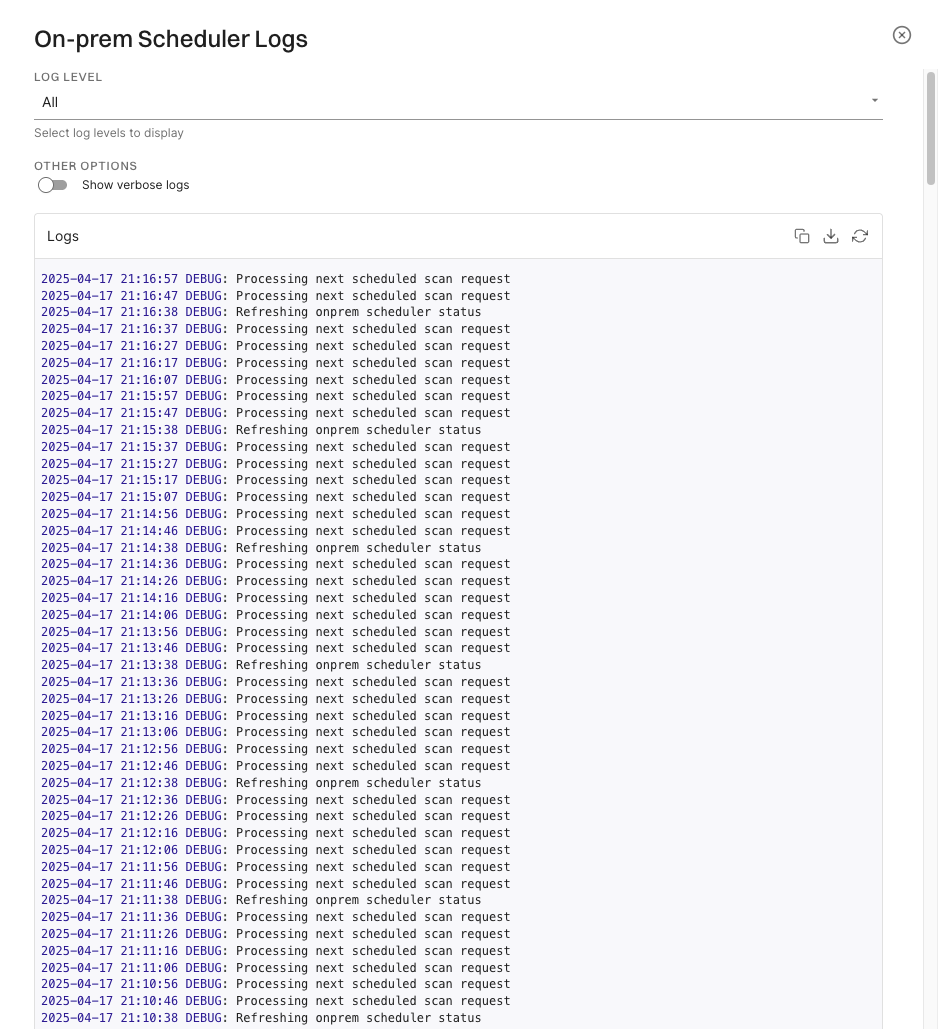
You can copy the logs to the clipboard or download the logs.
By default, the logs are brief logs are displayed. You can select Show Verbose Logs to view the detailed logs.
The log level is set as All by default. You can select Info to view the info logs and Debug to view the debug logs.
Run the following command to extract the default values for the Outpost Helm chart.
helm pull oci://endorcipublic.azurecr.io/charts/onprem-scheduler --untar
The values.yaml file in the onprem-scheduler directory contains the default values for the Outpost Helm chart.
The following yaml file shows the default values in the values.yaml file.
# Default values for onprem-scheduler.
# This file is YAML-formatted.

# Base URL for the Endor Labs platform [Do not modify]
endorAPI: "https://api.endorlabs.com"

# Your organization's namespace in Endor Labs [Do not modify unless there is a change in your tenant]
endorNamespace: "required"

# Log level for scheduler and endorctl. Optional.
logLevel: "info"

# Log output format for scheduler. Optional.
logOutput: "json"

# Authentication configuration - use ONE of the following methods.
# NOTE: Only one authentication method (apiKey & apiSecret, gcpServiceAccountName,
# or azureManagedIdentityClientID) must be set.
auth:
  # Option 1: API Key authentication. Enter the Endor Labs API key and secret.
  apiKey: ""
  apiSecret: ""

  # Option 2: GCP Service Account authentication. Enter the GCP service account name.
  # NOTE: Ensure service accounts are created with workload identity annotations.
  gcpServiceAccountName: ""

  # Option 3: Azure Managed Identity authentication. Enter the Azure managed identity client ID.
  # NOTE: Ensure service accounts are created with workload identity annotations.
  azureManagedIdentityClientID: ""

scheduler:
  # Maximum number of scans that you want to run concurrently. Optional.
  maxRunningJobs: 20

  # Scheduler container image settings.
  image:
    # Container repository for the scheduler image [Do not modify]
    repository: "endorcipublic.azurecr.io/scheduler"

    # Image version to use [Do not modify]
    tag: "latest"

    # Image pull policy [Do not modify]
    pullPolicy: "Always"

  # Labels for the scheduler deployment. Optional.
  labels: {}

  # Annotations for the scheduler deployment. Optional.
  annotations: {}

  # Labels for the scheduler pod. Optional.
  podLabels: {}

  # Annotations for the scheduler pod. Optional.
  podAnnotations: {}

  serviceAccount:
    # Specifies whether a service account should be created. Optional.
    create: false

    # Name of the service account to use for scheduler. Optional.
    name: ""

    # Labels for the scheduler service account. Optional.
    labels: {}

    # Annotations for the scheduler service account. Optional.
    annotations: {}

  # Pod-level security context for the scheduler. Optional.
  podSecurityContext: {}

  # Container-level security context for the scheduler. Optional.
  securityContext: {}

  # Resource constraints for the scheduler pod. Optional.
  resources:
    requests:
      cpu: 512m
      memory: 512Mi

  healthProbes:
    # Port used to perform health checks. Optional.
    port: 8080

    # Readiness probe for the scheduler pod. Optional.
    readinessProbe:
      enabled: true
      failureThreshold: 2
      successThreshold: 1
      periodSeconds: 5
      timeoutSeconds: 1
      initialDelaySeconds: 10

    # Liveness probe for the scheduler pod. Optional.
    livenessProbe:
      enabled: true
      failureThreshold: 4
      periodSeconds: 10
      successThreshold: 1
      timeoutSeconds: 1
      initialDelaySeconds: 0

  # Node selector for the scheduler pod. Optional.
  nodeSelector: {}

  # Tolerations for the scheduler pod. Optional.
  tolerations: []

  # Affinity settings for the scheduler pod. Optional.
  affinity: {}

  # Volumes for the scheduler pod. Optional.
  volumes: []

  # Volume mounts for the scheduler pod. Optional.
  volumeMounts: []

  # Additional environment variables for the scheduler pod. Optional.
  additionalEnvs: []

endorctl:
  # Maximum runtime duration in minutes for a scan. Optional. Default value is 60.
  maxDuration: 1440

  bazelRemote:
    # Bazel remote cache service name.
    # Refer bazelremote values below. Optional.
    serviceName: "bazel-remote-cache"

    # Bazel remote cache GRPC service port.
    # Refer bazelremote values below. Optional.
    servicePort: 9092

  # Endorctl container image settings.
  image:
    # Container repository for the endorctl image [Do not modify]
    repository: "endorcipublic.azurecr.io/endorctl_bare"

    # Image version to use [Do not modify]
    tag: "latest"

    # Image pull policy [Do not modify]
    pullPolicy: "Always"

  # Labels for the endorctl job. Optional.
  labels: {}

  # Annotations for the endorctl job. Optional.
  annotations: {}

  # Labels for the endorctl pod. Optional.
  podLabels: {}

  # Annotations for the endorctl pod. Optional.
  podAnnotations: {}

  serviceAccount:
    # Specifies whether a service account should be created. Optional.
    create: false

    # Name of the service account to use for endorctl. Optional.
    name: ""

    # Labels for the endorctl service account. Optional.
    labels: {}

    # Annotations for the endorctl service account. Optional.
    annotations: {}

  # Pod-level security context for the endorctl. Optional.
  podSecurityContext: {}

  # Container-level security context for the endorctl. Optional.
  securityContext: {}

  # Resource constraints for the endorctl job. Optional.
  resources: {}

  # Node selector for the endorctl pod. Optional.
  nodeSelector: {}

  # Tolerations for the endorctl pod. Optional.
  tolerations: []

  # Affinity settings for the endorctl pod. Optional.
  affinity: {}

  # Volumes for the endorctl pod. Optional.
  volumes: []

  # Volume mounts for the endorctl pod. Optional.
  volumeMounts: []

  # Backoff limit for the endorctl job. Optional.
  backoffLimit: 0

  # TTL seconds after finished for the endorctl job. Optional.
  ttlSecondsAfterFinished: 100

  # Additional environment variables for the endorctl pod. Optional.
  additionalEnvs: []

#
# DEPENDENCIES
#

# Bazel remote cache configuration. Optional. Not enabled by default.
bazelremote:
  # Whether to install the Bazel remote cache component
  install: false

  image:
    # Container repository for the Bazel remote cache image [Do not modify]
    repository: "buchgr/bazel-remote-cache"

    # Specific version of the Bazel remote cache to use [Do not modify]
    tag: "v2.4.1"

    # Image pull policy [Do not modify]
    pullPolicy: "IfNotPresent"

  # Full name of the chart. Optional.
  fullnameOverride: "bazel-remote-cache"

  # Bazel-remote config to provision inside of the container. Optional.
  conf: |-
    # https://github.com/buchgr/bazel-remote#example-configuration-file
    dir: /data
    max_size: 500
    experimental_remote_asset_api: true
    access_log_level: all
    port: 8080
    grpc_port: 9092

  ## For advanced bazel-remote configuration options,
  ## Refer https://github.com/slamdev/helm-charts/tree/master/charts/bazel-remote#readme
After you deploy Outpost, you can set up Endor Labs apps depending on your source code manager. You can install Endor Labs apps for the following source code managers:
Use the Endor Labs Jenkins pipeline to scan all the repositories in your organization and view consolidated findings. This pipeline runs on your organization’s Jenkins infrastructure and enables administrators to run organization-level supervisory scans easily. It is designed to work in GitHub Cloud and GitHub enterprise server environments.
The Jenkins pipeline carries out the following actions.
The Jenkins Pipeline script is available in the github-org-scan-docker.groovy file.
To scan the repositories in your organization:
Configure the required credentials needed to access GitHub and Endor Labs in the Jenkins pipeline script. You can configure these values from the Jenkins user interface.
GITHUB_TOKEN- Enter the GitHub token that has permission to access all the repositories in the organization.ENDOR_LABS_API_KEY- Enter the Endor Labs API key that you generated.ENDOR_LABS_API_SECRET- Enter the Endor Labs API secret generated while creating the Endor Labs API key.Configure the following GitHub cloud parameters in the Jenkins pipeline script.
AGENT_LABEL- This is a string parameter. Enter the label used to identify the Jenkins agents. The Jenkins job will run on the agents that have this label.GITHUB_ORG- This is a string parameter. Enter the organization name in GitHub.ENDOR_LABS_NAMESPACE- This is a string parameter. The namespace of your organization tenant in Endor Labs.ENDOR_LABS_API- This is a string parameter. This is only required if the tenant namespace is configured on the Endor Labs staging environment.ADDITIONAL_ARGS- This is a string parameter. Use this field to pass any additional parameter to the endorctl scan.NO_OF_THREADS- This is a string parameter. Enter the number of Jenkins agents that can be used in parallel for the endorctl scan. If you have 10 Jenkins agents configured with the given AGENT_LABEL, you can enter this value as 9, 1 agent is used for the main job. If not specified, this value defaults to 5.ENDORCTL_VERSION- This is a string parameter. Specify the version of the endorctl Docker container. Defaults to the latest version.SCAN_TYPE- This is a string parameter. Set this to git to scan commits or github to fetch info from the GitHub API. Defaults to [git, analytics].SCAN_SUMMARY_OUTPUT_TYPE- This is a string parameter. Use this field to set the desired output format. Supported formats: json, yaml’, table, summary. Defaults to table.LOG_LEVEL- This is a string parameter. Use this field to set the log level of the application. Defaults to info.LOG_VERBOSE- This is a string parameter. Use this field to make the log verbose.LANGUAGES- This is a string parameter. Use this field to set programming languages to scan. Supported languages: c#,go, java, javascript, php, python, ruby, rust, scala, typescript. Defaults to all supported languages.ADDITIONAL_ARGS- This is a string parameter. Use this field to pass any additional parameters to the endorctl scan.Configure the following GitHub enterprise server parameters in the Jenkins pipeline script.
AGENT_LABEL - This is a string parameter. Enter the label used to identify the Jenkins agents. The Jenkins job will run on the agents that have this label.GITHUB_ORG - This is a string parameter. Enter the organization name in GitHub.ENDOR_LABS_NAMESPACE - This is a string parameter. The namespace of your organization tenant in Endor Labs.GITHUB_API_URL - This is a string parameter. Enter the API URL of the GitHub enterprise server. This is normally in the form of <FQDN of GitHub Enterprise Server>/api/v3. For example, https://ghe.endorlabs.in/api/v3.ENDOR_LABS_API - This is a string parameter. This is only required if the tenant namespace is configured on the Endor Labs staging environment.
GITHUB_DISABLE_SSL_VERIFY - This is a boolean parameter. This should be used when you want to skip SSL Verification while cloning the repository.
GITHUB_CA_CERT - This is a multi-line string parameter. This should be used to provide the content of the CA Certificate (PEM format) of the SSL Certificate used on the GitHub Enterprise Server.
PROJECT_LIST - This is a multi-line string parameter. This should be used to provide a list of projects to scan.
SCAN_TYPE - This is a string parameter. Set this to git to scan commits or github to fetch info from the GitHub API. Defaults to [git, analytics].
SCAN_SUMMARY_OUTPUT_TYPE - This is a string parameter. Use this field to set the desired output format. Supported formats: json, yaml*, table, summary. Defaults to table.
LOG_LEVEL - This is a string parameter. Use this field to set the log level of the application. Defaults to info.
LOG_VERBOSE - This is a string parameter. Use this field to generate verbose logs.
LANGUAGES - This is a string parameter. Use this field to set programming languages to scan. Supported languages: c#, go, java, javascript, php, python, ruby, rust, scala, typescript. Defaults to all supported languages.
ADDITIONAL_ARGS - This is a string parameter. Use this field to pass any additional parameters to the endorctl scan.
PROJECT_LIST - This is a multi-line string parameter. List of projects to scan. Even though all projects are synchronized, scans run only on the provided projects.
SCAN_PROJECTS_BY_LAST_COMMIT - This is a string parameter. This parameter is used to filter projects based on the date of the last commit. Enter a number (integer) value for this parameter. The value of 0 means that projects won’t be filtered based on last commit date. Any positive integer is used to calculate the duration in which a commit will add the project for further scanning. If a project did not have a commit in that interval, it will be skipped.
If a proper SSL Certificate (a certificate issued by a well-known CA) is not used for GitHub Enterprise, the sync-org command fails and Endor Labs cannot fetch the projects or repositories to scan from the GitHub enterprise server. You can use this field to provide the list of projects or repositories to scan one per line.
For example:
        https://github-test.endorlabs.in/pse/vuln_rust_callgraph.git
        https://github-test.endorlabs.in/pse/vulnerable-golang.git
        https://github-test.endorlabs.in/pse/java-javascript-vulnerable-repo.git
        https://github-test.endorlabs.in/pse/multi-lang-repo.git
EXCLUDE_PROJECTS - This is a multi-line string parameter. Use this parameter to list projects or repositories to exclude from the scan.
NO_OF_THREADS - This is a string parameter. Enter the number of Jenkins agents that can be used in parallel for the endorctl scan. If you have 10 Jenkins agents configured with the given AGENT_LABEL, you can enter this value as 9. If not specified, this value defaults to 5.
Use the following procedure to configure the Jenkins pipeline and scan the repositories in your organization.
git@github.com:endorlabs/jenkins-org-scan.git or https://github.com/endorlabs/jenkins-org-scan.git.*/main.github-org-scan-docker.groovy.The Jenkins pipeline is highly customizable and adaptable to various GitHub environments and scanning requirements. It streamlines the process of running endorctl scans on your repositories efficiently.
CI Scans are used to focus team’s attention and establish development workflows on the most actionable issues, prioritizing the development team’s time. CI Scans can be triggered directly from automated CI/CD pipelines, looking for new vulnerabilities relative to the baseline established for the target branch. These CI Scans provide immediate feedback to developers in the form of PR comments and can also enforce policies to break builds, block PRs, send notifications, open tickets, and more. CI scans are the most actionable method to prevent vulnerabilities from entering your repositories.
Perform CI scans using:
See scanning strategies to learn techniques for effectively scanning and monitoring different versions of your projects with Endor Labs.
endorctl is a command line utility designed to bring the functionality of Endor Labs into your software delivery workflows. endorctl has several command flags to help you facilitate operational and security risk monitoring. Developers can integrate Endor Labs into Continuous Integration Workflows using the endorctl scan.
endorctl scan - You can use endorctl scan to monitor your projects using Endor Labs, and you can update the scan information each time to keep monitoring the project for new findings. The endorctl scan command will scan a specific version of your repository, such as the default branch, a tagged release version, or a commit SHA.endorctl scan --pr - You can use the endorctl scan --pr command to scan a specific version of your source code for security and operational risks as part of your continuous integration workflows or CI runs. The endorctl scan --pr command performs a one-time evaluation of your project, focusing on security and operational risks, rather than providing continuous monitoring. CI runs are shown in the Scan History section of each project and are stored for 30 days so that you can analyze and review them on the Endor Labs user interface. See PR scans for more information.Any continuous integration workflows generally run using the endorctl scan --pr command unless a scan is run on a created tag release, a push to the default or specific branch, or a commit SHA that will be deployed to production.
Keyless Authentication enhances security and minimizes the expenses associated with secret rotation. Keyless authentication is Endor Labs recommended path to scan your projects in the CI workflows. See Keyless Authentication for more information.
At Endor Labs, we believe that the most secure secret is one that doesn’t exist. That’s why in CI/CD environments we recommend using keyless authentication for machine authentication. Keyless Authentication uses OAuth for API authentication and removes the need to maintain and rotate an API key to Endor Labs.
Keyless Authentication is more secure and reduces the cost of secret rotation.
Configure keyless authentication using:
To enable keyless authentication in AWS you’ll first need permissions to create or modify the following roles and an instance profile with the appropriate roles configured.
Perform the following steps to configure keyless authentication in AWS.
An instance profile allows users to attach a single role to an EC2 instance. If you do not already have a pre-defined role or instance profile used by your EC2 instances you should create an instance profile for Endor Labs access.
To create an instance profile using the AWS CLI:
aws iam create-instance-profile --instance-profile-name EndorLabsAccessProfile
To successfully authenticate to Endor Labs you will need to assign an instance access role to the instance profile you created above.
The instance access role must at a minimum allow the compute resources that require access to perform the action sts:AssumeRole. If you already have a role you intend to assign to your instance profile, ensure that it has permissions to allow your compute resources to perform this action.
If you do not have an existing role you intend to use, create the role named endorlabs-instance-access-role using the instructions below.
Add the following json to a file called endorlabs-instance-access-role.json
cat > endorlabs-instance-access-role.json <<EOF
{
    "Version": "2012-10-17",
    "Statement": [
        {
            "Effect": "Allow",
            "Principal": {
                "Service": [
                    "ec2.amazonaws.com"
                ]
            },
            "Action": "sts:AssumeRole"
        }
    ]
}
EOF
Use this file to create your instance access role using the following command:
aws iam create-role --role-name endorlabs-instance-access-role --assume-role-policy-document file://endorlabs-instance-access-role.json
Next, ensure that the instance access role is assigned to the instance profile using the following command:
aws iam add-role-to-instance-profile --instance-profile-name EndorLabsAccessProfile --role-name endorlabs-instance-access-role
Finally, create your EC2 instance and ensure that your instance profile is assigned to it.
A dedicated federation role is leveraged to provide a least privileged role that enables access to Endor Labs. This role is designed to be assumed only by specific other roles and does not provide access to AWS resources.
To create your federation role you will need the name and AWS account number of the instance access role, which should look similar to the following policy json:
{
    "Version": "2012-10-17",
    "Statement": [
        {
            "Effect": "Allow",
            "Principal": {
                "AWS": "arn:aws:iam::$ACCOUNT:role/$ROLE_NAME"
            },
            "Action": "sts:AssumeRole"
        }
    ]
  }
First, get the account number of the role:
export ACCOUNT=$(aws sts get-caller-identity | jq -r '.Account')
Then define the name of the instance access role. For the following example, we will assume it is endorlabs-instance-access-role.
export ROLE_NAME=endorlabs-instance-access-role
Next, create the IAM policy document.
cat > endorlabs-federation-aws-role.json << EOF
{
  "Version": "2012-10-17",
  "Statement": [
      {
          "Effect": "Allow",
          "Principal": {
              "AWS": "arn:aws:iam::${ACCOUNT}:role/${ROLE_NAME}"
          },
          "Action": "sts:AssumeRole"
      }
  ]
}
EOF
Next, apply the policy document as a role:
aws iam create-role --role-name endorlabs-federation --assume-role-policy-document file://endorlabs-federation-aws-role.json
Finally, fetch the ARN of the IAM role you’ve created using the following command and create an authorization policy for it in Endor Labs.
To fetch the ARN of the Endor Labs federation role use the following command:
aws iam list-roles | jq -r '.Roles[] | select(.Arn|contains("endorlabs-federation"))'.Arn
Create an authorization policy in the Endor Labs user interface by following these steps:
On the EC2 instance you’ve configured for keyless authentication, download and install the latest version of endorctl. See our documentation for instructions on downloading the latest version
To scan with keyless authentication you must use the flag --aws-role-arn=<insert-your-arn> for federated access to Endor Labs such as in the below example:
endorctl --aws-role-arn=<insert-your-arn> api list -r Project -n <insert-your-endorlabs-tenant> --page-size=1
You’ve set up and configured keyless authentication. Now you can run a test scan to ensure you can successfully scan projects using keyless authentication with AWS.
To enable keyless authentication in Azure, you need to configure your Azure virtual machine with a managed identity and create an authorization policy in Endor Labs.
Complete the following tasks to set up keyless authentication in Azure.
You must enable Azure Managed Identity for your virtual machine from the Azure portal. For more information, refer to Azure managed identity.
You need to configure the Azure virtual machine with endorctl and configure endorctl to use Azure Managed Identify.
Log in to your Azure virtual machine and run the following command.
curl -s -H Metadata:true "http://169.254.169.254/metadata/instance?api-version=2021-02-01"
The command returns the metadata details of the virtual machine instance in the raw json format.
Download and install the latest version of endorctl in your virtual machine. See endorctl for the various methods available to install endorctl.
The following example shows how you can download the endorctl binary directly.
## Download the latest CLI for Windows AMD64
curl -O https://api.endorlabs.com/download/latest/endorctl_windows_amd64.exe
## Check the expected checksum of the binary file
curl https://api.endorlabs.com/sha/latest/endorctl_windows_amd64.exe
## Verify the expected checksum and the actual checksum of the binary match
certutil -hashfile .\endorctl_windows_amd64.exe SHA256
## Rename the binary file
ren endorctl_windows_amd64.exe endorctl.exe
Set the environment variable ENDOR_AZURE_CREDENTIALS_MANAGED_IDENTITY_ENABLE to true in your virtual machine instance.
export ENDOR_AZURE_CREDENTIALS_MANAGED_IDENTITY_ENABLE=true
Run the following command to check the status of the environment variable.
echo $ENDOR_AZURE_CREDENTIALS_MANAGED_IDENTITY_ENABLE
If the variable is set, then the command returns true.
Create an authorization policy for Azure in the Endor Labs user interface. See set up authorization policy for more information on creation an authorization policy.
Choose the following parameters when you create the authorization policy.
Select Azure as the Identity Provider.
Select Code Scanner in Permissions.
Enter the following values for the claims:
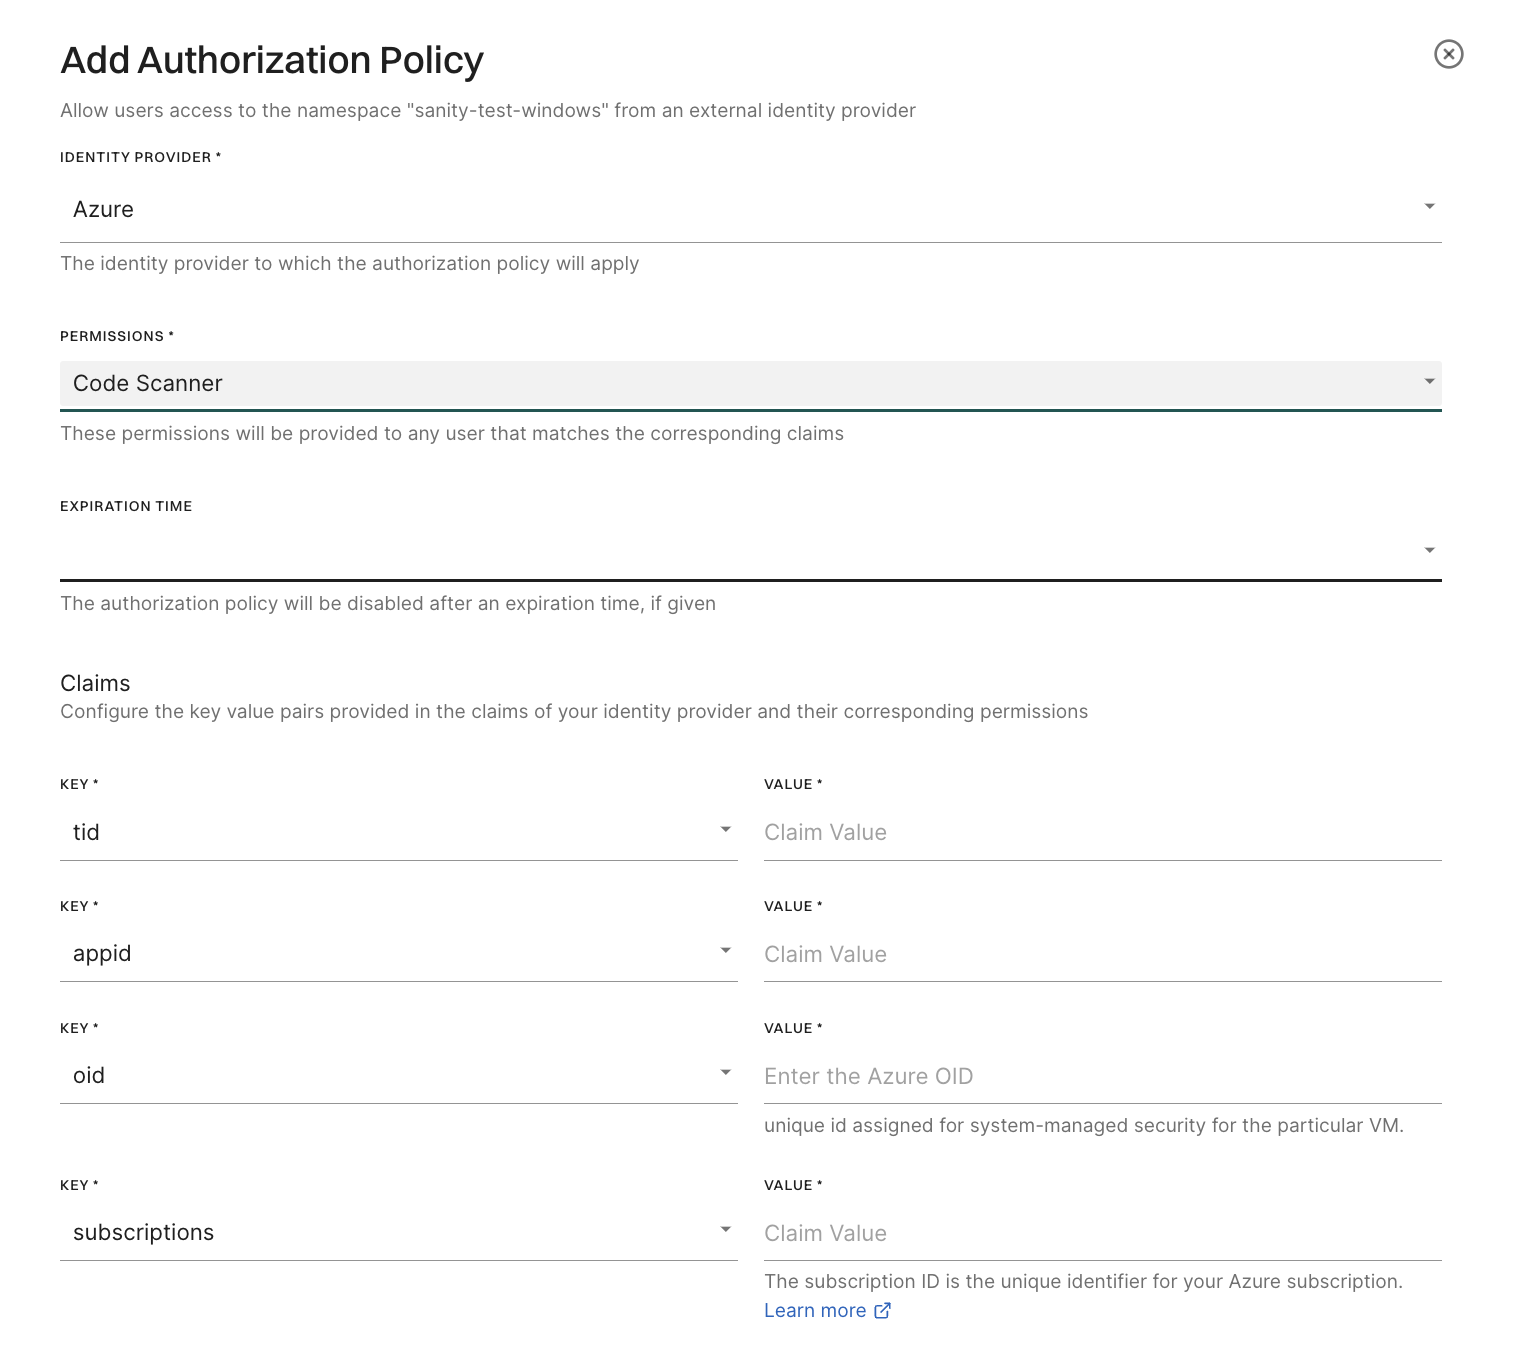
Once the authorization policy is set up, you can test keyless authentication using endorctl.
For example, run the following command to fetch the number of projects in a namespace with keyless authentication set up.
endorctl api list -r Project -n demo --enable-azure-managed-identity --count
The following example shows the response for the preceding command when keyless authentication is successful.
{
  "count_response": {
    "count": 3
  }
}
You’ve set up and configured keyless authentication. Now you can run a test scan to ensure you can successfully scan projects using keyless authentication with Azure.
To enable Keyless Authentication for GitHub Actions, you’ll need to perform the following steps:
id-tokenGitHub Action OIDCGithub Action OIDCTo ensure that the GitHub action OIDC identity can successfully login to Endor Labs you’ll need to create an authorization policy in Endor Labs.
To create an authorization policy:
user and put in a matching value that maps to the organization of your GitHub repository.To configure your GitHub Action workflow with GitHub Action OIDC you can use the following example as a baseline.
The important items in this workflow are:
id-tokenname: Example Scan of OWASP Java
on: workflow_dispatch
jobs:
create_project_owasp:
permissions:
id-token: write # This is required for requesting the JWT
runs-on: ubuntu-latest
steps:
- name: Checkout Repo
uses: actions/checkout@v3
with:
repository: OWASP-Benchmark/BenchmarkJava
- name: Setup Java
uses: actions/setup-java@v3
with:
distribution: 'microsoft'
java-version: '17'
- name: Compile Package
run: mvn clean install
- name: Scan with Endor Labs
uses: endorlabs/github-action@main # This workflow uses the Endor Labs GitHub action to scan.
with:
namespace: 'demo'
scan_summary_output_type: 'json'
pr: false
scan_secrets: true
scan_dependencies: true
Now that you’ve successfully configured your GitHub action workflow file you can use this workflow file or one of your own designs to run a test scan using Keyless authentication for GitHub actions.
To enable Keyless Authentication in GCP you’ll first need permissions to create service accounts and assign these accounts roles to GCP.
The workflow to enable keyless authentication is:
To create your service accounts, first export your GCP project name as an environment variable:
export PROJECT=<insert-gcp-project>
Once you’ve set the environment variable you’ll create a service account that will be used to federate access to Endor Labs and will be provided permission to access the Endor Labs APIs:
Step 1: Create a federation service account called endorlabs-federation:
gcloud iam service-accounts create endorlabs-federation --description="Endor Labs Keyless Federation Service Account" --display-name="Endor Labs Federation Service Account"
We’ll also create a second service account, that will have access to impersonate the endorlabs-federation account. We’ll call this endorlabs-compute-service.
This is needed if you don’t already have service accounts for your compute resources. If you do, you need to modify the existing permissions to allow the existing service account to create a federation token.
Step 2: Create a keyless authentication service account to assign to compute resources called endorlabs-compute-service:
gcloud iam service-accounts create endorlabs-compute-service --description="Endor Labs Service account for keyless authentication" --display-name="Endor Labs Compute Instance SA"
Finally, we’ll assign endorlabs-compute-service permissions to impersonate the endorlabs-federation account to authenticate to Endor Labs through OIDC.
Step 3: Assign the serviceAccountOpenIdTokenCreator role to the endorlabs-compute-service service account:
gcloud projects add-iam-policy-binding $PROJECT --member="serviceAccount:endorlabs-compute-service@$PROJECT.iam.gserviceaccount.com" --role="roles/iam.serviceAccountOpenIdTokenCreator"
Once we’ve created the necessary account permissions we will create an authorization policy in Endor Labs to allow the account endorlabs-federation to your Endor Labs tenant:
Use the following command to create an authorization policy in Endor Labs.
Note: Make sure to replace <your-tenant> with your Endor Labs tenant name and <insert-your-project> with your GCP project name in the following command.**
endorctl api create -r AuthorizationPolicy -d '{
    "tenant_meta": { "namespace": "<your-tenant>" },
    "meta": {
        "name": "Keyless Auth",
        "kind": "AuthorizationPolicy",
        "tags": ["gcp"]
     },
     "spec": {
        "clause": ["email=endorlabs-federation@<insert-your-project>.iam.gserviceaccount.com", "gcp"],
        "target_namespaces": ["<your-tenant>"],
        "propagate": true,
        "permissions": {
            "rules": {},
            "roles": [
                "SYSTEM_ROLE_CODE_SCANNER"
            ]
        },
    }
}'
You’ve now set up the foundation of keyless authentication. You’ll now need to provision your compute resources with the appropriate GCP scopes and service account.
See Provisioning and Testing Keyless Authentication for GKE workloads for instructions on setting up GKE for keyless authentication.
See Provisioning and Testing Keyless Authentication for GCP Virtual Machine Instances for instructions on setting up a virtual machine instance for keyless authentication.
The following prerequisites are required to setup keyless authentication on GKE workloads:
The following instructions require you to export the following environment variables to appropriately run:
export PROJECT=<Insert_GCP_Project>
export CLUSTER_NAME=<GKE_CLUSTER>
Optional Step 1: To create a GKE cluster with workload identity enabled if you do not already have a GKE cluster with workload identity enabled run the following command:
gcloud container clusters create keyless-test --workload-pool=endor-github.svc.id.goog --scopes https://www.googleapis.com/auth/cloud-platform
Step 2: To authenticate to your GKE cluster run the following command:
gcloud container clusters get-credentials $CLUSTER_NAME
Optional Step 3: To create a namespace for Endor Labs scans run the following command:
kubectl create namespace endorlabs
Step 4: To create a Kubernetes service account to impersonate your GKE compute service account run the following command:
kubectl create serviceaccount endorlabs-compute-service -n endorlabs
Step 5: To bind your Kubernetes service account to your GCP compute service account run the following command:
Note: Make sure to replace <insert-your-project> in the following command with your GCP project name.
gcloud iam service-accounts add-iam-policy-binding endorlabs-compute-service@$PROJECT.iam.gserviceaccount.com --role roles/iam.workloadIdentityUser --member "serviceAccount:<insert-your-project>.svc.id.goog[endorlabs/endorlabs-compute-service]"
Step 6: To annotate your Kubernetes service account with your GCP service account to complete your binding run the following command:
Note: If you have created a different service account name replace endorlabs-compute-service with the appropriate service account name.
kubectl annotate serviceaccount endorlabs-compute-service -n endorlabs iam.gke.io/gcp-service-account=endorlabs-compute-service@$PROJECT.iam.gserviceaccount.com
Step 7: Test scan your project with keyless authentication
You’ve set up and configured keyless authentication. Now you can run a test scan to ensure you can successfully scan projects using keyless authentication.
The following high-level procedure describes the required steps to use keyless authentication with a GCP virtual machine instance:
Procedure:
The following instructions require you to export the following environment variables to appropriately run:
export PROJECT=<Insert_GCP_Project>
To successfully test keyless authentication first you’ll need to provision a compute resource with the service account endorlabs-compute-service@$PROJECT.iam.gserviceaccount.com and the scope https://www.googleapis.com/auth/cloud-platform:
Step 1: To create a virtual machine instance with the appropriate scopes run the following command:
gcloud compute instances create test-keyless --service-account endorlabs-compute-service@$PROJECT.iam.gserviceaccount.com --scopes https://www.googleapis.com/auth/cloud-platform
Step 2: To download and install endorctl on the virtual machine instance run the following series of commands:
First, SSH to the virtual machine instance you’ve created to test:
gcloud compute ssh --zone "us-west1-b" "test-keyless" --project $PROJECT
Then download and install the latest version of endorctl. See our documentation for instructions on downloading the latest version
To scan with keyless authentication you must use the flag --gcp-service-account=endorlabs-federation@<insert-your-project>.iam.gserviceaccount.com for federated access to Endor Labs such as in the below example:
endorctl api list --gcp-service-account=endorlabs-federation@<insert-your-project>.iam.gserviceaccount.com -r Project -n <insert-your-tenant> --count
If this scan runs successfully you’ve tested and scanned a project with keyless authentication to Endor Labs.
GitHub Actions is a continuous integration and continuous delivery (CI/CD) platform that allows you to automate your build, test, and deployment pipeline. You can use GitHub Actions to include Endor Labs into your CI pipeline seamlessly.
Using this pipeline, developers can view and detect:
The Endor Labs verifications are conducted as automated checks and help you discover violations before pushing code to the repository. Information about the violations can be included as comments on the corresponding pull request (PR). This enables developers to easily identify issues and take remedial measures early in the development life cycle.
To ensure the successful execution of the Endor Labs GitHub action, the following prerequisites must be met:
Endor Labs scanning workflow using GitHub actions that accomplishes the following tasks in your CI environment:
The following example workflow shows how to scan with Endor Labs for a Java application using the recommended keyless authentication for GitHub actions.
name: Endor Labs Dependency and Secrets Scan
on:
  push:
    branches: [ main ]
  pull_request:
    branches: [ main ]
jobs:
  scan:
    permissions:
      security-events: write # Used to upload Sarif artifact to GitHub
      contents: read # Used to check out a private repository
      actions: read # Required for private repositories to upload Sarif files. GitHub Advanced Security licenses are required.
      id-token: write # Used for keyless authentication with Endor Labs
      pull-requests: write # Required to automatically comment on PRs for new policy violations
    runs-on: ubuntu-latest
    steps:
    - name: Checkout Repository
      uses: actions/checkout@v3
    - name: Setup Java
      uses: actions/setup-java@v3
      with:
        distribution: 'microsoft'
        java-version: '17'
    - name: Build Package
      run: mvn clean install
    - name: Endor Labs Scan Pull Request
      if: github.event_name == 'pull_request'
      uses: endorlabs/github-action@v1 # Replace v1 with the commit SHA of the latest version of the GitHub Action for enhanced security
      with:
        namespace: 'example' # Replace with your Endor Labs tenant namespace
        scan_dependencies: true
        scan_secrets: true
        pr: true
        enable_pr_comments: true # Required to automatically comment on PRs for new policy violations
        github_token: ${{ secrets.GITHUB_TOKEN }} # Required for PR comments on new policy violations

  scan-main:
    permissions:
      id-token: write
      repository-projects: read
      pull-requests: read
      contents: read
    name: endorctl-scan
    runs-on: ubuntu-latest
    steps:
    - name: Checkout Repository
      uses: actions/checkout@v3
    - name: Setup Java
      uses: actions/setup-java@v3
      with:
        distribution: 'microsoft'
        java-version: '17'
    - name: Build Package
      run: mvn clean install
    - name: 'Endor Labs Scan Push to main'
      if: ${{ github.event_name == 'push' }}
      uses: endorlabs/github-action@v1 # Replace v1 with the commit SHA of the latest version of the GitHub Action for enhanced security
      with:
        namespace: 'example' # Replace with your Endor Labs tenant namespace
        scan_dependencies: true
        scan_secrets: true
        pr: false
        scan_summary_output_type: 'table'
        sarif_file: 'findings.sarif'
    - name: Upload findings to github
      uses: github/codeql-action/upload-sarif@v3
      with:
        sarif_file: 'findings.sarif'
Endor Labs recommends pinning the commit SHA of the GitHub Actions to enhance security. By pinning GitHub Actions to a commit SHA, you make the code immutable even if the tag version is changed or the code is updated.
To find the Endor Labs GitHub action’s latest commit SHA:
Go to Endor Labs GitHub Actions page and select the latest release version in Releases.
Click the commit of the release.

Copy the commit SHA from the URL.
The commit SHA is the 40-character alphanumeric string in the URL after /commit/.

Endor Labs recommends using keyless authentication in CI environments. Keyless authentication is more secure and reduces the cost of secret rotation. To set up keyless authentication see Keyless Authentication.
If you choose not to use keyless authentication, you can configure an API key and secret in GitHub for authentication as outlined in Managing API keys.
If you are not using keyless authentication for GitHub Actions, you must not provide id-token: write permissions to your GitHub token unless specifically required by a step in this job. You must also set enable_github_action_token: false in your Endor Labs GitHub action configuration.
The following example configuration uses the Endor Labs API key for authentication:
      - name: Scan with Endor Labs
        uses: endorlabs/github-action@v1 # Replace v1 with the commit SHA of the latest version of the GitHub Action for enhanced security
        with:
          namespace: 'example'
          api_key: ${{ secrets.ENDOR_API_CREDENTIALS_KEY }}
          api_secret: ${{ secrets.ENDOR_API_CREDENTIALS_SECRET }}
          enable_github_action_token: false
The following example configuration uses a GCP service account for keyless authentication to Endor Labs:
      - name: Scan with Endor Labs
        uses: endorlabs/github-action@v1 # Replace v1 with the commit SHA of the latest version of the GitHub Action for enhanced security
        with:
          namespace: 'example'
          gcp_service_account: '<Insert_Your_Service_Account>@<Insert_Your_Project>.iam.gserviceaccount.com'
          enable_github_action_token: false
The following input configuration parameters are supported for the Endor Labs GitHub Action:
Endor Labs GitHub actions supports the following input global parameters:
| Flags | Description |
|---|---|
api_key |
Set the API key used to authenticate with Endor Labs. |
api_secret |
Set the secret corresponding to the API key used to authenticate with Endor Labs. |
enable_github_action_token |
Set to false if you prefer to use another form of authentication over GitHub action OIDC tokens. (Default: true) |
endorctl_checksum |
Set to the checksum associated with a pinned version of endorctl. |
endorctl_version |
Set to a version of endorctl to pin this specific version for use. Defaults to the latest version. |
gcp_service_account |
Set the target service account for GCP based authentication. GCP authentication is only enabled if this flag is set. Cannot be used with api_key. |
log_level |
Set the log level. (Default: info) |
log_verbose |
Set to true to enable verbose logging. (Default: false) |
namespace |
Set to the namespace of the project that you are working with. (Required) |
The following input parameters are also supported for the Endor Labs GitHub action when used for scanning:
| Flags | Description |
|---|---|
additional_args |
Use additional_args with endorctl scan for advanced scenarios. However, no example use case currently exists as standard options suffice for typical needs. |
use-bazel |
Enable the usage of Bazel for the scan. (Default: false) |
bazel_exclude_targets |
Specify a list of Bazel targets to exclude from the scan. |
bazel_include_targets |
Specify a list of Bazel targets to scan. If bazel_targets_include is not set, the bazel_targets_query value is used to determine which Bazel targets to scan. |
bazel_targets_query |
Specify a Bazel query to determine which Bazel targets to scan. Ignored if bazel_targets_include is set. |
pr |
Set to false to track this scan as a monitored version within Endor Labs, as opposed to a point-in-time policy and finding test for a PR. (Default: true) |
enable_pr_comments |
Set to true to publish new findings as review comments. Requires pr and github_token. Additionally, the pull-requests: write permissions must be set in the workflow. (Default: false) |
pr_baseline |
Set to the Git reference that you are merging to, such as the default branch. Enables endorctl to compare findings, so developers are only alerted to issues in the current changeset. Example: pr_baseline: "main". Note: Not needed if enable_pr_comments is set to true. |
github_token |
Set the token used to authenticate with GitHub. Mandatory if enable_pr_comments is set to true |
run_stats |
Set to false to disable reporting of CPU/RAM/time scan statistics via time -v (sometimes required on Windows runners). (Default: true) |
phantom_dependencies |
Set to true to enable phantom dependency analysis. (Default: false) |
project_name |
Specify a project name for a container image scan or a package scan. |
image |
Specify a container image to scan. |
tags |
Specify a list of user-defined tags to add to this scan. You can use tags to search and filter scans later. |
scan_dependencies |
Scan Git commits and generate findings for all dependencies. (Default: true) |
scan_git_logs |
Perform a more complete and detailed scan of secrets in the repository history. Must be used together with scan_secrets. (Default: false) |
scan_github_actions |
Scan source code repository for GitHub actions used in workflow files to analyze vulnerabilities and malware. (Default: false) |
scan_path |
Set the path of the directory to scan. (Default: .) |
scan_secrets |
Scan the source code repository and generate findings for secrets. See also scan_git_logs. (Default: false) |
scan_tools |
Scan source code repository for CI/CD tools. (Default: false) |
scan_package |
Scan a specified artifact or a package. Set the path to an artifact with scan_path. (Default: false) |
scan_container |
Scan a specified container image. The image must be set with image and a project can be defined with project_name. (Default: false) |
scan_sast |
Scan the source code repository and generate findings for SAST. (Default: false) |
disable_code_snippet_storage |
Disable code snippet storage for SAST scans. (Default: false) |
scan_summary_output_type |
Set the desired output format to table, json, yaml, or summary. (Default: json) |
sarif_file |
Set to a path on your GitHub runner to store the analysis results in SARIF format. |
export_scan_result_artifact |
Set to false to disable the json scan result artifact export. (Default: true) |
output_file |
Set a file to save the scan results. Use this instead of export_scan_result_artifact to save any scan results data to a file in the workspace for processing by others steps in the same job, instead of the workflow run log. |
You can use the following environmental variable for the Endor Labs GitHub action:
| Flags | Description |
|---|---|
ENDOR_JS_ENABLE_TSSERVER |
Set to false to skip installing tsserver when function reachability analysis is not required for JavaScript/TypeScript projects. |
Use the following parameters and the latest sign action endorlabs/github-action/sign@version to build artifact signing through Endor Labs GitHub actions.
The optional parameters are required only if enable_github_action_token in common parameters is false. If true (default value), GitHub automatically populates the optional and other parameters as token claims and sends them to Endor Labs.
| Flags | Required | Description |
|---|---|---|
artifact_name |
Mandatory | Set to the name of the artifact to be signed. |
source_repository_ref |
Optional | Set to the repository reference on which the build run was based. For example, ref/tags/v1.0.1 |
certificate_oidc_issuer |
Optional | Set to the OIDC issuer of the token expected in the certificate. For example, https://token.actions.githubusercontent.com |
Use the following verification parameters and the latest verify action endorlabs/github-action/verify@version to build artifact verification through Endor Labs GitHub actions.
| Flags | Required | Description |
|---|---|---|
artifact_name |
Mandatory | Set to the name of the artifact to be verified. |
certificate_oidc_issuer |
Mandatory | Set to the OIDC issuer of the token expected in the certificate. For example, https://token.actions.githubusercontent.com |
Configure an action policy in the Endor Labs user interface to perform an action when a rule is triggered. See Action Policies for details on action policies.
You can configure GitHub Actions to comment on PRs if there are any policy violations. When you raise a PR, Endor Labs scans and detects policy violations. A comment is added in the PR with the details of violation. The CI pipeline warns you or fails the build based on your action policy configuration. The PR comments also include recommendations to help you take necessary remedial actions.
You can customize the template of the comment according to your requirement.
Make sure that your GitHub action workflow includes the following configuration.
with clause including: enable_pr_comments to true to publish new findings as review comments and github_token: ${{ secrets.GITHUB_TOKEN }}. This token is automatically provisioned by GitHub when using GitHub actions. See GitHub configuration parameters for more information.pull-requests: write.The following example configuration comments on PRs if a policy violation is detected.
      - name: Endor Labs Scan PR to Default Branch
        if: github.event_name == 'pull_request'
        uses: endorlabs/github-action@v1 # Replace v1 with the commit SHA of the latest version of the GitHub Action for enhanced security
        with:
          namespace: 'example' # Update with your Endor Labs namespace
          scan_summary_output_type: 'table'
          scan_dependencies: true
          scan_secrets: true
          pr: true
          enable_pr_comments: true
          github_token: ${{ secrets.GITHUB_TOKEN }}
You can view a live example of a GitHub repository with a workflow that enables PR comments.
The main.yaml file contains the following configuration to enable PR comments.
name: Build Release
on:
  pull_request:
    branches: [main]
  workflow_dispatch:
  push:
    branches: [main]
  schedule:
    - cron: "23 23 * * 0"
jobs:
  build:
    permissions:
      pull-requests: write
      security-events: write
      contents: read
      id-token: write
      actions: read
    runs-on: ubuntu-latest
    env:
      ENDOR_NAMESPACE: "endorlabs-hearts-github"
    steps:
      - name: Endor Labs Scan PR to Default Branch
        if: github.event_name == 'pull_request'
        uses: endorlabs/github-action@v1 # Replace v1 with the commit SHA of the latest version of the GitHub Action for enhanced security
        with:
          namespace: ${{ env.ENDOR_NAMESPACE }}
          pr: true
          enable_pr_comments: true
          github_token: ${{ secrets.GITHUB_TOKEN }}
The PR #10 introduced a reachable vulnerability. Since the workflow has enable_pr_comments set as true, a comment is added to the PR on the policy violation.
You can expand the comment to view more details about the violation and take steps to resolve the issue.
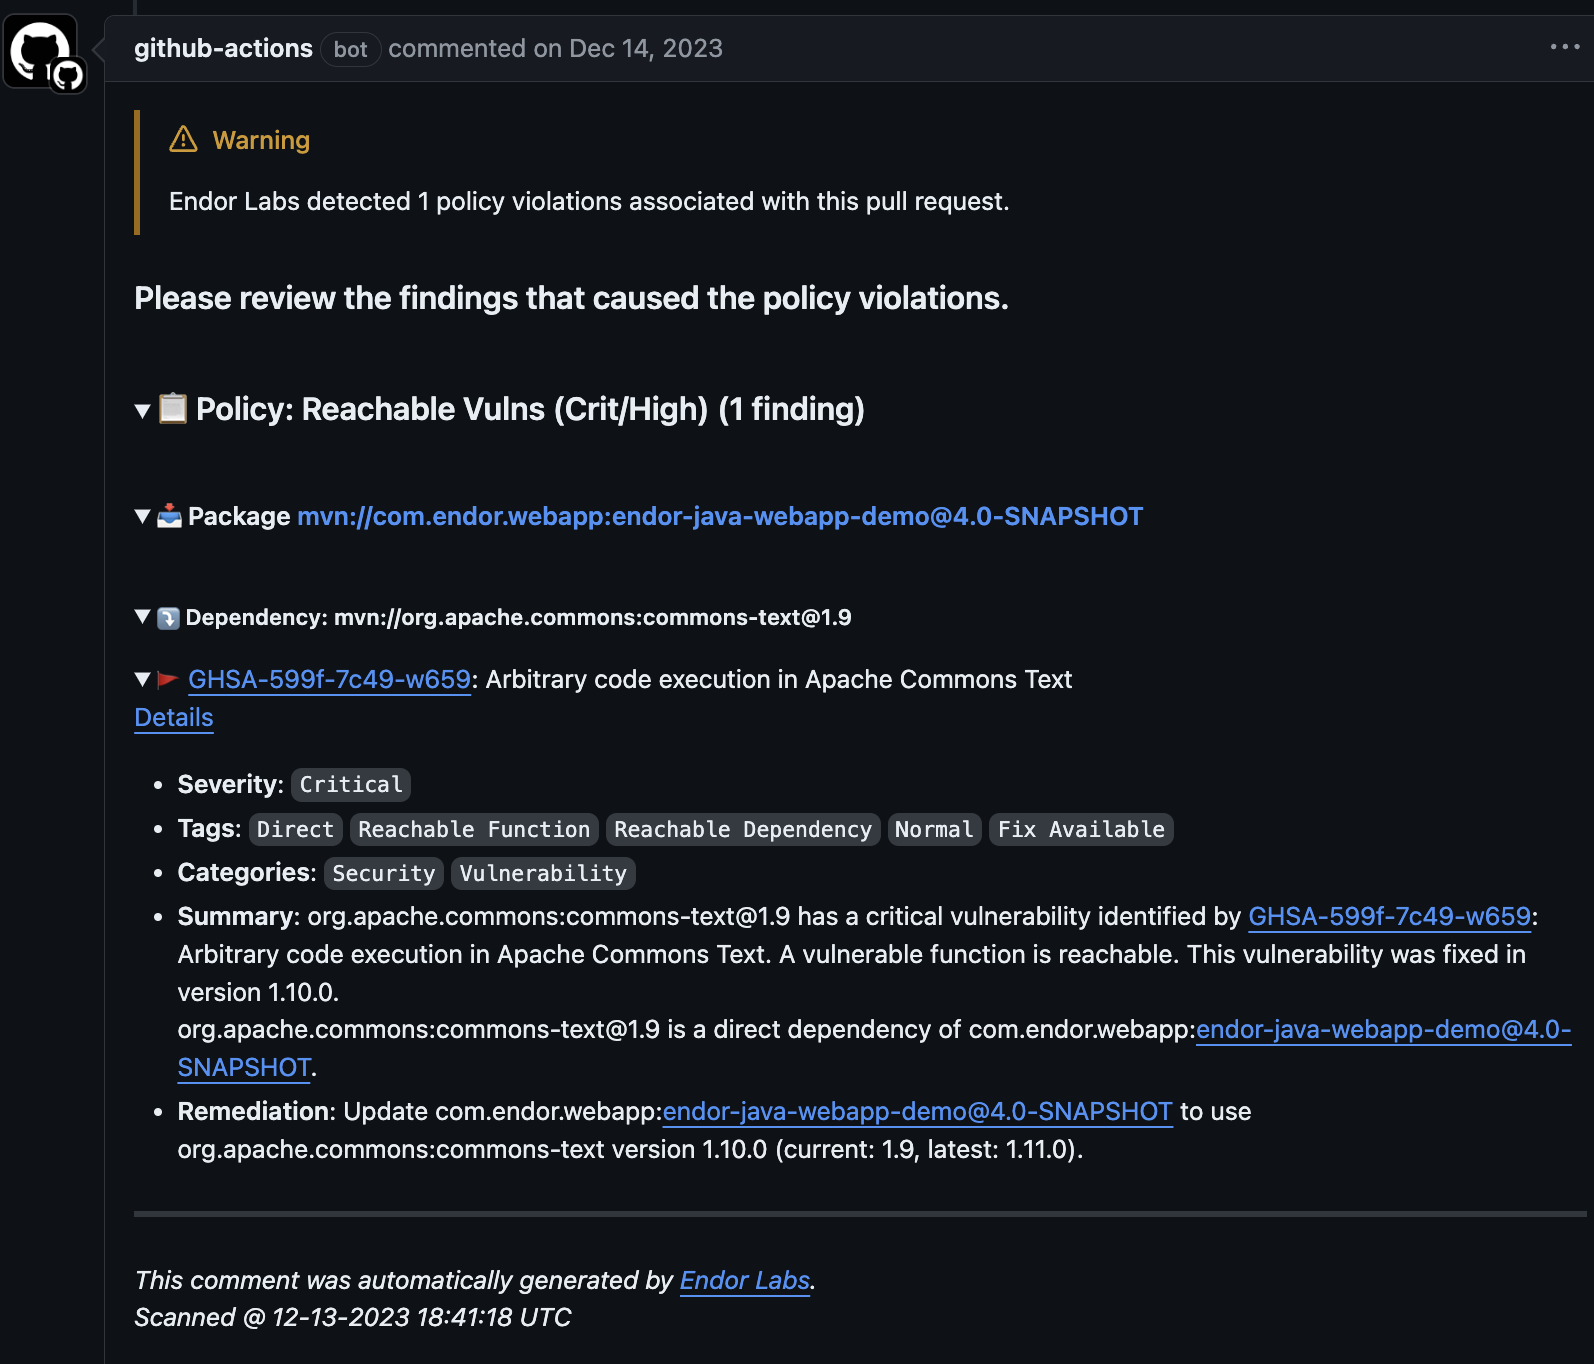
Endor Labs provides a default template with standard information that will be included in your pull requests as comments. You can use the default template, or you can choose to edit and customize this template to fit your organization’s specific requirements. You can also create custom templates using Go Templates.
To create custom templates for PR comments, you must understand the data supplied to the template.
See the following protobuf specification for the GithubCommentData message that this template uses.
syntax = "proto3";

package internal.endor.ai.endor.v1;

import "google/protobuf/wrappers.proto";
import "protoc-gen-openapiv2/options/annotations.proto";
import "spec/internal/endor/v1/common.proto";
import "spec/internal/endor/v1/finding.proto";
import "spec/internal/endor/v1/package_version.proto";

option go_package = "github.com/endorlabs/monorepo/src/golang/spec/internal.endor.ai/endor/v1";
option java_package = "ai.endor.internal.spec";

// The list of finding UUIDs.
message FindingUuids {
  repeated string uuids = 1;
}

// The map of dependency name to findings.
message DependencyToFindings {
  map<string, FindingUuids> dependency_to_findings = 1;
}

// The map of PackageVersion UUID to DependencyToFindings.
message PackageToDependencies {
  map<string, DependencyToFindings> package_to_dependencies = 1;
}

message GithubCommentData {
  // The header of the PR comment. Identifies the PR comment published by Endor Labs.
  // It should always be at top of the template.
  google.protobuf.StringValue comment_header = 1;

  // The footer of the PR comment.
  google.protobuf.StringValue comment_footer = 2;

  // The map of finding UUID to finding object.
  map<string, internal.endor.ai.endor.v1.Finding> findings_map = 3;

  // The map of policy UUID to policy name.
  // This will contain only the policies that are triggered or violated.
  map<string, string> policies_map = 4;

  // The map of policy UUID to the list of finding UUIDs.
  map<string, FindingUuids> policy_findings_map = 5;

  // The map of PackageVersion UUID to PackageVersion object.
  map<string, internal.endor.ai.endor.v1.PackageVersion> package_versions_map = 6;

  // The data needs to be grouped as follows:
  //
  // - Policy 1
  // 		- Package 1
  //			- Dependency Package 1
  //				- Finding 1
  //				- Finding 2
  //			- Dependency Package 2
  //				- Finding 3
  //				- Finding 4
  // 		- Package 2
  //			- Dependency Package 1
  //				- Finding 1
  //				- Finding 5
  // - Policy 2
  //		....
  //
  //		Map 0[PolicyUUID]/Map 1[PkgVerUUID]/Map 2 [Dep Names]/Finding UUID
  map<string, PackageToDependencies> data_map = 7;

  google.protobuf.StringValue api_endpoint = 8;
}

// Data structure for security review comments on pull requests.
message SecurityReviewCommentData {
  option (internal.endor.ai.endor.v1.parent_kinds) = {};
  option (grpc.gateway.protoc_gen_openapiv2.options.openapiv2_schema) = {
    json_schema: {
      extensions: {
        key: "x-internal";
        value {bool_value: true}
      }
    }
  };

  // Represents a specific security risk identified in the code review.
  message SecurityRisk {
    // Icon representing the severity level of the risk.
    google.protobuf.StringValue severity_icon = 1;

    // The category or type of the security risk.
    google.protobuf.StringValue category = 2;

    // The title or name of the security risk.
    google.protobuf.StringValue title = 3;

    // Link to the specific code location where the risk was identified.
    google.protobuf.StringValue code_link = 4;

    // Detailed description of the security risk and potential impact.
    google.protobuf.StringValue description = 5;

    // The level of the security risk.
    google.protobuf.StringValue level = 6;

    // The type of impact (improvement or regression).
    google.protobuf.StringValue impact_type = 7;
  }

  // The header of the security review comment.
  // It should always be at the top of the template.
  google.protobuf.StringValue comment_header = 1;

  // The footer of the security review comment.
  google.protobuf.StringValue comment_footer = 2;

  // A description of the changes made in the pull request.
  google.protobuf.StringValue changes_description = 3;

  // A general security assessment description.
  google.protobuf.StringValue security_description = 4;

  // The list of identified security risks in the pull request.
  repeated SecurityRisk security_risks = 5;
}
To understand Finding and PackageVersion definitions that are used in this protobuf specification, see:
See the following specification to understand the additional functions that are also available. You can access these functions by using their corresponding keys.
// FuncMap contains the additional functions that are available to GithubCommentTemplate.
var FuncMap = template.FuncMap{
	"now": toTime, // 'now' gives the current time

	// 'enumToString' coverts the enums for finding level, finding category and finding tags to string
	"enumToString": enumToString,

	// 'getPackageVersionURL' returns the URL for a given PackageVersion
	"getPackageVersionURL": func(apiURL string, packageVersion *endorpb.PackageVersion) string {
		result, err := common.GetPackageVersionURL(apiURL, packageVersion)
		if err != nil {
			return ""
		}
		return result
	},

	// 'getFindingURL' returns the URL for a given Finding
	"getFindingURL": func(apiURL string, finding *endorpb.Finding) string {
		result, err := common.GetFindingURL(apiURL, finding)
		if err != nil {
			return ""
		}
		return result
	},

	// 'add' returns the sum of two integers
	"add": func(n int, incr int) int {
		return n + incr
	},

	// 'getOtherFindingsPackageMarker' returns the key for _findingsWithNoPackages for lookup in DataMap
	// Not all findings are associated with a PackageVersion, such findings are grouped under this key
	// in the DataMap
	"getOtherFindingsPackageMarker": func() string { return _findingsWithNoPackages },

	// 'getOtherFindingsDependencyMarker' returns the key for _findingsWithNoDeps for lookup in DataMap
	// Not all findings are associated with a dependency, such findings are grouped under this key
	// in the DataMap
	"getOtherFindingsDependencyMarker": func() string { return _findingsWithNoDeps },

	// 'getFindingsCountString' returns a string with number of findings, example - "5 findings"
	"getFindingsCountString": func(dataMap *endorpb.PackageToDependencies) string {
		count := 0

		for _, depMap := range dataMap.PackageToDependencies {
			for _, findingMap := range depMap.DependencyToFindings {
				count += len(findingMap.Uuids)
			}
		}

		findingsStr := "findings"
		if count == 1 {
			findingsStr = "finding"
		}

		return fmt.Sprintf("%d %s", count, findingsStr)
	},
}
Jenkins is an open-source automation server widely used for building, testing, and deploying software. Specifically in the context of CI/CD pipelines, Jenkins serves as a powerful tool to automate various stages of the software development lifecycle.
To integrate Endor Labs into your Jenkins CI/CD processes:
To configure keyless authentication see the keyless authentication documentation
If you choose not to use keyless authentication you can configure an API key and secret in Jenkins for authentication using the following steps. See managing API keys for more information on generating an API key for Endor Labs.
See Jenkins documentation to install nodeJS plugin in Jenkins. You must have the nodeJS plugin to use npm and download endorctl.
To create a Jenkins pipeline:
Use the following examples to get started. Make sure to customize this job with your specific build environment and build steps.
pipeline {
    agent any
    tools {nodejs "NodeJS"}
    environment {
        ENDOR_API = credentials('ENDOR_API')
        ENDOR_NAMESPACE = credentials('ENDOR_NAMESPACE')
        ENDOR_API_CREDENTIALS_KEY = credentials('ENDOR_API_CREDENTIALS_KEY_1')
        ENDOR_API_CREDENTIALS_SECRET = credentials('ENDOR_API_CREDENTIALS_SECRET_1')
    }
    stages {
        stage('Checkout') {
            steps {
                // Checkout the Git repository
                checkout scmGit(branches: [[name: '*/main']], userRemoteConfigs: [[url: 'https://github.com/endorlabstest/app-java-demo.git']])
            }
        }

        stage('Build') {
            steps {
                // Perform any build steps if required
                sh 'mvn clean install'
            }
        }

        stage('endorctl Scan') {
            steps {
                script {
                    // Define the Node.js installation name configured in Jenkins
                    NODEJS_HOME = tool name: 'NodeJS', type: 'jenkins.plugins.nodejs.tools.NodeJSInstallation'
                    PATH = "$NODEJS_HOME/bin:${env.PATH}"
                }

                // Download and install endorctl.
                sh 'npm install -g endorctl'
                // Check endorctl version and installation.
                sh 'endorctl --version'
                // Run the scan.
                sh('endorctl scan -a $ENDOR_API -n $ENDOR_NAMESPACE --api-key $ENDOR_API_CREDENTIALS_KEY --api-secret $ENDOR_API_CREDENTIALS_SECRET')

            }
        }

        stage('Results') {
            steps {
                // Publish or process the vulnerability scan results
                // Publish reports, fail the build on vulnerabilities, etc.
                echo 'Publish results'
            }
        }
    }

}
The following example includes curl to download the endorctl binary.
pipeline {
    agent any

    // Endorctl scan uses following environment variables to the trigger endorctl scan
    environment {
        ENDOR_API = credentials('ENDOR_API')
        ENDOR_NAMESPACE = credentials('ENDOR_NAMESPACE')
        ENDOR_API_CREDENTIALS_KEY = credentials('ENDOR_API_CREDENTIALS_KEY')
        ENDOR_API_CREDENTIALS_SECRET = credentials('ENDOR_API_CREDENTIALS_SECRET')
    }
    stages {
        // Not required if repository is allready cloned to trigger a endorctl scan
        stage('Checkout') {
            steps {
                // Checkout the Git repository
                checkout scmGit(branches: [[name: '*/main']], userRemoteConfigs: [[url: 'https://github.com/endorlabstest/app-java-demo.git']])
            }
        }

        stage('Build') {
            // Not required if project is already built
            steps {
                // Perform any build steps if required
                sh 'mvn clean install'
            }
        }

        stage('endorctl Scan') {
            steps {
                // Download and install endorctl.
                sh '''#!/bin/bash
                    echo "Downloading latest version of endorctl"
                    VERSION=$(curl $ENDOR_API/meta/version | jq -r '.ClientVersion')
                    ENDORCTL_SHA=$(curl $ENDOR_API/meta/version | jq -r '.ClientChecksums.ARCH_TYPE_LINUX_AMD64')
                    curl $ENDOR_API/download/endorlabs/"$VERSION"/binaries/endorctl_"$VERSION"_linux_amd64 -o endorctl
                    echo "$ENDORCTL_SHA  endorctl" | sha256sum -c
                    if [ $? -ne 0 ]; then
                        echo "Integrity check failed"
                        exit 1
                    fi
                    chmod +x ./endorctl
                    // Check endorctl version and installation.
                    ./endorctl --version
                    // Run the scan.
                    ./endorctl scan -a $ENDOR_API -n $ENDOR_NAMESPACE --api-key $ENDOR_API_CREDENTIALS_KEY --api-secret $ENDOR_API_CREDENTIALS_SECRET
                '''
            }
        }
    }
}
Once you’ve set up Endor Labs you can test your CI implementation is successful and begin scanning.
GitLab CI/CD pipelines are a part of GitLab’s integrated continuous integration and deployment features. They allow you to define and automate the different stages and tasks in your software development workflow.
This documentation page provides an overview and example job to integrate Endor Labs into your GitLab CI pipeline.
Endor Labs recommends using keyless authentication in continuous integration environments.
Keyless Authentication is more secure and reduces the cost of secret rotation.
To setup keyless authentication see the keyless authentication documentation
If you choose not to use keyless authentication you can configure an API key and secret in GitLab for authentication using the following steps. See managing API keys for more information on getting an API key for Endor Labs authentication
.gitlab-ci.yml file in the root directory of your project if you do not already have one..gitlab-ci.yml file customize the job configuration based on your project’s requirements using the example below..gitlab-ci.yml file to your GitLab repository..gitlab-ci.yml file and trigger the defined job whenever there are changes pushed to the repository.Below is an example job to get you started. Please ensure to customize this job with your specific build environment and build steps as needed.
# You can copy and paste this template into a new `.gitlab-ci.yml` file.
# You should not add this template to an existing `.gitlab-ci.yml` file by using the `include:` keyword.
#
stages:
  - Scan
Endor Labs Dependency Scan:
  stage: test
  image: node # Modify this image to align with the build tools nessesary to build your software packages
  dependencies: []
  variables:
   ## Scan scoping section
   #
   ## Use the following environment variables for custom paths, inclusions and exclusions.
   # ENDOR_SCAN_PATH: "Insert a custom path to your git repository. Defaults to your pwd"
   # ENDOR_SCAN_EXCLUDE_PATH: "Insert a Glob style pattern of paths to exclude in the scan. Generally used for monorepos."
   # ENDORCTL_SCAN_INCLUDE_PATH: "Insert a Glob style pattern of paths to include in the scan. Generally used for monorepos."
   #
   ## Authentication to Endor Labs
   #
   ## Use the following environment variables for keyless authentication with your cloud provider. For more information visit: https://docs.endorlabs.com/continuous-integration/keyless-authentication/
   #
   # ENDOR_GCP_CREDENTIALS_SERVICE_ACCOUNT: "endorlabs@<yourproject.iam.gserviceaccount.com"
   # ENDOR_AWS_CREDENTIALS_ROLE_ARN: "arn:aws:iam::123456789012:role/my-role"
   #
   ## Follow the below instructions to use an API key and secret instead of keyless authentication.
   ## In your GitLab environment, select the project you want to scan.
   ## Go to `Settings` > `CI/CD`.
   ## Click `Expand` in the `Variables` section.
   ## Click the `Add variable` button at the bottom of the section.
   ## In the `Key` field, enter ENDOR_API_CREDENTIALS_SECRET.
   ## In the `Value` field, enter your Endor Labs API secret.
   ## Under `Flags` make sure you select `Mask variable`.
   ## Repeat to add your API key as the variable ENDOR_API_CREDENTIALS_KEY
   #
    ENDOR_ENABLED: "true"
    ENDOR_ALLOW_FAILURE: "false"
    ENDOR_NAMESPACE: "example" # Replace with your Endor Labs namespace
    ENDOR_PROJECT_DIR: "."
    ENDOR_ARGS: |
      --path=${ENDOR_PROJECT_DIR}
      --detached-ref-name=$CI_COMMIT_REF_NAME
      --output-type=summary
      --exit-on-policy-warning
      --dependencies --secrets --git-logs
  before_script:
    - npm install yarn # Replace with the build steps for your Endor Labs job.
  script:
    - curl https://api.endorlabs.com/download/latest/endorctl_linux_amd64 -o endorctl;
    - echo "$(curl -s https://api.endorlabs.com/sha/latest/endorctl_linux_amd64)  endorctl" | sha256sum -c;
      if [ $? -ne 0 ]; then
       echo "Integrity check failed";
       exit 1;
      fi
    - chmod +x ./endorctl
    - if [ "$DEBUG" == "true" ]; then
        export ENDOR_LOG_VERBOSE=true;
        export ENDOR_LOG_LEVEL=debug;
      fi
    - if [ "$CI_COMMIT_REF_NAME" == "$CI_DEFAULT_BRANCH" ]; then
        export ENDOR_SCAN_AS_DEFAULT_BRANCH=true;
        export ENDOR_SCAN_DETACHED_REF_NAME="$CI_COMMIT_REF_NAME";
      else
        export ENDOR_SCAN_PR=true;
      fi
    - ./endorctl scan ${ENDOR_ARGS}
  rules:
  - if: $ENDOR_ENABLED != "true"
    when: never
  - if: $ENDOR_ALLOW_FAILURE == "true"
    allow_failure: true
  - if: $ENDOR_ALLOW_FAILURE != "true"
    allow_failure: false
Azure Pipelines is a continuous integration and continuous delivery (CI/CD) service available in Azure DevOps ecosystem. It facilitates continuous integration, continuous testing, and continuous deployment for seamless building, testing, and delivery of software.
You can use Azure extension from Endor Labs to include Endor Labs within your Azure pipelines or add steps in your pipeline to manually download and use Endor Labs in your runner.
Ensure that you complete the following prerequisites before you proceed.
You must have an Endor Labs tenant set up for your organization. You can also set up namespaces according to your requirements. See Set up namespaces
Configure an API key and secret for authentication. See managing API keys for more information on generating an API key for Endor Labs. Store API key and secret as environment variables, ENDOR_API_CREDENTIALS_KEY and ENDOR_API_CREDENTIALS_SECRET.
You need to enable Advanced Security in your Azure repository to view results in Azure.

To integrate Endor Labs with Azure pipelines, you need to set up the Azure extension. After you set up the extension, you can configure your pipline to use Endor Labs.
code read, build read, and execute permissions.
https://api.endorlabs.com as the Server URL.Create azure-pipelines.yml file in your project, if it doesn’t exist and enter values according to your requirement.
In the azure-pipelines.yml file, enter the task, EndorLabsScan@0, with the service connection name, Endor Labs namespace, and the SARIF file name.
For example:
 steps:
  - task: EndorLabsScan@0
    inputs:
      serviceConnectionEndpoint: 'Endor'
      namespace: 'demo'
      sarifFile: 'scanresults.sarif'
Enter the task, AdvancedSecurity-Publish@1, if you wish to publish the scan results, which you can view under the Advanced Security tab in Azure DevOps.
steps:
  - task: AdvancedSecurity-Dependency-Scanning@1
    displayName: Publish scan dependencies to Advanced Security
    inputs:
      SarifsInputDirectory: $(Build.SourcesDirectory)\
After a successful run of the pipeline, you can view the results in Azure.
You can use the following input parameters in the EndorLabsScan@0 task.
| Parameter | Description |
|---|---|
additionalArgs |
Add custom arguments to the endorctl scan command. |
phantomDependencies |
Set to true to enable phantom dependency analysis. (Default: false) |
sarifFile |
Set to a location on your hosted agent to output the findings in SARIF format. |
scanDependencies |
Scan Git commits and generate findings for all dependencies. (Default: true) |
scanPath |
Set the path to the directory to scan. (Default: .) |
scanSast |
Set to true to enable SAST scan. (Default: false) |
scanSecrets |
Scan source code repository and generate findings for secrets. See also scanGitLogs. (Default: false) |
scanGitLogs |
Perform a more complete and detailed scan of secrets in the repository history. Requires scanSecrets to be set as true. (Default: false) |
scanTools |
Scan source code repository for CI/CD tools. (Default: false) |
tags |
Specify a list of user-defined tags to add to this scan. Tags help you search and filter scans. |
scanPackage |
Scan a specified artifact or a package. The path to an artifact must be set with scanPath. (Default: false) |
scanContainer |
Scan a specified container image. Set the image with image and a project with projectName. (Default: false) |
projectName |
Specify a project name for a container image scan or for a package scan. |
image |
Specify a container image to scan. |
The following example workflow initiates a scan where all dependencies are scanned along with secrets. The findings are tagged with Azure. The scan generates a SARIF file and uploads to GitHub Advanced Security.
trigger:
- none

pool:
  name: Azure Pipelines
  vmImage: "windows-latest"

steps:
- task: EndorLabsScan@0
  inputs:
    serviceConnectionEndpoint: 'endorlabs-service-connection'
    namespace: 'endor'
    sarifFile: 'scanresults.sarif'
    scanSecrets: 'true'
    tags: `Azure`

- task: AdvancedSecurity-Publish@1
  displayName: Publish 'scanresults.sarif' to Advanced Security
  inputs:
   SarifsInputDirectory: $(Build.SourcesDirectory)\
After the pipeline runs, you can view the scan results in Azure.
Log in to Azure and navigate to your projects.
Select Repos > Advanced Security to view the scan results.
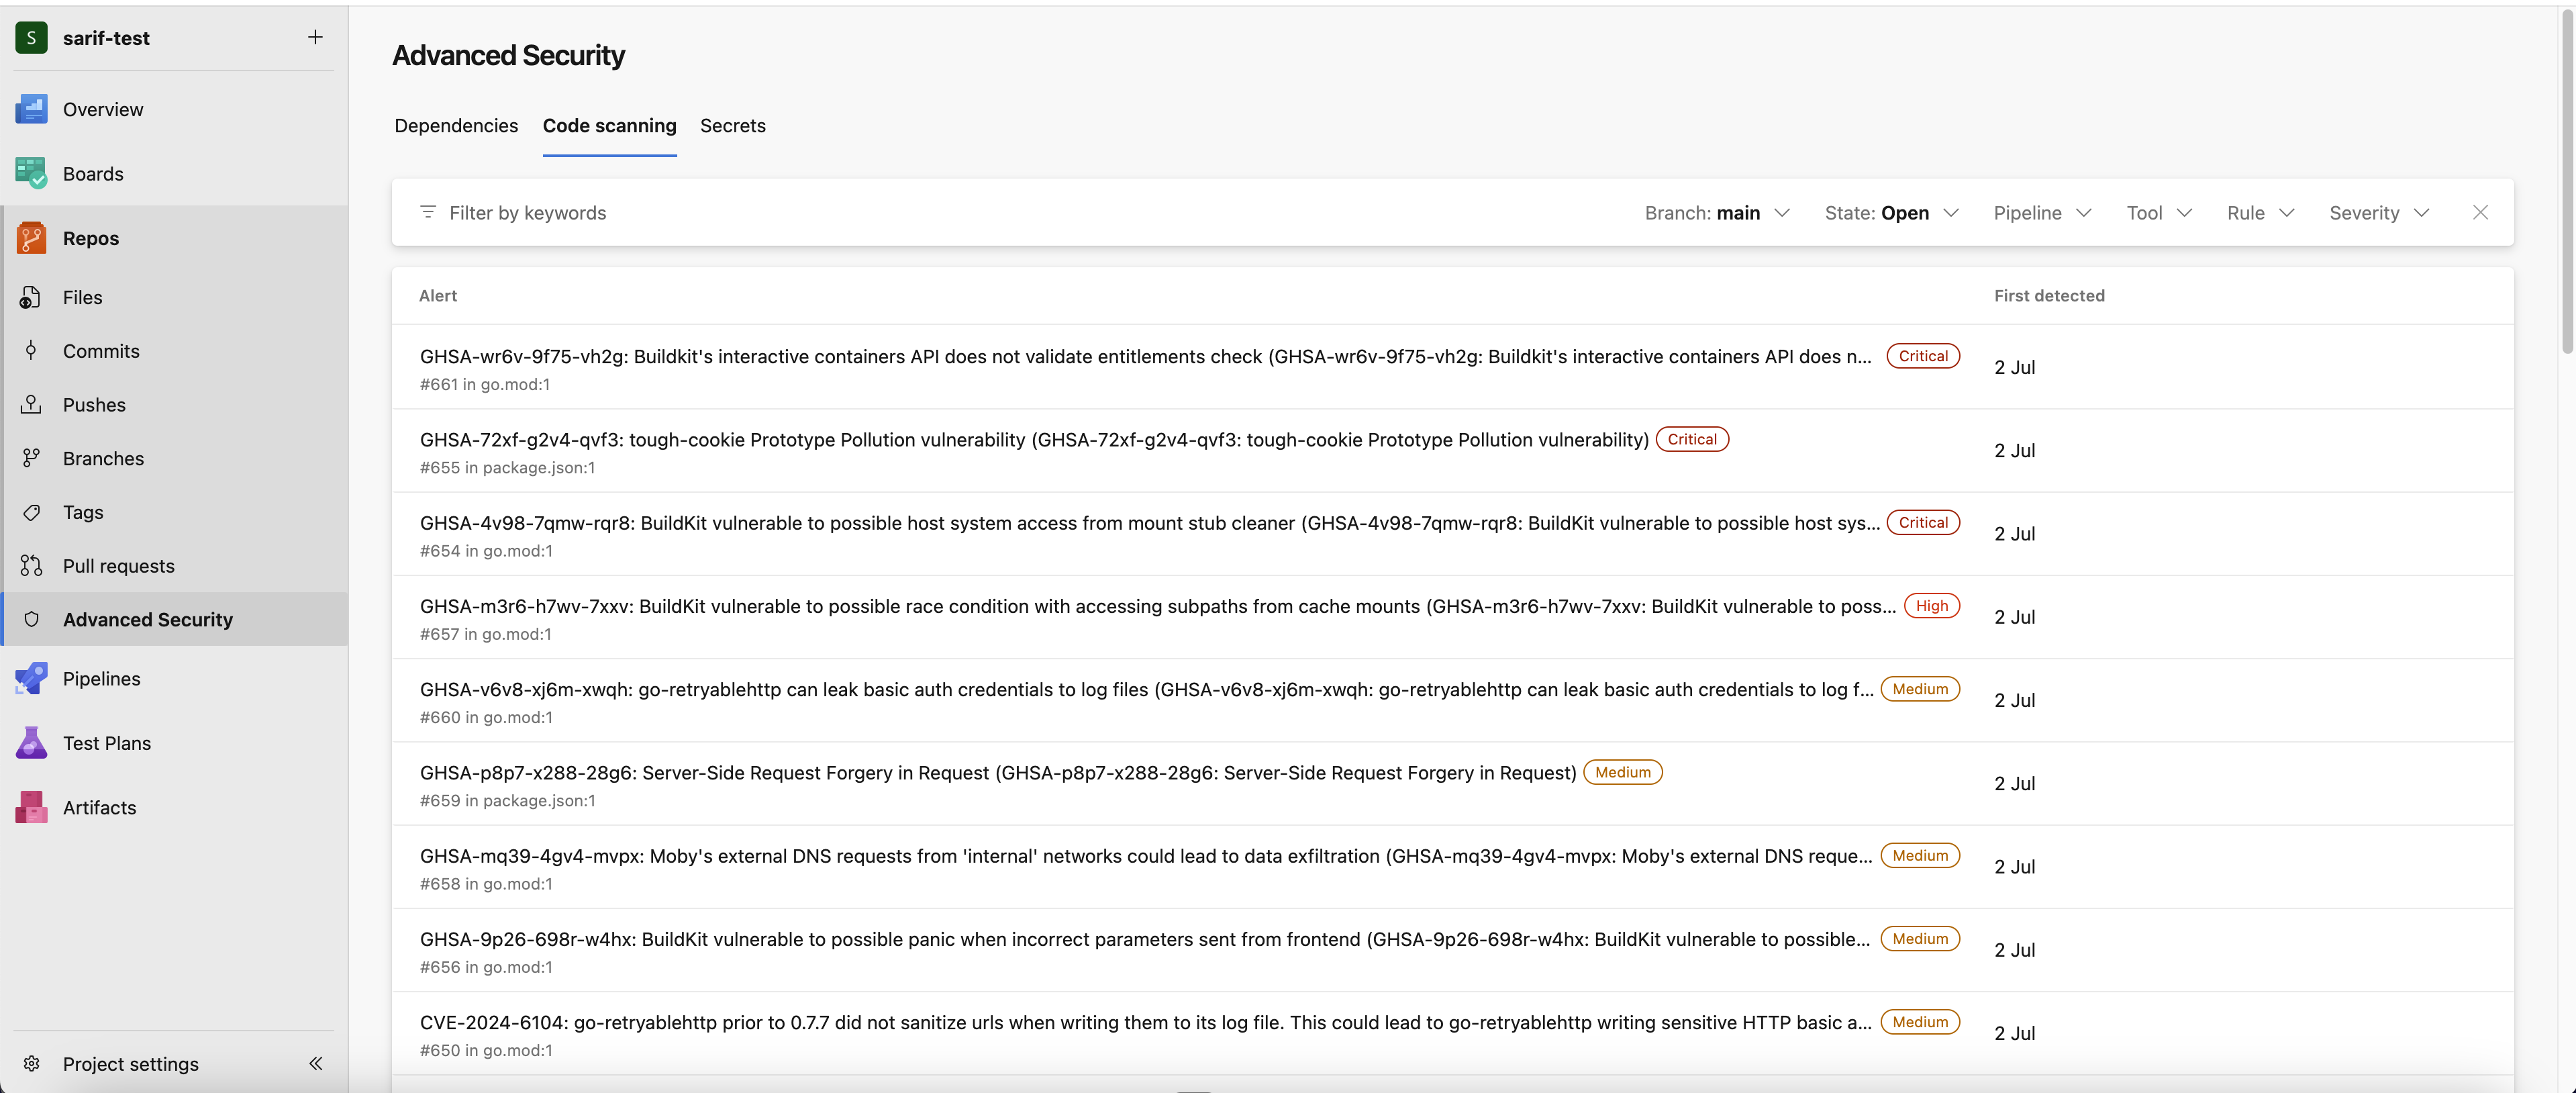
Click an alert to view more details.
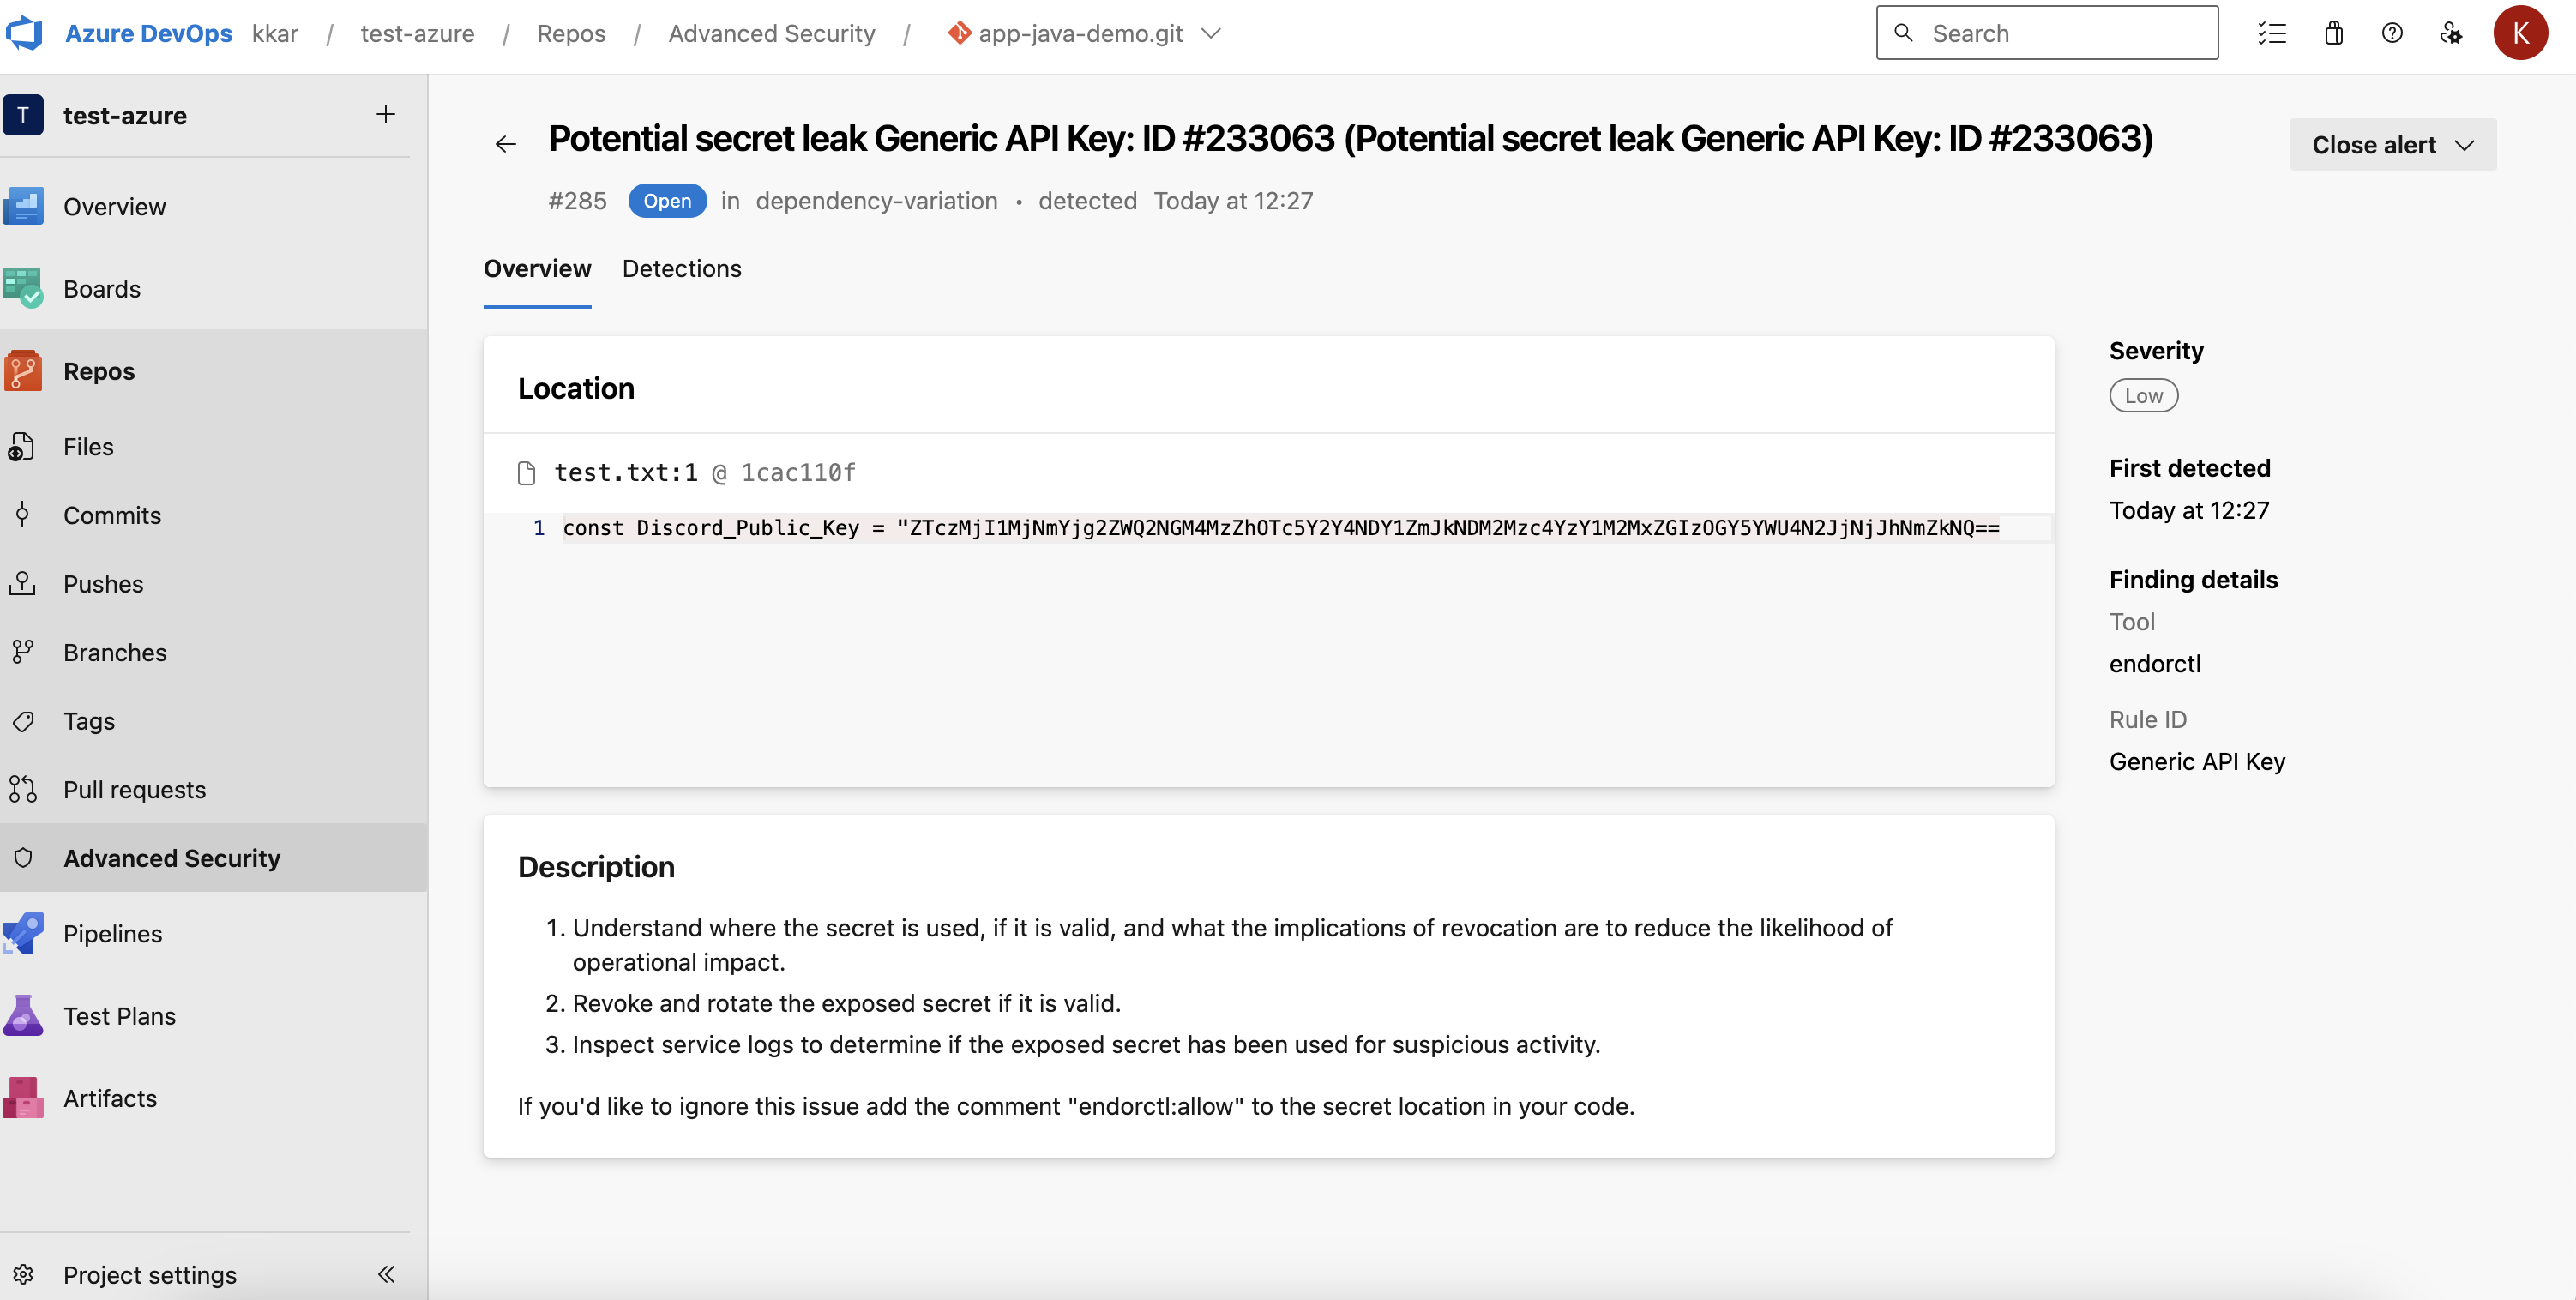
If you ran endorctl with --secrets flag, you can view if there are any secret leaks.
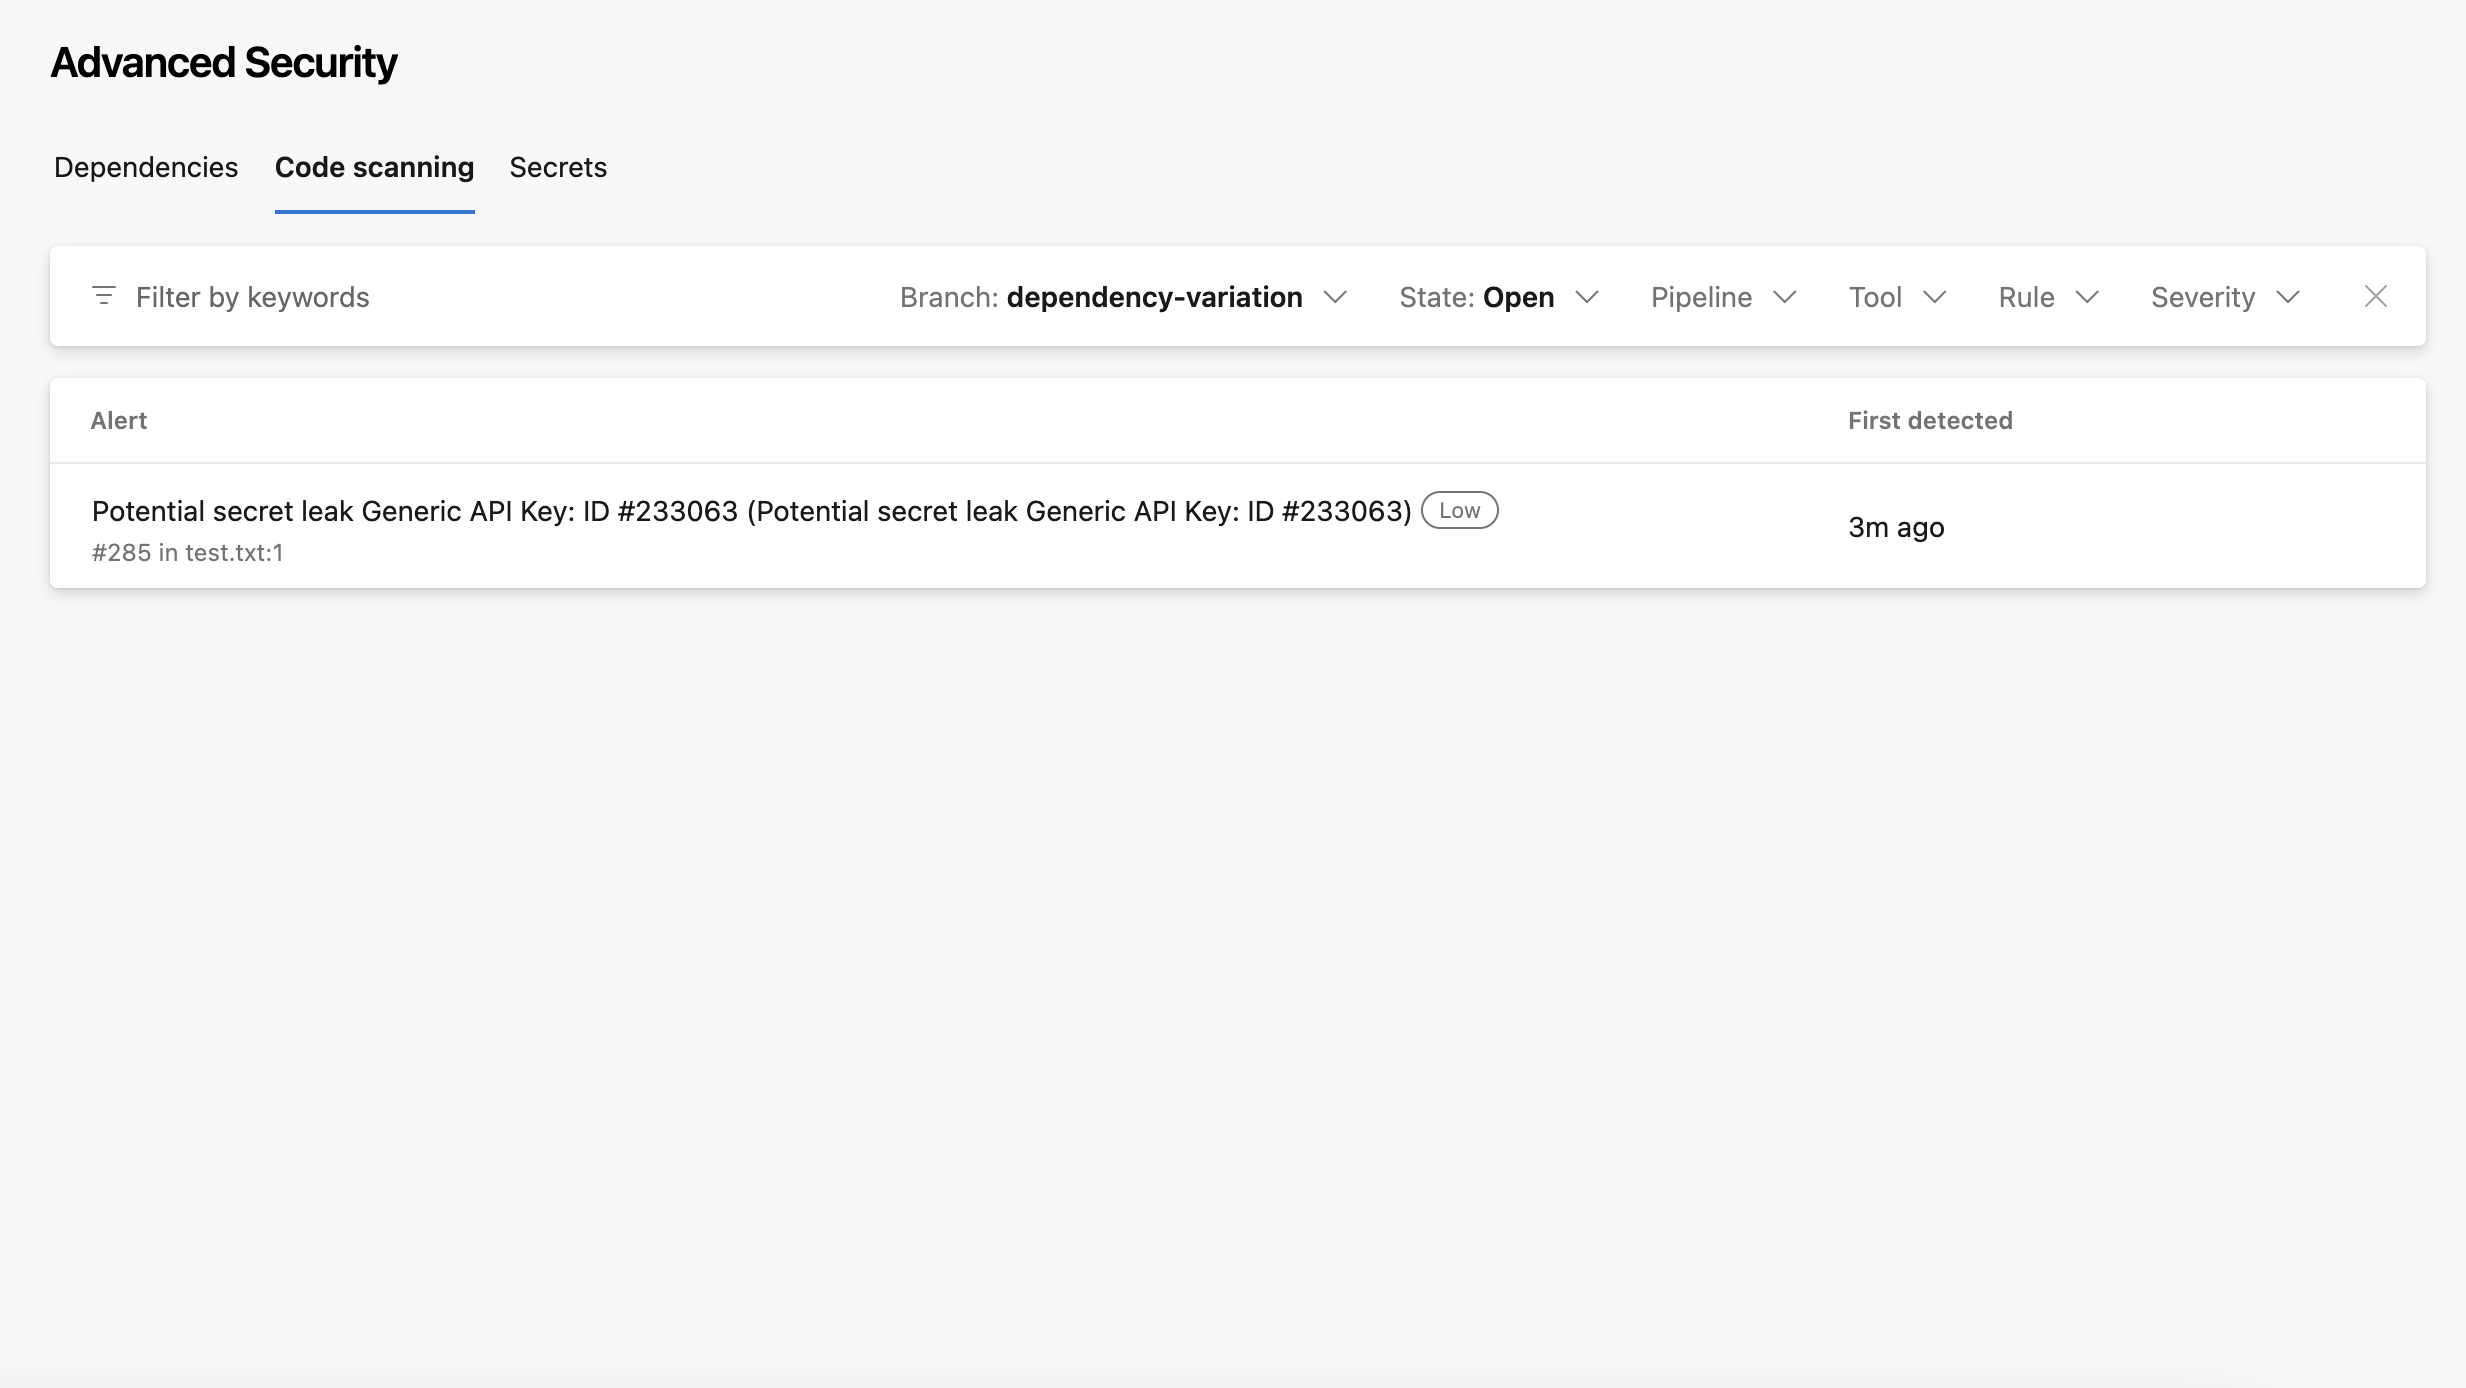
Click the entry to view more details.
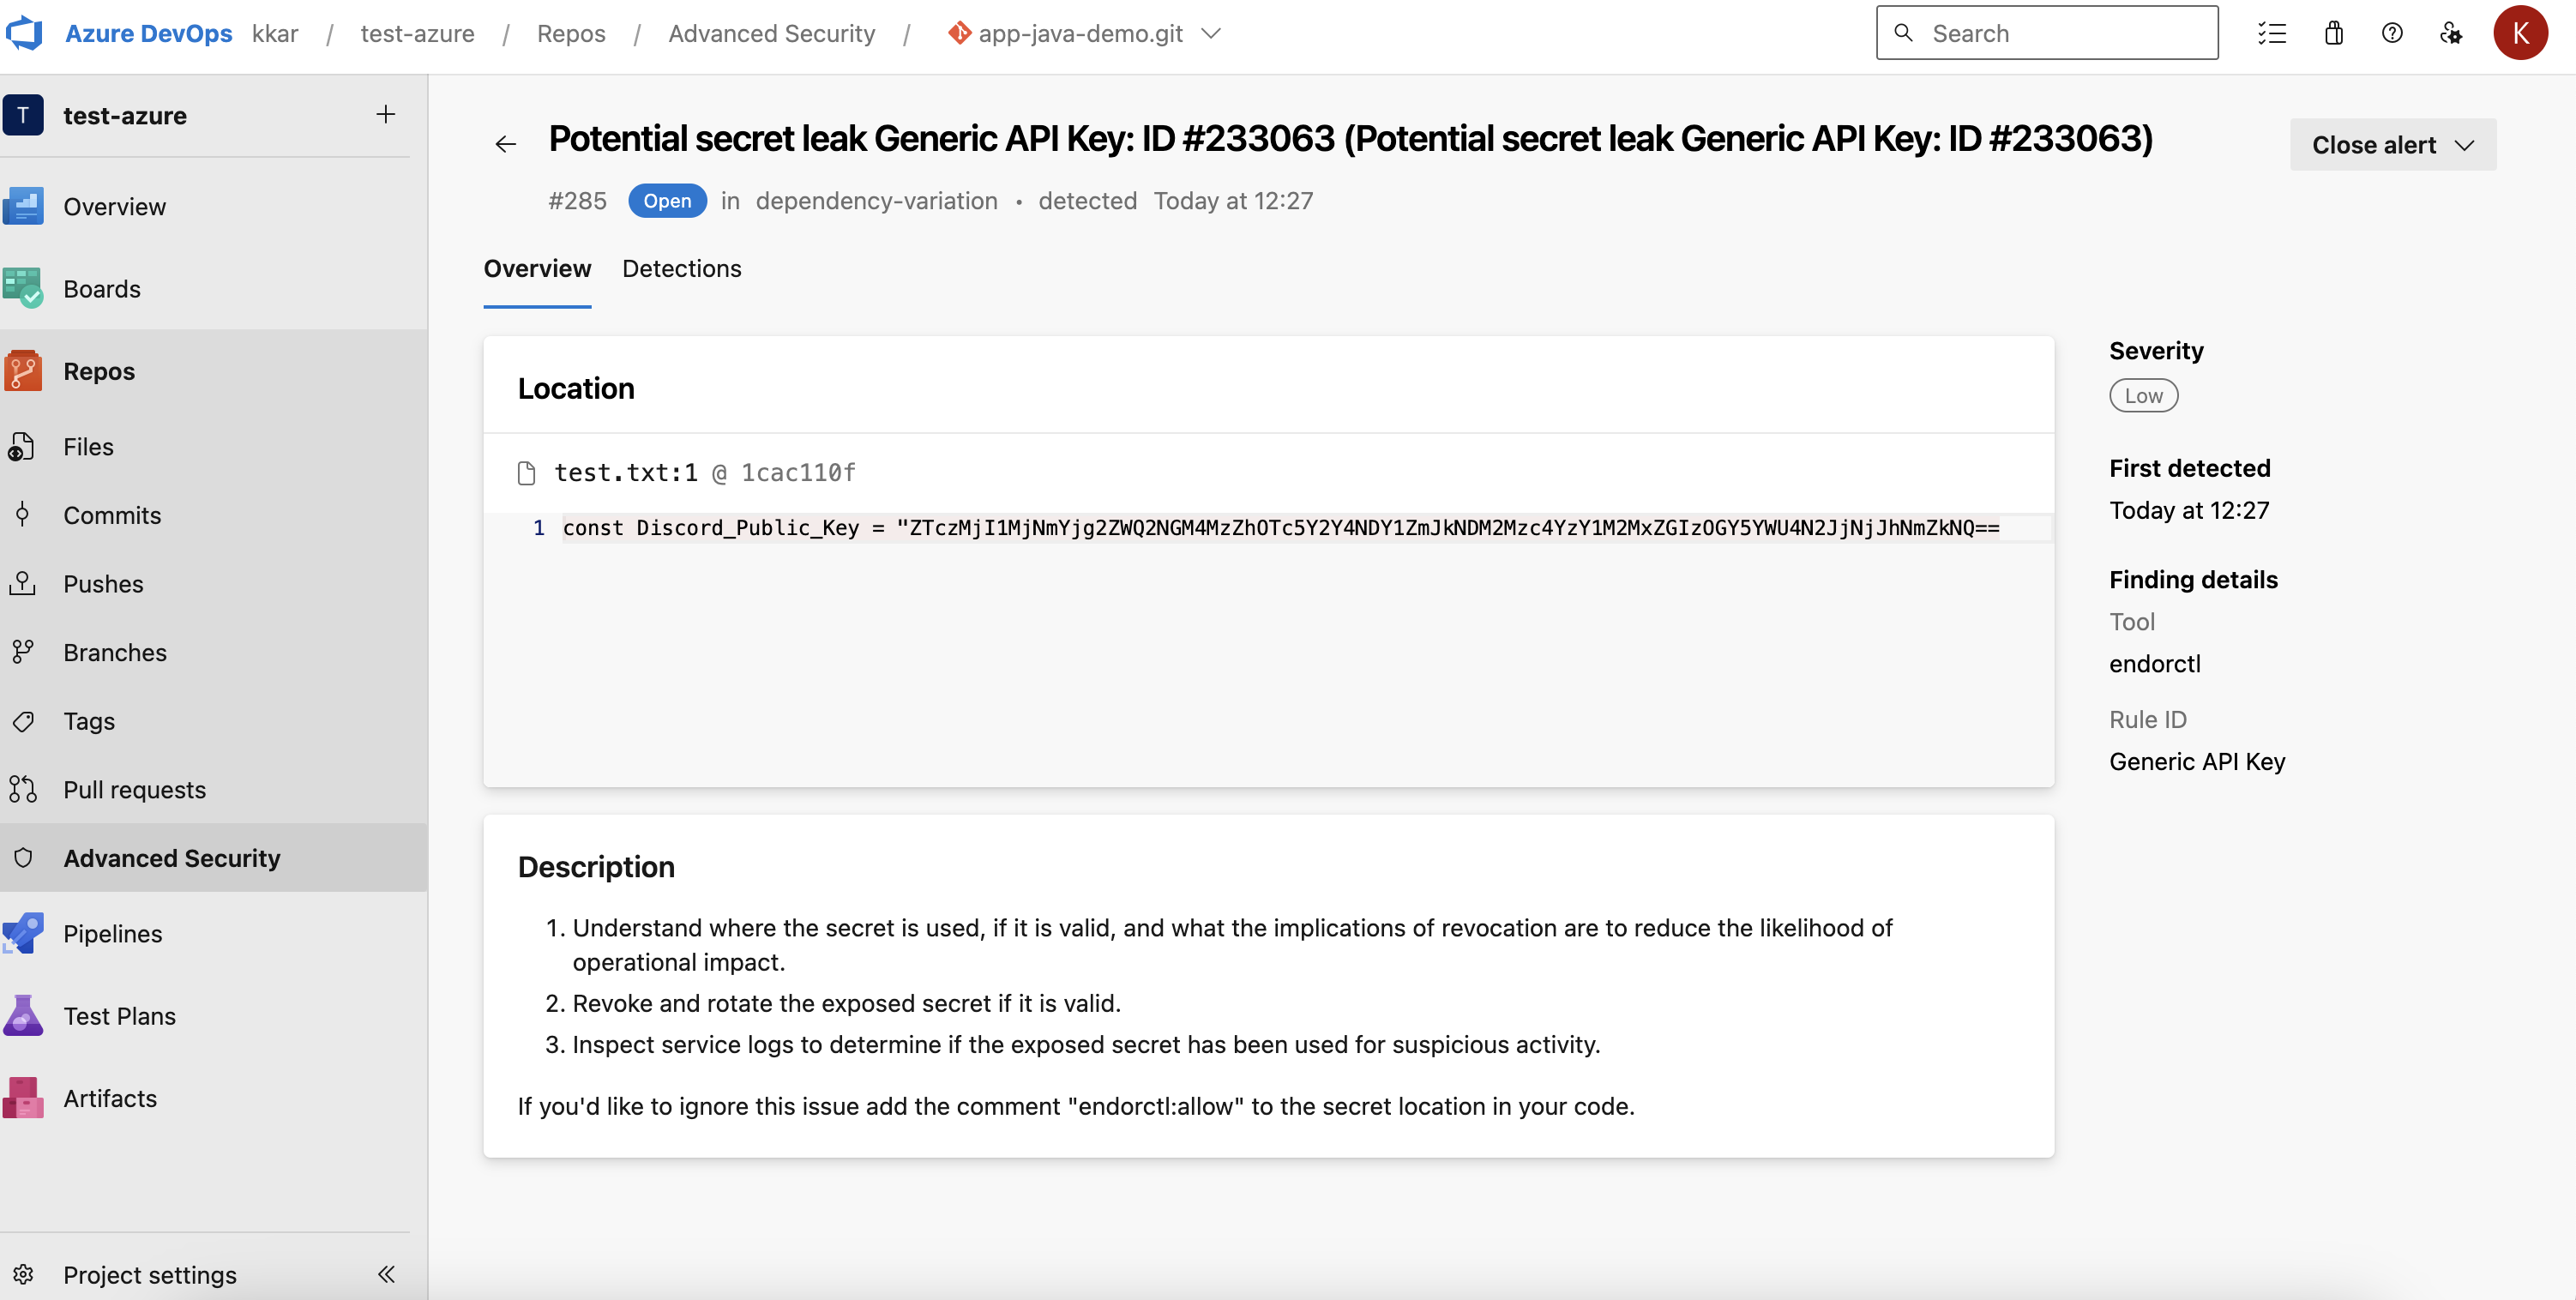
You can also choose to set up your pipeline to download endorctl and scan using Endor Labs without using the Azure extension.
You can manage Endor Labs variables centrally by configuring them within your Azure project. You can assign these variables to various pipelines.
tenant-variables, and click Add under Variables.ENDOR_API_CREDENTIALS_KEYENDOR_API_CREDENTIALS_SECRETNAMESPACE
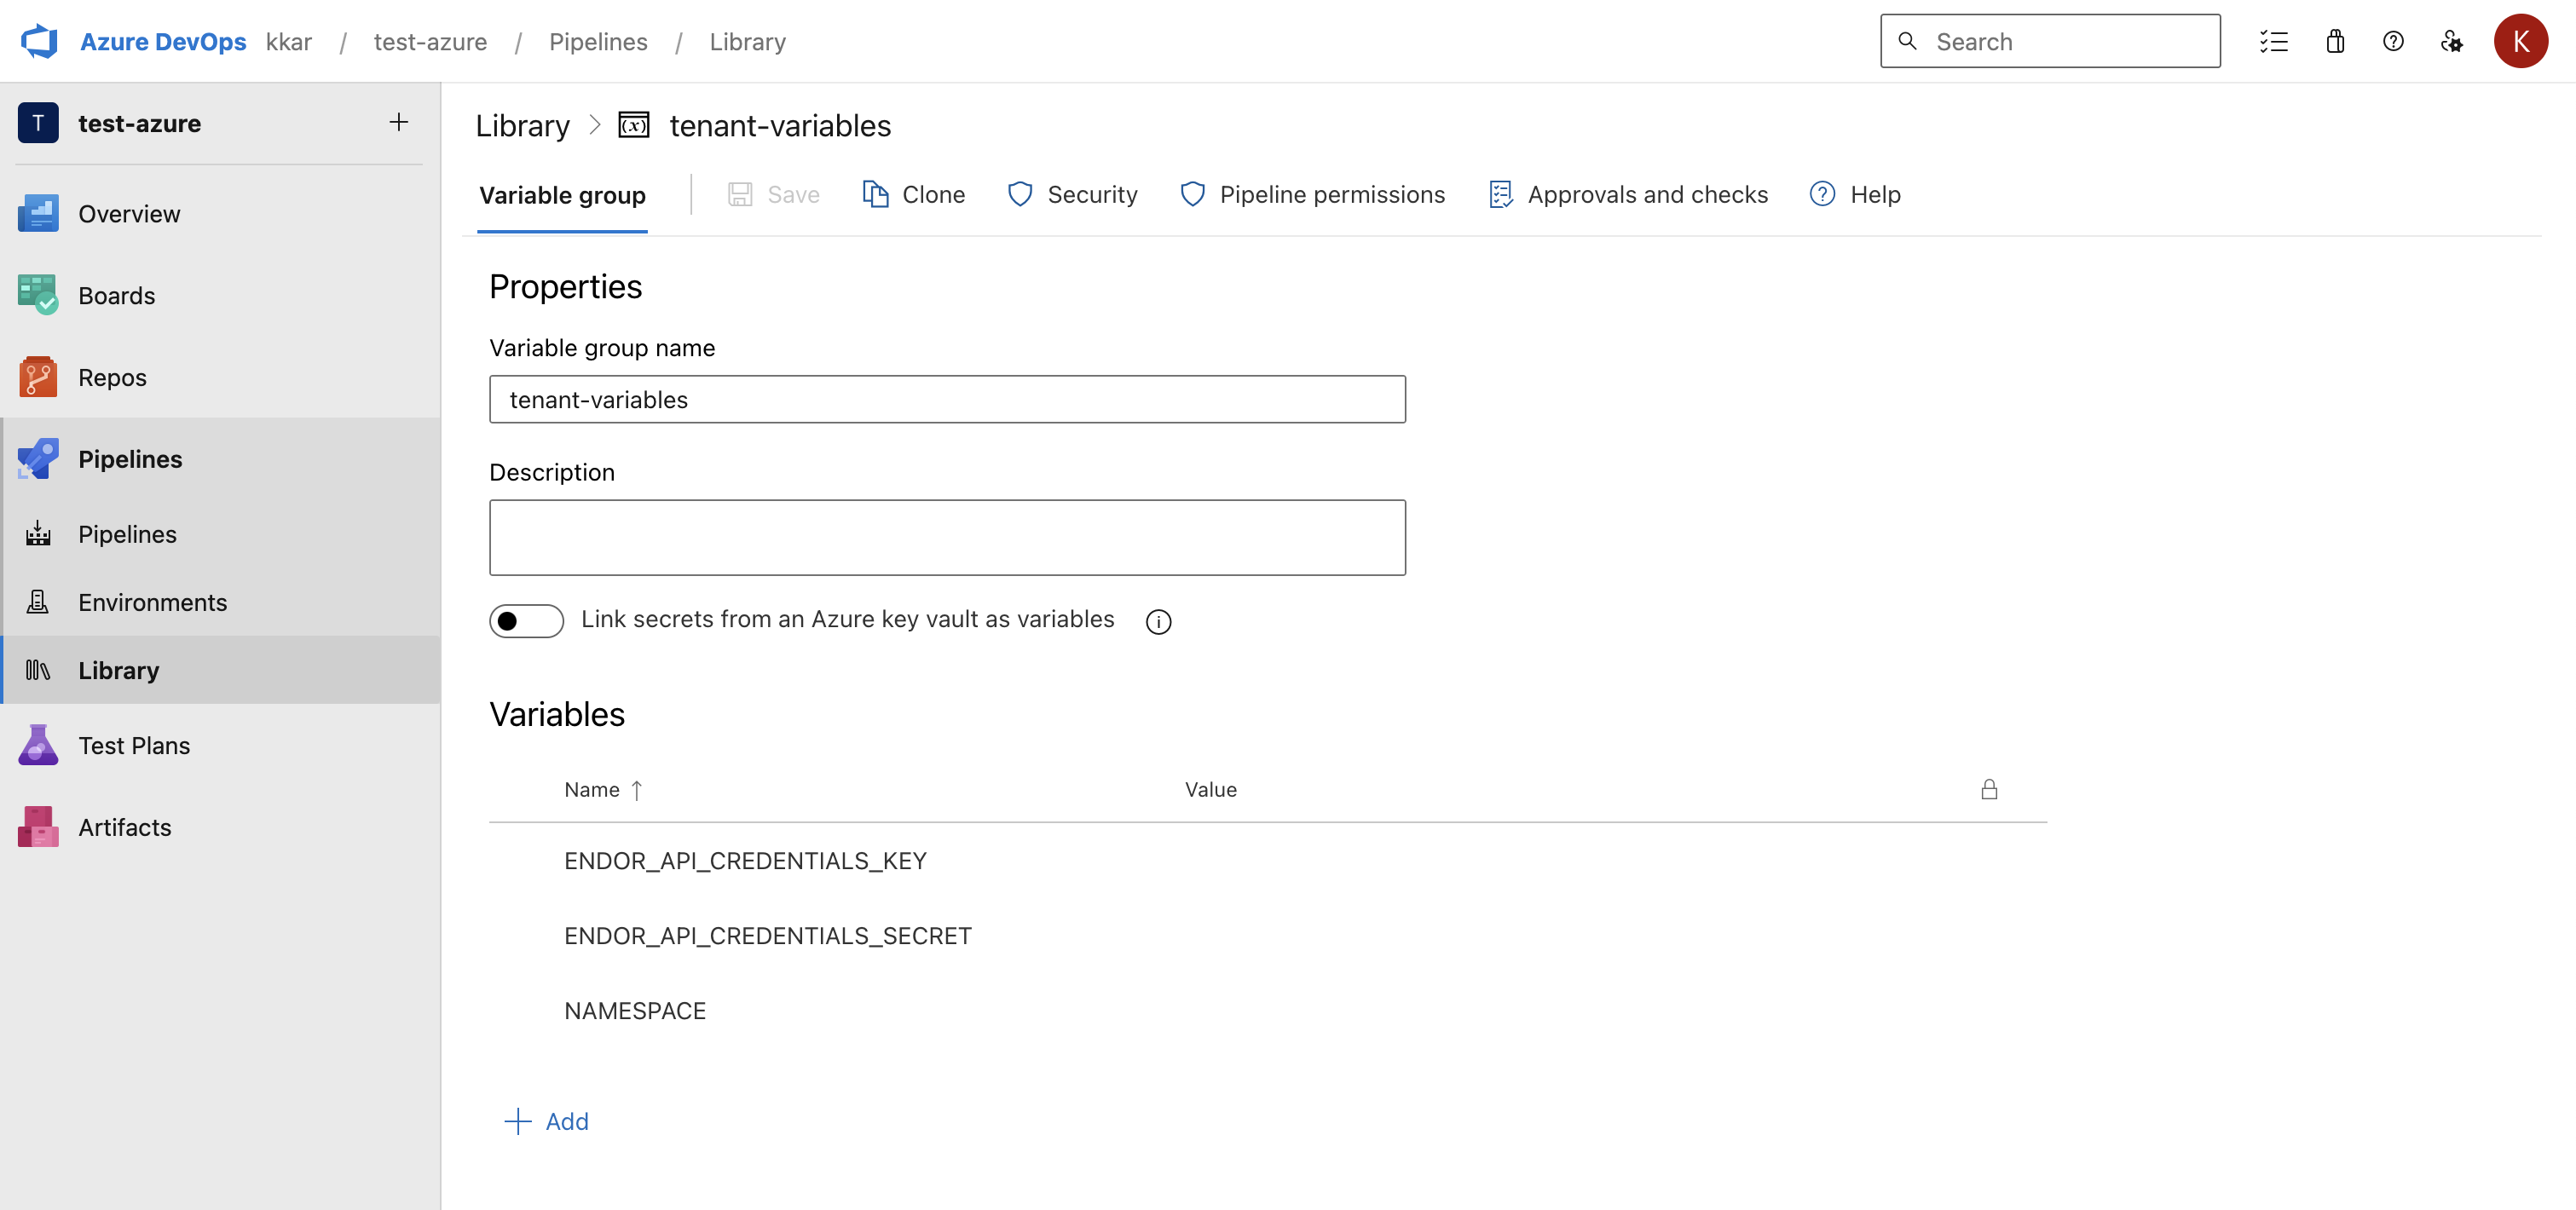
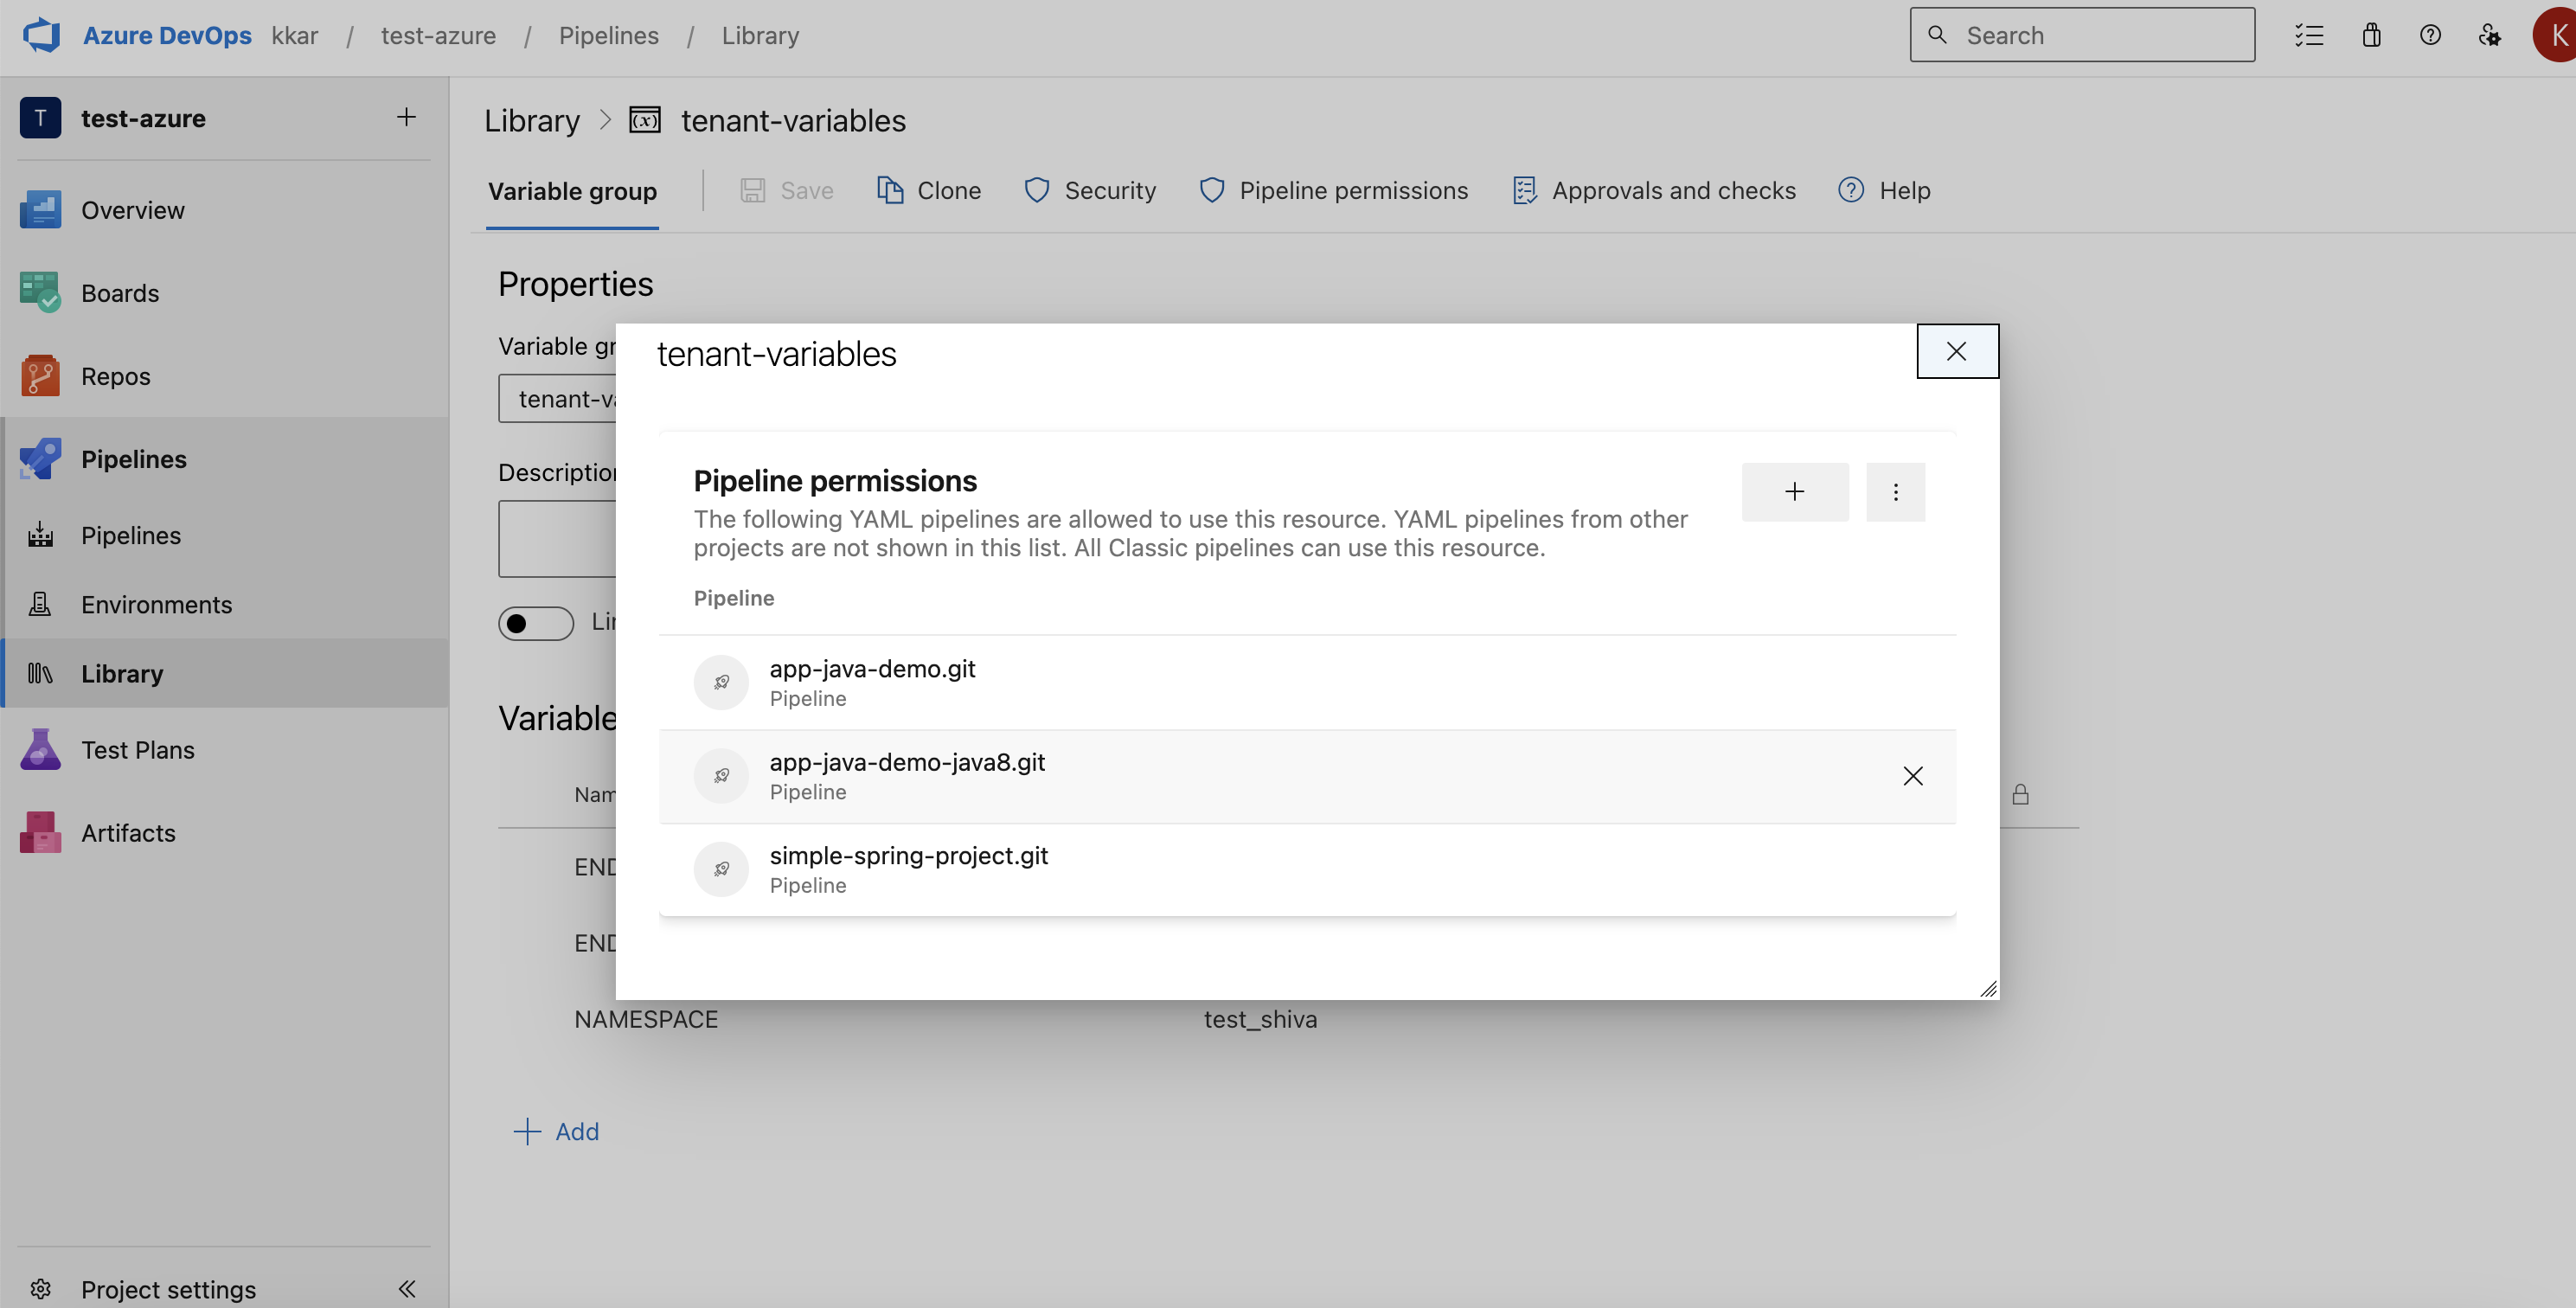
azure-pipelines.yml file in your project, if it doesn’t exist.azure-pipelines.yml file, customize the job configuration based on your project’s requirements.pool:
name: Default
vmImage: "windows-latest"
pool:
  name: Default
  vmImage: "ubuntu-latest"
pool:
  name: Default
  vmImage: "macOS-latest"
Update your default branch from main if you do not use main as the default branch name.
Modify any dependency or artifact caches to align with the languages and caches used by your project.
Enter the following steps in the azure-pipelines.yml file to download endorctl.
- bash: |
    echo "Downloading latest version of endorctl"
    VERSION=$(curl https://api.endorlabs.com/meta/version | grep -o '"Version":"[^"]*"' | sed 's/.*"Version":"\([^"]*\)".*/\1/')
    curl https://api.endorlabs.com/download/endorlabs/"$VERSION"/binaries/endorctl_"$VERSION"_windows_amd64.exe -o endorctl.exe
    echo "$(curl -s https://api.endorlabs.com/sha/latest/endorctl_windows_amd64.exe)  endorctl" | sha256sum -c
    if [ $? -ne 0 ]; then
      echo "Integrity check failed"
      exit 1
    fi
- bash: |
    echo "Downloading latest version of endorctl"
    VERSION=$(curl https://api.endorlabs.com/meta/version | grep -o '"Version":"[^"]*"' | sed 's/.*"Version":"\([^"]*\)".*/\1/')
    curl https://api.endorlabs.com/download/endorlabs/"$VERSION"/binaries/endorctl_"$VERSION"_linux_amd64 -o endorctl
    echo "$(curl -s https://api.endorlabs.com/sha/latest/endorctl_linux_amd64)  endorctl" | sha256sum -c
    if [ $? -ne 0 ]; then
      echo "Integrity check failed"
      exit 1
    fi
- bash: |
    echo "Downloading latest version of endorctl"
    VERSION=$(curl https://api.endorlabs.com/meta/version | grep -o '"Version":"[^"]*"' | sed 's/.*"Version":"\([^"]*\)".*/\1/')
    curl https://api.endorlabs.com/download/endorlabs/"$VERSION"/binaries/endorctl_"$VERSION"_macos_arm64 -o endorctl
    echo "$(curl -s https://api.endorlabs.com/sha/latest/endorctl_macos_arm64)  endorctl" | shasum -a 256 --check
    if [ $? -ne 0 ]; then
      echo "Integrity check failed"
      exit 1
    fi
Enter the steps to build your project if your project needs building and setup steps.
Enter the following step in the azure-pipelines.yml file to run endorctl scan to generate the SARIF file.
You can run endorctl scan with options according to your requirement, but you must include the -s option to generate the SARIF file.
For example, use the --secrets flag to scan for secrets.
- script: |
    .\endorctl.exe scan -n $(NAMESPACE) -s scanresults.sarif
    env:
      ENDOR_API_CREDENTIALS_KEY: $(ENDOR_API_CREDENTIALS_KEY)
      ENDOR_API_CREDENTIALS_SECRET: $(ENDOR_API_CREDENTIALS_SECRET)
- script: |
    .\endorctl scan -n $(NAMESPACE) -s scanresults.sarif
    env:
      ENDOR_API_CREDENTIALS_KEY: $(ENDOR_API_CREDENTIALS_KEY)
      ENDOR_API_CREDENTIALS_SECRET: $(ENDOR_API_CREDENTIALS_SECRET)
- script: |
    .\endorctl scan -n $(NAMESPACE) -s scanresults.sarif
    env:
      ENDOR_API_CREDENTIALS_KEY: $(ENDOR_API_CREDENTIALS_KEY)
      ENDOR_API_CREDENTIALS_SECRET: $(ENDOR_API_CREDENTIALS_SECRET)
azure-pipelines.yml to publish the scan results.- task: AdvancedSecurity-Publish@1
displayName: Publish '.\sarif\scanresults.sarif' to Advanced Security
inputs:
SarifsInputDirectory: $(Build.SourcesDirectory)\
After a successful run of the pipeline, you can view the results in Azure.
trigger:
- none
pool:
name: Azure Pipelines
vmImage: "windows-latest"
variables:
- group: tenant-variables
steps:
# All steps related to building of the project should be before this step.
# Implement and scan with Endor Labs after your build is complete.
- bash: |
- bash: |
echo "Downloading latest version of endorctl"
VERSION=$(curl https://api.endorlabs.com/meta/version | grep -o '"Version":"[^"]*"' | sed 's/.*"Version":"\([^"]*\)".*/\1/')
curl https://api.endorlabs.com/download/endorlabs/"$VERSION"/binaries/endorctl_"$VERSION"_windows_amd64.exe -o endorctl.exe
echo "$(curl -s https://api.endorlabs.com/sha/latest/endorctl_windows_amd64.exe) endorctl" | sha256sum -c
if [ $? -ne 0 ]; then
echo "Integrity check failed"
exit 1
fi
displayName: 'Downloading latest version of endorctl'
continueOnError: false
- script: |
.\endorctl.exe scan -n $(NAMESPACE) -s scanresults.sarif
displayName: 'Run a scan against the repository using your API key & secret pair'
env:
ENDOR_API_CREDENTIALS_KEY: $(ENDOR_API_CREDENTIALS_KEY)
ENDOR_API_CREDENTIALS_SECRET: $(ENDOR_API_CREDENTIALS_SECRET)
- task: AdvancedSecurity-Publish@1
    displayName: Publish '.\sarif\scanresults.sarif' to Advanced Security
    inputs:
      SarifsInputDirectory: $(Build.SourcesDirectory)\
trigger:
- none

pool:
  name: Azure Pipelines
  vmImage: "ubuntu-latest"

variables:
- group: tenant-variables

steps:
# All steps related to building of the project should be before this step.
# Implement and scan with Endor Labs after your build is complete.
- bash: |
    - bash: |
        echo "Downloading latest version of endorctl"
        VERSION=$(curl https://api.endorlabs.com/meta/version | grep -o '"Version":"[^"]*"' | sed 's/.*"Version":"\([^"]*\)".*/\1/')
        curl https://api.endorlabs.com/download/endorlabs/"$VERSION"/binaries/endorctl_"$VERSION"_linux_amd64 -o endorctl
        echo "$(curl -s https://api.endorlabs.com/sha/latest/endorctl_linux_amd64)  endorctl" | sha256sum -c
        if [ $? -ne 0 ]; then
          echo "Integrity check failed"
          exit 1
        fi
        ## Modify the permissions of the binary to ensure it is executable
        chmod +x ./endorctl
        ## Create an alias of the endorctl binary to ensure it is available in other directories
        alias endorctl="$PWD/endorctl"

  displayName: 'Downloading latest version of endorctl'
  continueOnError: false

- script: |
    ./endorctl scan -n $(NAMESPACE) -s scanresults.sarif
  displayName: 'Run a scan against the repository using your API key & secret pair'
  env:
    ENDOR_API_CREDENTIALS_KEY: $(ENDOR_API_CREDENTIALS_KEY)
    ENDOR_API_CREDENTIALS_SECRET: $(ENDOR_API_CREDENTIALS_SECRET)

- task: AdvancedSecurity-Publish@1
  displayName: Publish '.\sarif\scanresults.sarif' to Advanced Security
  inputs:
   SarifsInputDirectory: $(Build.SourcesDirectory)/
trigger:
- none

pool:
  name: Azure Pipelines
  vmImage: "macos-latest"

variables:
- group: tenant-variables

steps:
# All steps related to building of the project should be before this step.
# Implement and scan with Endor Labs after your build is complete.
- bash: |
        echo "Downloading latest version of endorctl"
        VERSION=$(curl https://api.endorlabs.com/meta/version | grep -o '"Version":"[^"]*"' | sed 's/.*"Version":"\([^"]*\)".*/\1/')
        curl https://api.endorlabs.com/download/endorlabs/"$VERSION"/binaries/endorctl_"$VERSION"_macos_arm64 -o endorctl
        echo "$(curl -s https://api.endorlabs.com/sha/latest/endorctl_macos_arm64)  endorctl" | shasum -a 256 --check
        if [ $? -ne 0 ]; then
          echo "Integrity check failed"
          exit 1
        fi
        ## Modify the permissions of the binary to ensure it is executable
        chmod +x ./endorctl
        ## Create an alias of the endorctl binary to ensure it is available in other directories
        alias endorctl="$PWD/endorctl"
  displayName: 'Downloading latest version of endorctl'
  continueOnError: false

- script: |
    ./endorctl scan -n $(NAMESPACE) -s scanresults.sarif
  displayName: 'Run a scan against the repository using your API key & secret pair'
  env:
    ENDOR_API_CREDENTIALS_KEY: $(ENDOR_API_CREDENTIALS_KEY)
    ENDOR_API_CREDENTIALS_SECRET: $(ENDOR_API_CREDENTIALS_SECRET)

- task: AdvancedSecurity-Publish@1
  displayName: Publish '.\sarif\scanresults.sarif' to Advanced Security
  inputs:
   SarifsInputDirectory: $(Build.SourcesDirectory)/
Bitbucket Pipelines is a continuous integration and continuous delivery (CI/CD) service built into Bitbucket. It allows developers to automatically build, test, and deploy their code based on a configuration file bitbucket-pipelines.yml defined in the root of their repository.
To integrate Endor Labs into a Bitbucket pipeline:
Configure an API key and secret in the bitbucket-pipelines.yml file for authentication. See managing API keys for more information on generating an API key for Endor Labs.
To create a Bitbucket pipeline reference the following steps:
bitbucket-pipelines.yml file in your repository if you do not already have one.bitbucket-pipelines.yml file customize the job configuration based on your project’s requirements using the following example.Use the following example to get started. Make sure to customize this job with your specific build environment and build steps.
simage: maven:3.6.3-jdk-11

pipelines:
  branches:
    main:
      - step:
          name: "Build and Test"
          script:
            - mvn install -DskipTests
            - echo "Running Endor Labs Scan"
            - curl https://api.endorlabs.com/download/latest/endorctl_linux_amd64 -o endorctl
            - echo "$(curl -s https://api.endorlabs.com/sha/latest/endorctl_linux_amd64)  endorctl" | sha256sum -c
            - chmod +x ./endorctl
            - ./endorctl scan -n $ENDOR_NAMESPACE --api-key $ENDOR_API_CREDENTIALS_KEY --api-secret $ENDOR_API_CREDENTIALS_SECRET
  pull-requests:
    '**':
      - step:
          name: "Build and Test on PR to Main"
          script:
            - mvn install -DskipTests
            - echo "Running Endor Labs PR Scan"
            - curl https://api.endorlabs.com/download/latest/endorctl_linux_amd64 -o endorctl
            - echo "$(curl -s https://api.endorlabs.com/sha/latest/endorctl_linux_amd64)  endorctl" | sha256sum -c
            - chmod +x ./endorctl
            - ./endorctl scan --pr --pr-baseline=main --languages=java --output-type=json -n $ENDOR_NAMESPACE --api-key $ENDOR_API_CREDENTIALS_KEY --api-secret $ENDOR_API_CREDENTIALS_SECRET | tee output.json
            #Optional - Comment on the PR
            # - apt-get update
            # - apt-get install -y python3 python3-pip
            # - pip3 install -r requirements.txt
            # - python3 add-bitbucket-pr-comments.py output.json
Once you’ve set up Endor Labs, you can test your CI implementation to ensure it is successful and then proceed with your scans.
You can also use the Insights feature in Bitbucket Pipelines to indicate if the changes in your pull requests violated any policies set in Endor Labs.
import json
import os
import sys
import requests
import argparse

# Check for required environment variables
BITBUCKET_REPO_OWNER = os.getenv('BITBUCKET_REPO_OWNER')
BITBUCKET_REPO_SLUG = os.getenv('BITBUCKET_REPO_SLUG')
BITBUCKET_COMMIT = os.getenv('BITBUCKET_COMMIT')

if not all([BITBUCKET_REPO_OWNER, BITBUCKET_REPO_SLUG, BITBUCKET_COMMIT]):
     sys.exit("Error: One or more required environment variables (BITBUCKET_REPO_OWNER, BITBUCKET_REPO_SLUG, BITBUCKET_COMMIT) are not set.")

#This is an internal proxy running in the BitBucket environment to accept Code Insights
proxies = {"http": "http://localhost:29418"}

def load_json_with_unescaped_characters(file_path):
    """Load and return JSON data from a file, replacing unescaped characters if necessary."""
    try:
        with open(file_path, 'r', encoding='utf-8') as file:
            json_str = file.read().strip()
        return json.loads(json_str)
    except json.decoder.JSONDecodeError as e:
        print(f"Failed to parse JSON: {e}")
        return None
    except FileNotFoundError:
        print(f"File not found: {file_path}")
        sys.exit()

def construct_report_payload(endor_findings):
    """Construct and return the payload for creating a Bitbucket report."""
    warning_findings_count = len(endor_findings.get('warning_findings', []))
    blocking_findings_count = len(endor_findings.get('blocking_findings', []))
    total_violations = warning_findings_count + blocking_findings_count
    result = "PASSED" if total_violations == 0 else "FAILED"
    report_payload = {
        "title": "Endor Labs Policy Violations",
        "details": f"Endor Labs detected {total_violations} policy violations associated with this pull request.\n\n{endor_findings['warnings'][0]}",
        "report_type": "SECURITY",
        "reporter": "Endor Labs",
        "link": f"https://app.endorlabs.com/t/{namespace}/projects/{project_uuid}/pr-runs/{report_id}",
        "logo_url": "https://avatars.githubusercontent.com/u/92199924",
        "result": result,
        "data": [
            {"title": "Warning Findings", "type": "NUMBER", "value": warning_findings_count},
            {"title": "Blocking Findings", "type": "NUMBER", "value": blocking_findings_count}
        ]
    }
    return report_payload

def construct_annotation_payload(finding):
    """Construct and return the payload for creating an annotation in Bitbucket."""
    title = "Endor Labs Policy Violation"
    summary = finding['meta']['description']
    details =  f"{finding['spec']['summary']}\n\n{finding['spec']['remediation']}"
    severity = "CRITICAL" if finding['spec']['level'] == "FINDING_LEVEL_CRITICAL" else \
               "HIGH" if finding['spec']['level'] == "FINDING_LEVEL_HIGH" else \
               "MEDIUM" if finding['spec']['level'] == "FINDING_LEVEL_MEDIUM" else "LOW"
    affected_paths = finding['spec'].get('dependency_file_paths', [])
    path = affected_paths[0] if affected_paths else "Unknown file"
    annotation_payload = {
        "external_id": finding['uuid'],
        "title": title,
        "annotation_type": "VULNERABILITY",
        "summary": summary,
        "details": details,
        "severity": severity,
        "path": path
    }
    return annotation_payload

def send_report(report_payload):
    """Send the constructed report payload to the Bitbucket API."""
    report_url = f"http://api.bitbucket.org/2.0/repositories/{BITBUCKET_REPO_OWNER}/{BITBUCKET_REPO_SLUG}/commit/{BITBUCKET_COMMIT}/reports/{report_id}"
    response = requests.put(report_url, json=report_payload, proxies=proxies)
    if response.status_code in [200, 201]:
        print("Report created or updated successfully")
    else:
        print(f"Failed to create or update report: {response.text}")

def send_annotation(annotation_payload):
    """Send the constructed annotation payload to the Bitbucket API."""
    annotation_url = f"{base_url}/{report_id}/annotations/{annotation_payload['external_id']}"
    response = requests.put(annotation_url, json=annotation_payload, proxies=proxies)
    if response.status_code in [200, 201]:
        print("Annotation added successfully")
    else:
        print(f"Failed to add annotation: {response.text}")

def process_findings(filename):
    """Load findings from JSON, create a report, and add annotations for each finding."""
    endor_findings = load_json_with_unescaped_characters(filename)
    if endor_findings is None:
        print("Failed to load findings. Exiting.")
        return

    global report_id, project_uuid, namespace

    # Define the order of keys to check
    finding_types = ['all_findings', 'warning_findings', 'blocking_findings']

    # Iterate over finding types and extract the first one found
    for finding_type in finding_types:
        if endor_findings.get(finding_type):
            first_finding = endor_findings[finding_type][0]
            report_id = first_finding['context']['id']
            project_uuid = first_finding['spec']['project_uuid']
            namespace = first_finding['tenant_meta']['namespace']
            break  # Stop after finding the first non-empty list

    if not report_id:
        print("No findings found.")
        sys.exit()

    # Prepare the base URL for Bitbucket API requests
    global base_url
    base_url = f"http://api.bitbucket.org/2.0/repositories/{BITBUCKET_REPO_OWNER}/{BITBUCKET_REPO_SLUG}/commit/{BITBUCKET_COMMIT}/reports"

    # Create the report
    report_payload = construct_report_payload(endor_findings)
    send_report(report_payload)

    # Iterate over findings and create annotations
    for finding in endor_findings.get('blocking_findings', []) + endor_findings.get('warning_findings', []):
        annotation_payload = construct_annotation_payload(finding)
        send_annotation(annotation_payload)

def main():
    """Main function to parse arguments and process findings."""
    parser = argparse.ArgumentParser(description="Script to process findings and update Bitbucket via API.")
    parser.add_argument("filename", help="Filename containing the JSON findings.")
    args = parser.parse_args()

    process_findings(args.filename)

if __name__ == "__main__":
    main()
CircleCI CI/CD pipelines allow you to configure your pipeline as code. Your entire CI/CD process is orchestrated through a single file called config.yml. The config.yml file is located in a folder called .circleci at the root of your project which defines the entire pipeline.
To integrate Endor Labs into your CircleCI CI/CD processes:
Endor Labs recommends using keyless authentication in continuous integration environments. Keyless Authentication is more secure and reduces the cost of secret rotation but is only available on self-hosted runners in CircleCI.
To configure keyless authentication see the keyless authentication documentation
If you choose not to use keyless authentication you can configure an API key and secret in CircleCI for authentication using the following steps. See managing API keys for more information on generating an API key for Endor Labs.
To create a CircleCI pipeline reference the following steps:
.cirlceci/config.yml file in your repository if you do not already have one.config.yml file customize the job configuration based on your project’s requirements using one of the examples, simple CircleCI configuration or advanced CircleCI configuration.build_and_watch_endorlabs and build_and_test_endorlabs.Use the following examples to get started. Make sure to customize this job with your specific build environment and build steps.
version: 2.1

jobs:
  test-endorlabs-scan:
    docker:
      - image: maven:3.6.3-jdk-11 # Modify this image as needed for your build tools
    environment:
      ENDORCTL_VERSION: "latest"
      ENDOR_NAMESPACE: "example"
    steps:
      - checkout
      - run:
          name: "Build"
          command: |
            mvn clean install -Dskiptests
      - run:
          name: "Install endorctl"
          command: |
            curl https://api.endorlabs.com/download/latest/endorctl_linux_amd64 -o endorctl
            echo "$(curl -s https://api.endorlabs.com/sha/latest/endorctl_linux_amd64)  endorctl" | sha256sum -c;
            if [ $? -ne 0 ]; then
              echo "Integrity check failed";
              exit 1;
            fi
            chmod +x ./endorctl
            ./endorctl --version
      - run:
          name: "Endor Labs Test"
          command: |
            ./endorctl scan --pr --pr-baseline=main --dependencies --secrets
  watch-endorlabs-scan:
    docker:
      - image: maven:3.6.3-jdk-11 # Modify this image as needed for your build tools
    environment:
      ENDOR_NAMESPACE: "example" # Replace with your Endor Labs namespace
    steps:
      - checkout
      - run:
          name: "Build"
          command: |
            mvn clean install -Dskiptests
      - run:
          name: "Install endorctl"
          command: |
            curl https://api.endorlabs.com/download/latest/endorctl_linux_amd64 -o endorctl
            echo "$(curl -s https://api.endorlabs.com/sha/latest/endorctl_linux_amd64)  endorctl" | sha256sum -c;
            if [ $? -ne 0 ]; then
              echo "Integrity check failed";
              exit 1;
            fi
            chmod +x ./endorctl
            ./endorctl --version
      - run:
          name: "Endor Labs Watch"
          command: |
            ./endorctl scan --dependencies --secrets
workflows:
  build_and_endorlabs_watch:
    when:
      equal: [ main, << pipeline.git.branch >> ]
    jobs:
      - watch-endorlabs-scan:
          context:
            - endorlabs
  build_and_endorlabs_test:
    jobs:
      - test-endorlabs-scan:
          context:
            - endorlabs
The following example is an advanced implementation of Endor Labs in circleCI which includes several optional performance optimizations and job maintainability updates.
This includes:
# You can copy and paste portions of this `config.yml` file as an easy reference.
#
version: 2.1

jobs:
  build:
    docker:
      - image: maven:3.6.3-jdk-11 # Modify this image as needed for your build steps
    steps:
      - checkout
      - restore_cache:
          keys:
            # when lock file changes, use increasingly general patterns to restore cache
            - maven-repo-v1-{{ .Branch }}-{{ checksum "pom.xml" }}
            - maven-repo-v1-{{ .Branch }}-
            - maven-repo-v1-
      - run:
          name: "Build Your Project"
          command: |
            mvn clean install
      - persist_to_workspace:
          root: .
          paths:
            - target/ # Persist artifact across job. Change this if you are creating your artifact in a location outside of the target directory.
      - save_cache:
          paths:
            - ~/.m2/repository
          key: maven-repo-v1-{{ .Branch }}-{{ checksum "pom.xml" }}

  test-endorlabs-scan:
    docker:
      - image: maven:3.6.3-jdk-11 # Modify this image as needed for your build tools
    environment:
      ENDORCTL_VERSION: "latest"
      ENDOR_NAMESPACE: "example"
    steps:
      - checkout
      - attach_workspace:
          at: .
      - restore_cache:
          keys:
            # when lock file changes, use increasingly general patterns to restore cache
            - maven-repo-v1-{{ .Branch }}-{{ checksum "pom.xml" }}
            - maven-repo-v1-{{ .Branch }}-
            - maven-repo-v1-
      - run:
          name: "Install endorctl"
          command: |
            curl https://api.endorlabs.com/download/latest/endorctl_linux_amd64 -o endorctl
            echo "$(curl -s https://api.endorlabs.com/sha/latest/endorctl_linux_amd64)  endorctl" | sha256sum -c;
            if [ $? -ne 0 ]; then
              echo "Integrity check failed";
              exit 1;
            fi
            chmod +x ./endorctl
            ./endorctl --version
      - run:
          name: "Endor Labs Test"
          command: |
            ./endorctl scan --pr --pr-baseline=main --dependencies --secrets

  watch-endorlabs-scan:
    docker:
      - image: maven:3.6.3-jdk-11 # Modify this image as needed for your build tools
    environment:
      ENDORCTL_VERSION: "latest"
      ENDOR_NAMESPACE: "example" #Replace with your namespace in Endor Labs
    steps:
      - checkout
      - attach_workspace:
          at: .
      - restore_cache:
          keys:
            # when lock file changes, use increasingly general patterns to restore cache
            - maven-repo-v1-{{ .Branch }}-{{ checksum "pom.xml" }}
            - maven-repo-v1-{{ .Branch }}-
            - maven-repo-v1-
      - run:
          name: "Install endorctl"
          command: |
            curl https://api.endorlabs.com/download/latest/endorctl_linux_amd64 -o endorctl
            echo "$(curl -s https://api.endorlabs.com/sha/latest/endorctl_linux_amd64)  endorctl" | sha256sum -c;
            if [ $? -ne 0 ]; then
              echo "Integrity check failed";
              exit 1;
            fi
            chmod +x ./endorctl
            ./endorctl --version
      - run:
          name: "Endor Labs Watch"
          command: |
            ./endorctl scan --dependencies --secrets
workflows:
  build_and_endorlabs_watch:
    when:
      equal: [ main, << pipeline.git.branch >> ]
    jobs:
      - build
      - watch-endorlabs-scan:
          requires:
            - build
          context:
            - endorlabs
  build_and_endorlabs_test:
    jobs:
      - build
      - test-endorlabs-scan:
          requires:
            - build
          context:
            - endorlabs
Once you’ve set up Endor Labs you can test your CI implementation is successful and begin scanning.
Google Cloud Build is a fully managed continuous integration and continuous delivery (CI/CD) service offered by Google Cloud Platform.
To integrate Endor Labs with Google Cloud Build:
Generate API credentials to authenticate to Endor Labs. Configure the API key and secret in the cloudbuild.yaml file for authentication. See managing API keys for more information on generating an API key for Endor Labs.
You can enable keyless authentication to Google Cloud. See Enabling Keyless Authentication in Google Cloud for more information.
Ensure the following prerequisites are in place in Google Cloud Build before integrating with Endor Labs.
endor-api-key and endor-api-secret.Triggers initiate Cloud Build for different types of scans. You can set up triggers for the following scan types:
cloudbuild.yaml file using the configuration file examples as a reference. Include this file for baseline scans in the required GitHub repository.cloudbuild.yaml file using the configuration file examples as a reference. Include this file for baseline scans in the required GitHub repository,cloudbuild.yaml file using the configuration file examples excluding the --as-default-branch argument for release scans, and add this file to the required GitHub repository.Here is an example cloudbuild.yaml configuration file to perform a baseline scan for Java project repository.
steps:
  # Step 1: Fetch The Trigger Branch
  # This step addresses a known issue where Cloud Build renames the pulled branch to main.
  # If you are not encountering this issue with your build, you can skip this step.
  - name: 'gcr.io/cloud-builders/git'
    entrypoint: 'bash'
    args:
      - '-c'
      - |
        echo "Fetching all branches..."
        git fetch origin
        echo "Checking out branch: ${BRANCH_NAME}"
        git checkout ${BRANCH_NAME}
  # Step 2: Build With Maven
  - name: 'maven:3.8.6-openjdk-11'
    entrypoint: 'mvn'
    args: ['clean', 'install']
    id: 'Build'
  # Step 3: Install latest version of endorctl
  - name: 'maven:3.8.6-openjdk-11'
    entrypoint: 'bash'
    args:
      - '-c'
      - |
        curl https://api.endorlabs.com/download/latest/endorctl_linux_amd64 -o endorctl
        echo "$(curl -s https://api.endorlabs.com/sha/latest/endorctl_linux_amd64)  endorctl" | sha256sum -c
        chmod +x ./endorctl
        ./endorctl --version
    id: 'Install latest version of endorctl'
  # Step 4: SCA Scan With EndorLabs
  - name: 'maven:3.8.6-openjdk-11'
    entrypoint: 'bash'
    args: ["-c", "./endorctl scan -n $$ENDOR_NAMESPACE --api-key=$$ENDOR_API_CREDENTIALS_KEY --api-secret=$$ENDOR_API_CREDENTIALS_SECRET --as-default-branch=true"]
    secretEnv: ['ENDOR_API_CREDENTIALS_KEY', 'ENDOR_API_CREDENTIALS_SECRET']
    env:
      - 'ENDOR_NAMESPACE=demo'
    id: 'SCA Scan With EndorLabs'

# Fetch Endor Labs API Token and Secret From Secrets Manager
availableSecrets:
  secretManager:
  - versionName: projects/{your-project-id}/secrets/endor-api-key/versions/1
    env: 'ENDOR_API_CREDENTIALS_KEY'
  - versionName: projects/{your-project-id}/secrets/endor-api-secret/versions/1
    env: 'ENDOR_API_CREDENTIALS_SECRET'

options:
  # Choose your log configuration
  logging: 'CLOUD_LOGGING_ONLY'
  # Select a private pool if the default runners do not meet the minimum requirements.
  pool:
    name: 'projects/{your-project-id}/locations/{your_location}/workerPools/{your_worker_pool_id}'
Check the example configuration files and customize them for your requirements.
Endor Labs provides developers with plug-ins that they can directly install in their Integrated Development Environments (IDE). The extension helps developers fix code at its origin phase and during the early stages of development without running the endorctl scan.
Developers can successfully perform early security reviews and mitigate the need for expensive fixes during later stages of development. It accelerates the process of creating, delivering, and shipping secure applications.
Endor Labs provides a plug-in for Visual Studio Code that developers can install from Visual Studio’s marketplace and get started with early vulnerability and dependency scanning.
The Endor Labs extension for Visual Studio Code scans your repositories and highlights issues that may exist in the open-source dependencies. You can use the extension with Endor Labs API credentials.
The following prerequisites must be fulfilled to use the Endor Labs VS Code extension:
| Supported Language | Manifest file | Source code file |
|---|---|---|
| JavaScript | package.json |
.js, .ts, .jsx, .tsx, .mjs, .cjs extensions |
| Python | requirements.txt |
.py extension |
| Go | go.mod |
.go extension |
Developers can install the extension from the Visual Studio marketplace and configure it with Endor Labs API keys.
The Endor Labs Visual Studio extension reads all the manifest files in your project and fetches the list of dependencies.